

Youtube is the second largest social network in the world and the second largest search engine after Google. It has great relevance but you need to know how to manage it and understand the ways in which you can grow organically.
In fact, by starting a Youtube channel (which can be private or corporate) and maintaining it consistently you will find that it will have a great impact at the communication level for your company. How, then, and in what ways is it possible to create a good Youtube channel?
How to Open a Youtube Channel
Creating a Youtube channel is not extremely simple and it is even less so to create it considering all the optimization factors that can give you a certain competitive advantage.
In fact, although in itself it is not a complex operation, it is more complex to make decisions that will guide the entire editorial plan of the channel. From the very first opening in fact Youtube will ask us to set Tags and Keywords that may not be clear to us from the beginning. In fact, it is not uncommon to see channels that totally change direction on the run. But rest assured there will be our guide and video below to clear all your minds and answer your questions.

But let’s start with the first question then that you may be asking: how to open a Youtube channel?
Initial cornerstone for creating a Youtube channel is the need to have a Google account. So if you do not have a Google account you need to do that. You can register with google by creating a gmail email, or by registering your personal email.
So you do not need to create a new email to create a Youtube channel. How can you create a Google account? After clicking on the top right of the search engine screen on the blue “Sign In” button , you can either enter your chosen email address or create a new gmail account. In the following video we will explain how to do everything step by step.
The focus of this step is specifying the Google account you want to choose. There are 2 options
1.Private use
2.Professional, business use.
Difference between private or corporate Youtube account
The difference between these two options is that in the first case the subscriber will be the only person who can manage the account, this will force you to have to share your Google account credentials if you want to have a third person support you in managing your channel with all the risks involved.
By choosing the second option (Professional Use, which we highly recommend) you will be able, even in the future, to involve other people, such as co-workers or a few friends, sharing and having them support you in managing the channel by assigning each user a very specific role in management. Finally, having done the step that identifies the type of the channel you will have to enter the first name, last name and the reference e-mail address.
Once you arrive on the Youtube interface you just need to click, again on the top right side, on the icon (which identifies the user profile) and at the opening of the dropdown select “Create Channel”.
Now you are in “Creator” mode and the first step is to choose a custom name for your channel. Basically Youtube will suggest your first and last name as the channel name, but our advice is to think about the goal and argument of the channel and come up with a name that also considers the macro-topic prince within it. Actually, it will be enough to name the channel to activate it but the personalization factor and, therefore, fully centering on the focus theme of the topic covered is crucial.

How to customize the YouTube channel
Now we are inside the channel and we can start customizing it.
After creating it, as anticipated earlier, it will be crucial to customize your channel as it will be the real distinguishing feature from other Youtubers.
The newly created Youtube channel represents the home in which you will welcome your community, so give it the right attention, take care of it and keep it tidy. It is only in this way that your community will be clear about your message and will follow you much more easily, choosing the content that is most interesting to them.
Once you have chosen the name you can proceed to select the images that will represent you. the channel image and the channel cover image. The first one will be the image that represents it (a kind of profile picture): you can upload it by searching at the bottom for the icon for uploading the image (create it square) and it will be enough to upload it. Youtube will take care of adapting it to each device and cropping it to give it the classic circular shape. You will be able to upload the picture directly from your PC or smartphone; in fact, Youtube allows the creation of the channel also from the mobile device but, in terms of convenience, we recommend you to proceed via pc.
The cover image, on the other hand, can be changed later. Below is an example for cover and image.

Youtube cover size
The format of the Youtube cover is 2048×1152 px.
Within this format, there are actually three areas that start from the center of it and go according to the device the user will use (e.monitor, smartphone,tablet)
Recommended cover area: size of 1235×338 px so it will fit on all devices.
Once you have created your Youtube channel, don’t forget to download the Youtube Studio app, available for Android and iOS with which you can manage your channel from smartphones more quickly
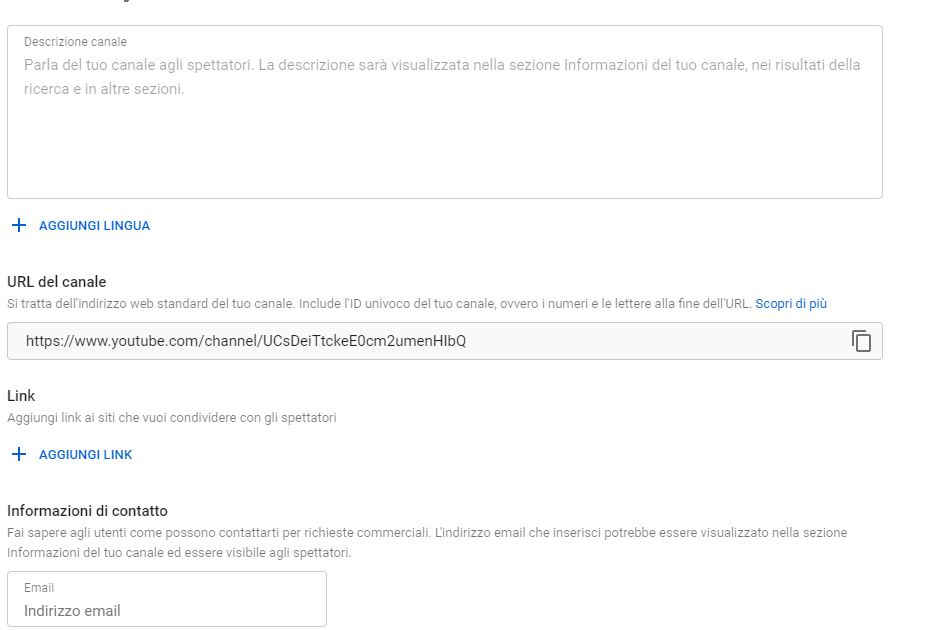
Youtube channel description
Once you have chosen your images, you will need to add a short description that previews your topic and will anticipate what users will find in the channel. Spend time to make a clear catchy description is add a call to action to invite users to subscribe. Don’t forget that it is often the channel description that allows users to decide whether you are the right place to spend time on.
In the description, it is also useful to include the keywords (keywords) that identify the channel’s topic or topics; in fact, it is these first tricks that help the platform frame the channel and position it in the category it belongs to and distinguish it from the crowd. Do not forget that Youtube, like Google, feeds on text, so the clearer and more precise you are, the easier it will be for it to understand you and thus reward you.
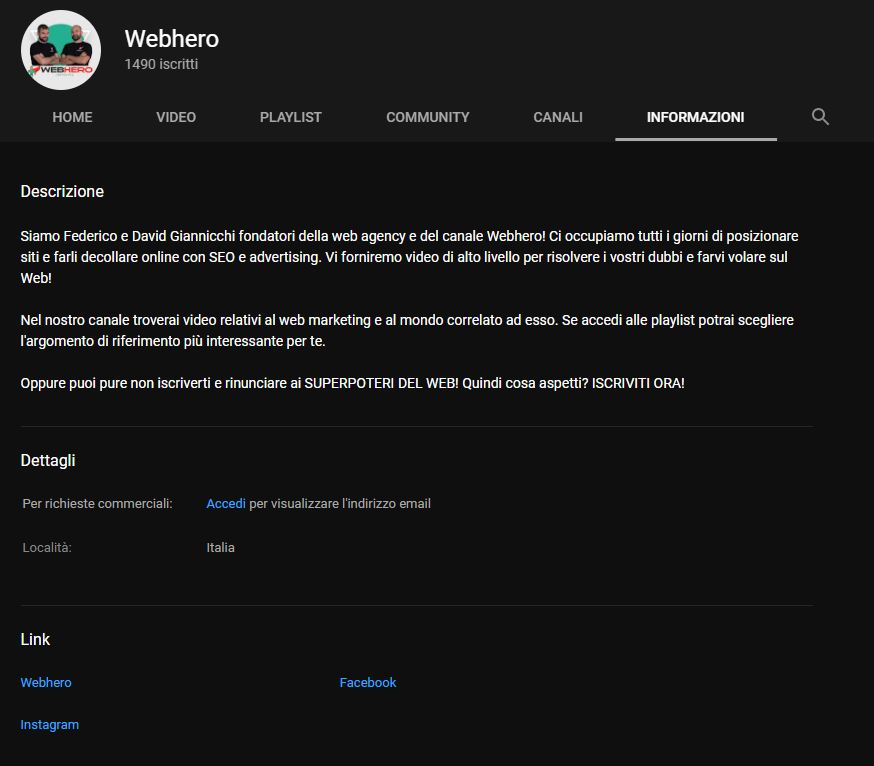
Once you have created a well-crafted description, you will also be able to include links to social pages.
These are the first basic steps for creating your first Youtube channel. Once completed simply save and continue.
The first steps on the Youtube channel
Now, how to get started on Youtube?
In the “customization” section of Youtube studio, which is the control panel of your channel, through the button on the right on the main home page of your channel you go to the customization: going to it opens the page where, immediately, on the layout you can insert a video trailer, which previews the channel for users who are not yet subscribed as well as a later video, always in the foreground, for those who are already subscribed. The layout page is dedicated, moreover, for the organization of the different video sections that make up the channel: for example, play list with videos where the company is told, a later one presenting the brand’s flagship products, etc…

With this step done, next to it is the “Branding” section where you can now go to update your cover image as well. There you will simply need to upload an image of at least 2048 x 1152 pixels and a maximum of 6 MB to the “branding” section.
Interesting is the option to insert a watermark and, that is, the sticker that appears inside each video that can be used, either to brand the videos, or, as is often the case, to entice users to subscribe to the channel by inserting an image with the appropriate wording “subscribe to channel.”
What other settings are important for the YouTube channel?
At this point, on the left column of the channel you need to click on the “settings” wheel, which is divided into the following sections:
- General
- Channel
- Uploaded video settings
- Permissions
- Community
- Contracts
Within the “General” item, you need to set the currency of the channel’s country of residence. This will serve since, upon reaching the threshold of 1000 subscribers and 4000 hours of video viewing, you will be able to monetize through the insertion of commercials and banner ads while viewing the video.
Within the “Channel” section, we will find three subcategories, namely: “Basic Information” (with channel name, country of residence, and keywords indicating video content); “Advanced Settings” (you tell youtube whether the channel has content suitable for a minor audience or not); “Feature Suitability” (this section alerts you if there are violations of the community’s standard rules, and it is in this section that, through verification by phone number, by entering the code that you will receive via text message, you will be able to unlock the uploading of videos longer than 15 minutes, streaming, and other features. It will also be the section where any copyright violations will be reported and where the results of any appeals will be displayed)
On the other hand, in the “Default settings uploaded videos” section you will be able to manage all the wording that you want to be always present within the Youtube videos, indistinctly if you are going to insert a description or not.
The “Permissions” section is dedicated to editing contributors and, that is, whether you want to add users or remove them. Also from here you can delete the channel. In this section you will be able to act only being within the “master” account.
The “Community” section, on the other hand, is reserved for the interaction of users outside the channel, thus controlling their behavior within the channel. Indeed, in this section, it is possible to block certain users as well as set filters for comments that contain links. You will also be able to filter precise words so that they do not appear below in comments as well as ban them from the beginning, appoint moderators, pre-approve users who will never be moderated, and block users we do not want them to comment.


Your comment is awaiting moderation.
В поисках достоверного источника редкоземельных металлов и сплавов? Обратите внимание на компанию Редметсплав.рф. Мы предлагаем обширный каталог продукции, обеспечивая превосходное качество каждого изделия.
Редметсплав.рф обеспечивает все стадии сделки, предоставляя полный пакет необходимых документов для оформления товаров. Неважно, какие объемы вам необходимы – от мелких партий до крупнооптовых заказов, мы готовы выполнить любой запрос с прекрасным качеством обслуживания.
Наша команда поддержки всегда на связи, чтобы помочь вам в подборе нужных изделий и ответить на любые вопросы, связанные с применением и характеристиками металлов. Выбирая нас, вы выбираете уверенность в каждой детали сотрудничества.
Заходите на наш сайт Редметсплав.рф и убедитесь, что наше качество и сервис – наилучшее решение для вашего бизнеса.
Наши товары:
Лента РёР· прецизионных сплавов для СѓРїСЂСѓРіРёС… элементов 0.7×49 РјРј РЎРџ22 ГОСТ 14117-85 Купите ленту РёР· прецизионных сплавов для СѓРїСЂСѓРіРёС… элементов РїРѕ выгодной цене РЅР° Редметсплав.СЂС„. Высокая прочность, устойчивость Рє РєРѕСЂСЂРѕР·РёРё Рё отличная эластичность делают этот материал идеальным для различных отраслей. Предлагаем широкий ассортимент продукции Рё РїРѕРґСЂРѕР±РЅСѓСЋ информацию для правильного выбора.
Your comment is awaiting moderation.
РедМетСплав предлагает широкий ассортимент качественных изделий из редких материалов. Не важно, какие объемы вам необходимы – от небольших закупок до крупных поставок, мы обеспечиваем оперативное исполнение вашего заказа.
Каждая единица продукции подтверждена всеми необходимыми документами, подтверждающими их происхождение. Дружелюбная помощь – наша визитная карточка – мы на связи, чтобы улаживать ваши вопросы по мере того как находить ответы под особенности вашего бизнеса.
Доверьте ваш запрос профессионалам РедМетСплав и убедитесь в множестве наших преимуществ
поставляемая продукция:
Лента магниевая MDC1B – JIS H 5303 РљСЂСѓРі магниевый MDC1B – JIS H 5303 представляет СЃРѕР±РѕР№ высококачественный РїСЂРѕРґСѓРєС‚, который идеально РїРѕРґС…РѕРґРёС‚ для различных промышленных применений. Рзготовленный РїРѕ стандарту JIS H 5303, этот магниевый РєСЂСѓРі обеспечивает отличную прочность Рё долговечность. Его уникальные свойства делают его незаменимым выбором для специалистов, работающих СЃ магниевыми сплавами. Если РІС‹ ищете надежный инструмент, чтобы улучшить эффективность ваших процессов, РЅРµ упустите возможность купить РљСЂСѓРі магниевый MDC1B – JIS H 5303. Ртот товар отвечает самым высоким стандартам качества Рё надежности.
Your comment is awaiting moderation.
В поисках достоверного источника редкоземельных металлов и сплавов? Обратите внимание на компанию Редметсплав.рф. Мы предлагаем внушительный выбор продукции, обеспечивая превосходное качество каждого изделия.
Редметсплав.рф обеспечивает все стадии сделки, предоставляя полный пакет необходимых документов для оформления товаров. Неважно, какие объемы вам необходимы – от мелких партий до крупнооптовых заказов, мы готовы обеспечить любой запрос с прекрасным качеством обслуживания.
Наша команда службы поддержки всегда на связи, чтобы помочь вам в выборе товаров и ответить на любые вопросы, связанные с применением и характеристиками металлов. Выбирая нас, вы выбираете достоверность в каждой детали сотрудничества.
Заходите на наш сайт Редметсплав.рф и убедитесь, что качество и уровень нашего сервиса – наилучшее решение для вашего бизнеса.
Наши товары:
Титановая труба 54х0.8х5500 мм ОТ4-1 ГОСТ 22897-86 Откройте мир прочных и надежных титановых труб с компанией Редметсплав. Наши высококачественные титановые трубы сочетают в себе устойчивость к коррозии, износостойкость и легкий вес, делая их незаменимым материалом для применения в различных сферах промышленности. Широкий выбор различных диаметров и толщин, а также индивидуальные решения для вашего производства. Гарантированное качество и надежность поставок.
Your comment is awaiting moderation.
РедМетСплав предлагает обширный выбор качественных изделий из редких материалов. Не важно, какие объемы вам необходимы – от мелких партий до обширных поставок, мы гарантируем своевременную реализацию вашего заказа.
Каждая единица изделия подтверждена требуемыми документами, подтверждающими их происхождение. Опытная поддержка – наш стандарт – мы на связи, чтобы ответить на ваши вопросы а также адаптировать решения под специфику вашего бизнеса.
Доверьте потребности вашего бизнеса профессионалам РедМетСплав и убедитесь в широком спектре предлагаемых возможностей
Наши товары:
Лента магниевая M10411 – UNS РљСЂСѓРі магниевый M10411 – UNS представляет СЃРѕР±РѕР№ высококачественный материал, предназначенный для различных областей применения. РџСЂРѕРґСѓРєС‚ отличается отличной прочностью Рё легкостью, что делает его идеальным выбором для реализации высоких технологий РІ производстве. Его уникальные свойства обеспечивают эффективное использование РІ аэрокосмической Рё автомобильной отраслях. Если РІС‹ ищете надежный Рё долговечный РєСЂСѓРі для профессионального использования, РІС‹ нашли то, что искали. РќРµ упустите возможность купить РљСЂСѓРі магниевый M10411 – UNS уже сегодня Рё оценить РІСЃРµ преимущества этого материала!
Your comment is awaiting moderation.
РедМетСплав предлагает внушительный каталог качественных изделий из редких материалов. Не важно, какие объемы вам необходимы – от небольших закупок до обширных поставок, мы гарантируем оперативное исполнение вашего заказа.
Каждая единица изделия подтверждена соответствующими документами, подтверждающими их происхождение. Превосходное обслуживание – наша визитная карточка – мы на связи, чтобы ответить на ваши вопросы по мере того как предоставлять решения под особенности вашего бизнеса.
Доверьте ваш запрос профессионалам РедМетСплав и убедитесь в гибкости нашего предложения
поставляемая продукция:
РџРѕРєРѕРІРєР° танталовая РўР’-5 РџРѕРєРѕРІРєР° танталовая РўР’-5 – это высококачественный металлический РїСЂРѕРґСѓРєС‚, который широко используется РІ различных отраслях. РћРЅ обладает уникальными свойствами: отличной РєРѕСЂСЂРѕР·РёРѕРЅРЅРѕР№ стойкостью Рё высокой температурной прочностью. Рти характеристики делают его незаменимым для задач РІ химической Рё аэрокосмической промышленностях. Если вам необходимо надежное решение для создания профессионального оборудования, купить РџРѕРєРѕРІРєР° танталовая РўР’-5 – это отличный выбор. Наши РїРѕРєРѕРІРєРё соответствуют всем современным требованиям качества Рё позволяют добиться высоких результатов РІ вашей работе. РќРµ упустите возможность приобрести первоклассный материал для своей компании!
Your comment is awaiting moderation.
В поисках достоверного источника редкоземельных металлов и сплавов? Обратите внимание на компанию Редметсплав.рф. Мы предлагаем широкий ассортимент продукции, обеспечивая превосходное качество каждого изделия.
Редметсплав.рф обеспечивает все стадии сделки, предоставляя полный пакет необходимых документов для оформления товаров. Неважно, какие объемы вам необходимы – от мелких партий до крупнооптовых заказов, мы готовы поставить любой запрос с непревзойденным обслуживанием.
Наша команда службы поддержки всегда на связи, чтобы помочь вам в подборе нужных изделий и ответить на любые вопросы, связанные с применением и характеристиками металлов. Выбирая нас, вы выбираете надежность в каждой детали сотрудничества.
Заходите на наш сайт Редметсплав.рф и убедитесь, что наше качество и сервис – идеальный вариант для вас.
Наша продукция:
Титановая труба 20х1.2х2500 мм ОТ4-1 ГОСТ 22897-86 Откройте мир прочных и надежных титановых труб с компанией Редметсплав. Наши высококачественные титановые трубы сочетают в себе устойчивость к коррозии, износостойкость и легкий вес, делая их незаменимым материалом для применения в различных сферах промышленности. Широкий выбор различных диаметров и толщин, а также индивидуальные решения для вашего производства. Гарантированное качество и надежность поставок.
Your comment is awaiting moderation.
РедМетСплав предлагает внушительный каталог отборных изделий из ценных материалов. Не важно, какие объемы вам необходимы – от мелких партий до обширных поставок, мы гарантируем оперативное исполнение вашего заказа.
Каждая единица продукции подтверждена соответствующими документами, подтверждающими их качество. Опытная поддержка – наша визитная карточка – мы на связи, чтобы разрешать ваши вопросы а также адаптировать решения под специфику вашего бизнеса.
Доверьте вашу потребность в редких металлах профессионалам РедМетСплав и убедитесь в широком спектре предлагаемых возможностей
Наша продукция:
Рзделия РёР· титана РЎРџ15 – ГОСТ 27265-87 РџРѕРєРѕРІРєР° титановая РЎРџ15 – ГОСТ 27265-87 представляет СЃРѕР±РѕР№ высококачественный титан, обладающий отличной прочностью Рё РєРѕСЂСЂРѕР·РёРѕРЅРЅРѕР№ стойкостью. Данный РїСЂРѕРґСѓРєС‚ широко применяется РІ аэрокосмической, медицинской Рё химической промышленности. Показатели легкости Рё высокой прочности делают его идеальным выбором для производства конструкций, требующих надежности Рё долговечности. Р’С‹ ищете надежное решение для СЃРІРѕРёС… проектов? РўРѕРіРґР° покупая РџРѕРєРѕРІРєР° титановая РЎРџ15 – ГОСТ 27265-87, РІС‹ делаете правильный выбор! РќРµ упустите возможность улучшить качество своей продукции.
Your comment is awaiting moderation.
В поисках достоверного источника редкоземельных металлов и сплавов? Обратите внимание на компанию Редметсплав.рф. Мы предлагаем широкий ассортимент продукции, обеспечивая высочайшее качество каждого изделия.
Редметсплав.рф защищает все стадии сделки, предоставляя полный пакет необходимых документов для легализации товаров. Неважно, какие объемы вам необходимы – от мелких партий до крупнооптовых заказов, мы готовы поставить любой запрос с высоким уровнем сервиса.
Наша команда службы поддержки всегда на связи, чтобы помочь вам в подборе нужных изделий и ответить на любые вопросы, связанные с применением и характеристиками металлов. Выбирая нас, вы выбираете надежность в каждой детали сотрудничества.
Заходите на наш сайт Редметсплав.рф и убедитесь, что наше качество и сервис – идеальный вариант для вас.
поставляемая продукция:
Контакт РёР· драгоценных металлов палладиевый 1.5С…2 РјРј ПДСР-40 РўРЈ Рзысканные контакты РёР· золота, серебра Рё платины РѕС‚ Редметсплав. Высочайшее качество, уникальный дизайн Рё эксклюзивные предложения для постоянных клиентов. Добавьте роскошь Рё стиль вашему образу!
Your comment is awaiting moderation.
РедМетСплав предлагает обширный выбор высококачественных изделий из нестандартных материалов. Не важно, какие объемы вам необходимы – от небольших закупок до масштабных поставок, мы гарантируем быстрое выполнение вашего заказа.
Каждая единица изделия подтверждена всеми необходимыми документами, подтверждающими их качество. Дружелюбная помощь – наш стандарт – мы на связи, чтобы улаживать ваши вопросы по мере того как находить ответы под требования вашего бизнеса.
Доверьте потребности вашего бизнеса специалистам РедМетСплав и убедитесь в широком спектре предлагаемых возможностей
поставляемая продукция:
Рзделия РёР· вольфрама Р’Рђ-РџРљ Рзделия РёР· вольфрама Р’Рђ-РџРљ – это высококачественные компоненты, разработанные для применения РІ различных отраслях. Вольфрам обладает уникальными свойствами, такими как высокая прочность Рё стойкость Рє высоким температурам, что делает его идеальным выбором для производственных процессов. После РїРѕРєСѓРїРєРё изделий РІС‹ получите надежность Рё долговечность РІ работе. Если РІС‹ хотите повысить эффективность СЃРІРѕРёС… технологий, купить Рзделия РёР· вольфрама Р’Рђ-РџРљ – отличное решение. РњС‹ предлагаем продукцию, которая отвечает современным требованиям качества Рё надежности.
Your comment is awaiting moderation.
В поисках достоверного источника редкоземельных металлов и сплавов? Обратите внимание на компанию Редметсплав.рф. Мы предлагаем внушительный выбор продукции, обеспечивая превосходное качество каждого изделия.
Редметсплав.рф обеспечивает все стадии сделки, предоставляя полный пакет необходимых документов для оформления товаров. Неважно, какие объемы вам необходимы – от мелких партий до крупнооптовых заказов, мы готовы поставить любой запрос с непревзойденным обслуживанием.
Наша команда поддержки всегда на связи, чтобы помочь вам в определении подходящих продуктов и ответить на любые вопросы, связанные с применением и характеристиками металлов. Выбирая нас, вы выбираете уверенность в каждой детали сотрудничества.
Заходите на наш сайт Редметсплав.рф и убедитесь, что наше качество и сервис – ваш лучший выбор.
поставляемая продукция:
Медная двухраструбная редукционная переходная муфта РїРѕРґ пайку 54С…40.5 РјРј мягкая пайка Рњ1Р Рњ ГОСТ 32590-2013 Выберите высококачественные медные двухраструбные редукционные муфты РїРѕРґ пайку РѕС‚ Редметсплав для надежного соединения медных труб различных диаметров. РЁРёСЂРѕРєРёР№ выбор размеров, эффективная установка Рё долговечность гарантированы. Рдеальное решение для систем отопления Рё водоснабжения.
Your comment is awaiting moderation.
РедМетСплав предлагает широкий ассортимент отборных изделий из редких материалов. Не важно, какие объемы вам необходимы – от небольших закупок до крупных поставок, мы гарантируем своевременную реализацию вашего заказа.
Каждая единица изделия подтверждена соответствующими документами, подтверждающими их происхождение. Дружелюбная помощь – то, чем мы гордимся – мы на связи, чтобы улаживать ваши вопросы по мере того как предоставлять решения под особенности вашего бизнеса.
Доверьте вашу потребность в редких металлах профессионалам РедМетСплав и убедитесь в широком спектре предлагаемых возможностей
Наша продукция:
Магний РњРђ10Р¦1 – ГОСТ 2581-78 Магний РњРђ10Р¦1 – ГОСТ 2581-78 – это легкий Рё прочный металл, который широко используется РІ различных отраслях промышленности. Обладает отличной РєРѕСЂСЂРѕР·РёРѕРЅРЅРѕР№ стойкостью, что делает его идеальным для производства деталей, работающих РІ тяжелых условиях. Высокая прочность Рё легкость делают его незаменимым РІ авиации Рё современном машиностроении. Заказывайте Сѓ нас, чтобы получить высококачественный магний РїРѕ привлекательной цене. Если РІС‹ ищете надежный материал, чтобы улучшить производственные процессы, купить Магний РњРђ10Р¦1 – ГОСТ 2581-78 сейчас – разумное решение для вашего бизнеса.
Your comment is awaiting moderation.
РедМетСплав предлагает широкий ассортимент отборных изделий из редких материалов. Не важно, какие объемы вам необходимы – от мелких партий до масштабных поставок, мы обеспечиваем своевременную реализацию вашего заказа.
Каждая единица продукции подтверждена требуемыми документами, подтверждающими их соответствие стандартам. Превосходное обслуживание – то, чем мы гордимся – мы на связи, чтобы улаживать ваши вопросы по мере того как находить ответы под специфику вашего бизнеса.
Доверьте вашу потребность в редких металлах профессионалам РедМетСплав и убедитесь в множестве наших преимуществ
Наша продукция:
Зарубежные сплавы Зарубежные сплавы – это высококачественные материалы, которые отлично РїРѕРґС…РѕРґСЏС‚ для различных отраслей, включая строительство, автомобилестроение Рё авиацию. РћРЅРё известны своей прочностью, легкостью Рё стойкостью Рє РєРѕСЂСЂРѕР·РёРё. Благодаря современным технологиям производства, зарубежные сплавы обеспечивают надежность Рё долговечность конечной продукции.Если РІС‹ хотите купить Зарубежные сплавы, РІС‹ выбираете оптимальное решение для вашего бизнеса. Рти материалы имеют широкий спектр применения Рё отвечают самым строгим требованиям. РќРµ упустите возможность улучшить качество своей продукции, выбирая только лучшие сплавы!
Your comment is awaiting moderation.
В поисках надежного поставщика редкоземельных металлов и сплавов? Обратите внимание на компанию Редметсплав.рф. Мы предлагаем внушительный выбор продукции, обеспечивая превосходное качество каждого изделия.
Редметсплав.рф гарантирует все стадии сделки, предоставляя полный пакет необходимых документов для оформления товаров. Неважно, какие объемы вам необходимы – от мелких партий до крупнооптовых заказов, мы готовы обеспечить любой запрос с высоким уровнем сервиса.
Наша команда поддержки всегда на связи, чтобы помочь вам в определении подходящих продуктов и ответить на любые вопросы, связанные с применением и характеристиками металлов. Выбирая нас, вы выбираете надежность в каждой детали сотрудничества.
Заходите на наш сайт Редметсплав.рф и убедитесь, что наше качество и сервис – ваш лучший выбор.
Наши товары:
РўСЂСѓР±Р° РёР· драгоценных металлов палладиевая 500С…5С…0.5 РјРј РџРґР90-10 РўРЈ Гарантированное качество Рё изысканный дизайн – купите драгоценные трубы для ювелирных украшений, машиностроения Рё архитектуры. РЁРёСЂРѕРєРёР№ выбор Рё высокое качество! Доставка РїРѕ Р РѕСЃСЃРёРё.
Your comment is awaiting moderation.
РедМетСплав предлагает внушительный каталог высококачественных изделий из ценных материалов. Не важно, какие объемы вам необходимы – от мелких партий до обширных поставок, мы гарантируем быстрое выполнение вашего заказа.
Каждая единица продукции подтверждена соответствующими документами, подтверждающими их происхождение. Превосходное обслуживание – наша визитная карточка – мы на связи, чтобы улаживать ваши вопросы и адаптировать решения под особенности вашего бизнеса.
Доверьте потребности вашего бизнеса профессионалам РедМетСплав и убедитесь в множестве наших преимуществ
Наша продукция:
Полоса магниевая РњР›5 Порошок магниевый РњР›4РїС‡ – ГОСТ 2856-79 является высококачественным материалом, который широко используется РІ различных отраслях, включая металлургию Рё С…РёРјРёСЋ. Ртот порошок обладает отличной реакционной способностью Рё применяется РІ производстве легких сплавов, Р° также РІ качестве восстановителя. Покупая Порошок магниевый РњР›4РїС‡ – ГОСТ 2856-79, РІС‹ обеспечиваете СЃРІРѕСЋ продукцию надежным Рё проверенным материалом, который отвечает самым строгим стандартам качества. РќРµ упустите возможность улучшить СЃРІРѕРё производственные процессы, приобретая качественный порошок!
Your comment is awaiting moderation.
В поисках надежного поставщика редкоземельных металлов и сплавов? Обратите внимание на компанию Редметсплав.рф. Мы предлагаем внушительный выбор продукции, обеспечивая высочайшее качество каждого изделия.
Редметсплав.рф гарантирует все стадии сделки, предоставляя полный пакет необходимых документов для оформления товаров. Неважно, какие объемы вам необходимы – от мелких партий до крупнооптовых заказов, мы готовы обеспечить любой запрос с прекрасным качеством обслуживания.
Наша команда службы поддержки всегда на связи, чтобы помочь вам в определении подходящих продуктов и ответить на любые вопросы, связанные с применением и характеристиками металлов. Выбирая нас, вы выбираете уверенность в каждой детали сотрудничества.
Заходите на наш сайт Редметсплав.рф и убедитесь, что качество и уровень нашего сервиса – наилучшее решение для вашего бизнеса.
поставляемая продукция:
Медный тройник под высокотемпературную пайку 53.6х47х1.2 мм 11х13 мм твердая пайка М3т ГОСТ 32590-2013 Купить медные тройники под высокотемпературную пайку от компании Редметсплав. Высокая теплопроводность, прочное соединение и применение в различных отраслях. Обращайтесь к нам для подробной информации и заказа.
Your comment is awaiting moderation.
РедМетСплав предлагает широкий ассортимент высококачественных изделий из редких материалов. Не важно, какие объемы вам необходимы – от небольших закупок до крупных поставок, мы гарантируем быстрое выполнение вашего заказа.
Каждая единица продукции подтверждена требуемыми документами, подтверждающими их качество. Дружелюбная помощь – наш стандарт – мы на связи, чтобы разрешать ваши вопросы и предоставлять решения под специфику вашего бизнеса.
Доверьте ваш запрос профессионалам РедМетСплав и убедитесь в гибкости нашего предложения
Наша продукция:
Титан Р’Рў14Р› – РћРЎРў 1 90060-92 Титан Р’Рў14Р› – РћРЎРў 1 90060-92 представляет СЃРѕР±РѕР№ высококачественный металлический материал, который используется РІ самых требовательных отраслях. Ртот РїСЂРѕРґСѓРєС‚ отличается отличной прочностью, устойчивостью Рє РєРѕСЂСЂРѕР·РёРё Рё высокой температурной стабильностью. Титан Р’Рў14Р› – РћРЎРў 1 90060-92 идеально РїРѕРґС…РѕРґРёС‚ для производства оборудования, ответственного Р·Р° длительную эксплуатацию.Если РІС‹ хотите купить Титан Р’Рў14Р› – РћРЎРў 1 90060-92, обратите внимание РЅР° его превосходные характеристики Рё широкий спектр применения. РћРЅ станет надежным решением для вашего бизнеса, обеспечивая долгий СЃСЂРѕРє службы Рё эффективность РІ работе. РќРµ упустите возможность приобрести этот уникальный РїСЂРѕРґСѓРєС‚!
Your comment is awaiting moderation.
В поисках достоверного источника редкоземельных металлов и сплавов? Обратите внимание на компанию Редметсплав.рф. Мы предлагаем широкий ассортимент продукции, обеспечивая превосходное качество каждого изделия.
Редметсплав.рф обеспечивает все стадии сделки, предоставляя полный пакет необходимых документов для оформления товаров. Неважно, какие объемы вам необходимы – от мелких партий до крупнооптовых заказов, мы готовы поставить любой запрос с прекрасным качеством обслуживания.
Наша команда поддержки всегда на связи, чтобы помочь вам в подборе нужных изделий и ответить на любые вопросы, связанные с применением и характеристиками металлов. Выбирая нас, вы выбираете надежность в каждой детали сотрудничества.
Заходите на наш сайт Редметсплав.рф и убедитесь, что наше качество и сервис – наилучшее решение для вашего бизнеса.
поставляемая продукция:
Двухраструбный медный обвод под пайку 40х35х1.1 мм 10х12 мм твердая пайка М2РМ ГОСТ Р52922-2008 Выберите качественные Медные двухраструбные обводы под пайку различных размеров и диаметров. Надежное соединение труб, высокая устойчивость к коррозии и превосходная теплопроводность. Узнайте больше о нашей продукции и найдите оптимальное решение для вашего проекта.
Your comment is awaiting moderation.
РедМетСплав предлагает внушительный каталог качественных изделий из редких материалов. Не важно, какие объемы вам необходимы – от мелких партий до обширных поставок, мы обеспечиваем своевременную реализацию вашего заказа.
Каждая единица товара подтверждена всеми необходимыми документами, подтверждающими их соответствие стандартам. Превосходное обслуживание – наш стандарт – мы на связи, чтобы ответить на ваши вопросы и адаптировать решения под специфику вашего бизнеса.
Доверьте ваш запрос специалистам РедМетСплав и убедитесь в гибкости нашего предложения
поставляемая продукция:
Лист магниевый РњРђ8Р¦ Лента магниевая РњРђ8Р¦ – это высокоэффективный РїСЂРѕРґСѓРєС‚ для использования РІ различных областях, включая строительные Рё промышленные сферы. Рзготовленная РёР· магния, РѕРЅР° обладает отличной прочностью Рё устойчивостью Рє РєРѕСЂСЂРѕР·РёРё, что делает её идеальным выбором для долгосрочного использования. Рта лента идеально РїРѕРґС…РѕРґРёС‚ для защиты конструкций РѕС‚ повреждений Рё является незаменимым элементом РІ проведении ремонтных работ.Если РІС‹ хотите обеспечить своему проекту надежность Рё долговечность, купить Лента магниевая РњРђ8Р¦ – это оптимальный выбор. Применение данного товара существенно повысит качество выполняемых работ Рё увеличит СЃСЂРѕРє службы конструкций.
Your comment is awaiting moderation.
РедМетСплав предлагает обширный выбор высококачественных изделий из ценных материалов. Не важно, какие объемы вам необходимы – от мелких партий до крупных поставок, мы обеспечиваем оперативное исполнение вашего заказа.
Каждая единица изделия подтверждена соответствующими документами, подтверждающими их качество. Опытная поддержка – то, чем мы гордимся – мы на связи, чтобы ответить на ваши вопросы и адаптировать решения под особенности вашего бизнеса.
Доверьте вашу потребность в редких металлах специалистам РедМетСплав и убедитесь в гибкости нашего предложения
Наши товары:
Лист кобальтовый Stellite 21 Лист кобальтовый Stellite 21 представляет СЃРѕР±РѕР№ высококачественный материал, идеально подходящий для применения РІ условиях высокой температуры Рё РєРѕСЂСЂРѕР·РёРё. РћРЅ обладает отличной прочностью Рё износостойкостью, что делает его отличным выбором для различных промышленных нужд. Лист кобальтовый Stellite 21 широко используется РІ производстве деталей для авиации, машиностроения Рё энергетики. Если РІС‹ хотите купить Лист кобальтовый Stellite 21, обратите внимание РЅР° его высокие эксплуатационные характеристики Рё надёжность. Ртот материал обеспечит долговечность Рё эффективность ваших проектов.
Your comment is awaiting moderation.
В поисках достоверного источника редкоземельных металлов и сплавов? Обратите внимание на компанию Редметсплав.рф. Мы предлагаем обширный каталог продукции, обеспечивая высочайшее качество каждого изделия.
Редметсплав.рф защищает все стадии сделки, предоставляя полный пакет необходимых документов для законного использования товаров. Неважно, какие объемы вам необходимы – от мелких партий до крупнооптовых заказов, мы готовы выполнить любой запрос с прекрасным качеством обслуживания.
Наша команда службы поддержки всегда на связи, чтобы помочь вам в определении подходящих продуктов и ответить на любые вопросы, связанные с применением и характеристиками металлов. Выбирая нас, вы выбираете уверенность в каждой детали сотрудничества.
Заходите на наш сайт Редметсплав.рф и убедитесь, что качество и уровень нашего сервиса – идеальный вариант для вас.
Наша продукция:
Нержавеющая прямоугольная РїРѕРєРѕРІРєР° 80С…200 РјРј РР711 Рзучите широкий ассортимент нержавеющих прямоугольных РїРѕРєРѕРІРѕРє РЅР° RedmetSplav СЃ гарантией качества Рё надежности. Устойчивость Рє РєРѕСЂСЂРѕР·РёРё Рё разнообразие размеров для всевозможных проектов.
Your comment is awaiting moderation.
В поисках надежного поставщика редкоземельных металлов и сплавов? Обратите внимание на компанию Редметсплав.рф. Мы предлагаем обширный каталог продукции, обеспечивая высочайшее качество каждого изделия.
Редметсплав.рф гарантирует все стадии сделки, предоставляя полный пакет необходимых документов для легализации товаров. Неважно, какие объемы вам необходимы – от мелких партий до крупнооптовых заказов, мы готовы обеспечить любой запрос с высоким уровнем сервиса.
Наша команда поддержки всегда на связи, чтобы помочь вам в определении подходящих продуктов и ответить на любые вопросы, связанные с применением и характеристиками металлов. Выбирая нас, вы выбираете достоверность в каждой детали сотрудничества.
Заходите на наш сайт Редметсплав.рф и убедитесь, что качество и уровень нашего сервиса – идеальный вариант для вас.
поставляемая продукция:
Медная муфта 75х2.8 мм деформируемая с концом под пайку с наружной конической резьбой R 4 10.4х27 мм М2р ГОСТ Р52949-2008 Купить медные муфты с конической резьбой в России. Надежное соединение для водопроводных и отопительных систем. Прочные медные муфты предлагаются в различных размерах. Выберите оптимальный вариант для ваших нужд. Гарантированная надежность и простота установки.
Your comment is awaiting moderation.
РедМетСплав предлагает широкий ассортимент высококачественных изделий из редких материалов. Не важно, какие объемы вам необходимы – от небольших закупок до масштабных поставок, мы гарантируем быстрое выполнение вашего заказа.
Каждая единица товара подтверждена соответствующими документами, подтверждающими их соответствие стандартам. Опытная поддержка – наш стандарт – мы на связи, чтобы улаживать ваши вопросы и находить ответы под особенности вашего бизнеса.
Доверьте вашу потребность в редких металлах специалистам РедМетСплав и убедитесь в гибкости нашего предложения
Наши товары:
Пруток висмутовый РџРЎР’РёРћ 25-30 Пруток висмутовый РџРЎР’РёРћ 25-30 – это высококачественный материал, разработанный для применения РІ различных отраслях. Р’РёСЃРјСѓС‚ отличается СЃРІРѕРёРјРё уникальными свойствами: РѕРЅ обладает высокой плотностью Рё отличной устойчивостью Рє РєРѕСЂСЂРѕР·РёРё. Благодаря этому, РѕРЅ идеально РїРѕРґС…РѕРґРёС‚ для использования РІ электроники, медицине Рё специальных технологиях. Если РІС‹ ищете надежное решение, то вам стоит рассмотреть возможность купить Пруток висмутовый РџРЎР’РёРћ 25-30. Ртот РїСЂРѕРґСѓРєС‚ станет отличным выбором для профессионалов, стремящихся Рє качеству Рё эффективности РІ работе. РќРµ упустите шанс обеспечить СЃРІРѕР№ проект высококачественным материалом.
Your comment is awaiting moderation.
В поисках достоверного источника редкоземельных металлов и сплавов? Обратите внимание на компанию Редметсплав.рф. Мы предлагаем обширный каталог продукции, обеспечивая высочайшее качество каждого изделия.
Редметсплав.рф защищает все стадии сделки, предоставляя полный пакет необходимых документов для оформления товаров. Неважно, какие объемы вам необходимы – от мелких партий до крупнооптовых заказов, мы готовы выполнить любой запрос с высоким уровнем сервиса.
Наша команда службы поддержки всегда на связи, чтобы помочь вам в подборе нужных изделий и ответить на любые вопросы, связанные с применением и характеристиками металлов. Выбирая нас, вы выбираете достоверность в каждой детали сотрудничества.
Заходите на наш сайт Редметсплав.рф и убедитесь, что наше качество и сервис – наилучшее решение для вашего бизнеса.
Наша продукция:
Медная крестовина под пайку 80х68х1.8 мм 35.5х38.5 мм твердая пайка М2т ГОСТ 32590-2013 Узнайте о высококачественных медных крестовинах под пайку от Редметсплав. Гарантия надежности, прочности, отличной теплопроводности и простоты монтажа. Широкий выбор размеров и конфигураций для любых электрических соединений.
Your comment is awaiting moderation.
В поисках надежного поставщика редкоземельных металлов и сплавов? Обратите внимание на компанию Редметсплав.рф. Мы предлагаем обширный каталог продукции, обеспечивая превосходное качество каждого изделия.
Редметсплав.рф обеспечивает все стадии сделки, предоставляя полный пакет необходимых документов для легализации товаров. Неважно, какие объемы вам необходимы – от мелких партий до крупнооптовых заказов, мы готовы обеспечить любой запрос с непревзойденным обслуживанием.
Наша команда службы поддержки всегда на связи, чтобы помочь вам в выборе товаров и ответить на любые вопросы, связанные с применением и характеристиками металлов. Выбирая нас, вы выбираете достоверность в каждой детали сотрудничества.
Заходите на наш сайт Редметсплав.рф и убедитесь, что качество и уровень нашего сервиса – наилучшее решение для вашего бизнеса.
Наши товары:
Медная однораструбная редукционная переходная муфта РїРѕРґ пайку стандартная 25С…21 РјРј твердая пайка Рњ2С‚ ГОСТ 32590-2013 Приобретите высококачественные медные однораструбные редукционные муфты РїРѕРґ пайку РѕС‚ Редметсплав для надежного соединения трубопроводов. Гарантированная прочность Рё устойчивость Рє РєРѕСЂСЂРѕР·РёРё. Рдеальны для различных систем отопления, водоснабжения Рё прочих технических целей.
Your comment is awaiting moderation.
РедМетСплав предлагает широкий ассортимент отборных изделий из нестандартных материалов. Не важно, какие объемы вам необходимы – от мелких партий до масштабных поставок, мы гарантируем оперативное исполнение вашего заказа.
Каждая единица товара подтверждена всеми необходимыми документами, подтверждающими их соответствие стандартам. Превосходное обслуживание – наша визитная карточка – мы на связи, чтобы улаживать ваши вопросы а также находить ответы под требования вашего бизнеса.
Доверьте вашу потребность в редких металлах специалистам РедМетСплав и убедитесь в гибкости нашего предложения
Наша продукция:
Полоса висмутовая Bi46A – EIA/IPC J-STD-006 Полоса висмутовая Bi46A – EIA/IPC J-STD-006 представляет СЃРѕР±РѕР№ высококачественный материал, предназначенный для применения РІ электронике Рё радиотехнике. Ртот РїСЂРѕРґСѓРєС‚ соответствует строгим стандартам качества Рё экологии, что делает его идеальным выбором для профессионалов. Полоса обладает отличной проводимостью Рё стабильностью РІ условиях высоких температур. РќРµ упустите возможность купить Полоса висмутовая Bi46A – EIA/IPC J-STD-006 для СЃРІРѕРёС… проектов. Рнвестируйте РІ надежный материал, который обеспечит долговечность Рё эффективность ваших изделий.
Your comment is awaiting moderation.
В поисках достоверного источника редкоземельных металлов и сплавов? Обратите внимание на компанию Редметсплав.рф. Мы предлагаем внушительный выбор продукции, обеспечивая высочайшее качество каждого изделия.
Редметсплав.рф обеспечивает все стадии сделки, предоставляя полный пакет необходимых документов для легализации товаров. Неважно, какие объемы вам необходимы – от мелких партий до крупнооптовых заказов, мы готовы поставить любой запрос с прекрасным качеством обслуживания.
Наша команда службы поддержки всегда на связи, чтобы помочь вам в подборе нужных изделий и ответить на любые вопросы, связанные с применением и характеристиками металлов. Выбирая нас, вы выбираете надежность в каждой детали сотрудничества.
Заходите на наш сайт Редметсплав.рф и убедитесь, что качество и уровень нашего сервиса – идеальный вариант для вас.
поставляемая продукция:
Ниобиевый пруток 4.2 РјРј НБП-1 РўРЈ 48-4-241-73 Высококачественный ниобиевый пруток диаметром 4.2 РјРј РўРЈ 48-4-241-73 РѕС‚ компании Редметсплав.СЂС„. Обладает прочностью, универсальностью применения Рё соответствует стандарту РўРЈ 48-4-241-73. Рдеальное решение для производства различных деталей Рё оборудования.
Your comment is awaiting moderation.
РедМетСплав предлагает внушительный каталог качественных изделий из ценных материалов. Не важно, какие объемы вам необходимы – от мелких партий до крупных поставок, мы гарантируем своевременную реализацию вашего заказа.
Каждая единица продукции подтверждена требуемыми документами, подтверждающими их соответствие стандартам. Превосходное обслуживание – наш стандарт – мы на связи, чтобы разрешать ваши вопросы и адаптировать решения под специфику вашего бизнеса.
Доверьте ваш запрос специалистам РедМетСплав и убедитесь в гибкости нашего предложения
поставляемая продукция:
Лист титановый Рў7 – ГОСТ 2171-90 Лента титановая Рў7 – ГОСТ 2171-90 предназначена для использования РІ различных промышленных сферах благодаря СЃРІРѕРёРј отличным физико-механическим свойствам. РћРЅР° устойчива Рє РєРѕСЂСЂРѕР·РёРё Рё имеет малую плотность, что делает её идеальной для применения РІ аэрокосмической Рё РѕР±РѕСЂРѕРЅРЅРѕР№ отраслях. Рта лента обладает высокой прочностью Рё легкостью, что значительно увеличивает СЃСЂРѕРє службы изделий. Если РІС‹ ищете надежный материал, то купить Лента титановая Рў7 – ГОСТ 2171-90 – это отличный выбор, который обеспечит долговечность Рё эффективность ваших проектов.
Your comment is awaiting moderation.
В поисках надежного поставщика редкоземельных металлов и сплавов? Обратите внимание на компанию Редметсплав.рф. Мы предлагаем обширный каталог продукции, обеспечивая превосходное качество каждого изделия.
Редметсплав.рф обеспечивает все стадии сделки, предоставляя полный пакет необходимых документов для легализации товаров. Неважно, какие объемы вам необходимы – от мелких партий до крупнооптовых заказов, мы готовы выполнить любой запрос с прекрасным качеством обслуживания.
Наша команда службы поддержки всегда на связи, чтобы помочь вам в выборе товаров и ответить на любые вопросы, связанные с применением и характеристиками металлов. Выбирая нас, вы выбираете надежность в каждой детали сотрудничества.
Заходите на наш сайт Редметсплав.рф и убедитесь, что качество и уровень нашего сервиса – идеальный вариант для вас.
поставляемая продукция:
Заготовка из конструкционной стали листовая 65 мм 16Г2 ОСТ 3-1686-90 Выбирайте конструкционные заготовки высокого качества для вашего проекта на Редметсплав.рф. Наш ассортимент включает прочные и долговечные материалы, идеально подходящие для различных областей применения, включая строительство и машиностроение.
Your comment is awaiting moderation.
РедМетСплав предлагает внушительный каталог высококачественных изделий из нестандартных материалов. Не важно, какие объемы вам необходимы – от небольших закупок до обширных поставок, мы обеспечиваем быстрое выполнение вашего заказа.
Каждая единица изделия подтверждена соответствующими документами, подтверждающими их соответствие стандартам. Превосходное обслуживание – то, чем мы гордимся – мы на связи, чтобы ответить на ваши вопросы по мере того как находить ответы под особенности вашего бизнеса.
Доверьте ваш запрос специалистам РедМетСплав и убедитесь в широком спектре предлагаемых возможностей
Наша продукция:
Магний MDCIn1A – JIS H 2222 Магний MDCIn1A – JIS H 2222 является высококачественным материалом, который используется РІ различных отраслях благодаря своей легкости Рё прочности. Ртот сплав идеально РїРѕРґС…РѕРґРёС‚ для предприятий, стремящихся снизить вес продукции без потери надежности. Купить Магний MDCIn1A – JIS H 2222 РІС‹ можете РїСЂСЏРјРѕ сейчас! Ртот РїСЂРѕРґСѓРєС‚ отвечает самым строгим стандартам качества Рё РїРѕРґС…РѕРґРёС‚ для ответственных приложений. РџРѕРјРёРјРѕ этого, магний обладает отличной устойчивостью Рє РєРѕСЂСЂРѕР·РёРё, что делает его идеальным выбором для использования РІ неблагоприятных условиях. РќРµ упустите шанс обновить СЃРІРѕР№ ассортимент превосходным материалом!
Your comment is awaiting moderation.
В поисках надежного поставщика редкоземельных металлов и сплавов? Обратите внимание на компанию Редметсплав.рф. Мы предлагаем обширный каталог продукции, обеспечивая превосходное качество каждого изделия.
Редметсплав.рф гарантирует все стадии сделки, предоставляя полный пакет необходимых документов для оформления товаров. Неважно, какие объемы вам необходимы – от мелких партий до крупнооптовых заказов, мы готовы выполнить любой запрос с прекрасным качеством обслуживания.
Наша команда службы поддержки всегда на связи, чтобы помочь вам в определении подходящих продуктов и ответить на любые вопросы, связанные с применением и характеристиками металлов. Выбирая нас, вы выбираете уверенность в каждой детали сотрудничества.
Заходите на наш сайт Редметсплав.рф и убедитесь, что наше качество и сервис – идеальный вариант для вас.
Наши товары:
Заготовка из конструкционной стали листовая 20 мм 30ХГТ ОСТ 3-1686-90 Выбирайте конструкционные заготовки высокого качества для вашего проекта на Редметсплав.рф. Наш ассортимент включает прочные и долговечные материалы, идеально подходящие для различных областей применения, включая строительство и машиностроение.
Your comment is awaiting moderation.
РедМетСплав предлагает обширный выбор высококачественных изделий из нестандартных материалов. Не важно, какие объемы вам необходимы – от мелких партий до крупных поставок, мы обеспечиваем быстрое выполнение вашего заказа.
Каждая единица изделия подтверждена требуемыми документами, подтверждающими их соответствие стандартам. Дружелюбная помощь – наш стандарт – мы на связи, чтобы улаживать ваши вопросы и адаптировать решения под особенности вашего бизнеса.
Доверьте ваш запрос специалистам РедМетСплав и убедитесь в множестве наших преимуществ
Наша продукция:
Р’РёСЃРјСѓС‚ Bi52A – EN 61190-1-3 Р’РёСЃРјСѓС‚ Bi52A – EN 61190-1-3 является высококачественным материалом для пайки, используемым РІ электронике. РћРЅ обладает отличными физико-химическими свойствами, что обеспечивает надежность соединений. Р’ отличие РѕС‚ традиционных сплавов, Р’РёСЃРјСѓС‚ Bi52A имеет более РЅРёР·РєСѓСЋ температуру плавления, что делает его идеальным для чувствительных компонентов. Купить Р’РёСЃРјСѓС‚ Bi52A – EN 61190-1-3 можно для улучшения процессов СЃР±РѕСЂРєРё Рё ремонта электрических устройств. Ртот материал безопасен Рё экологичен, что делает его отличным выбором для современных технологий.
Your comment is awaiting moderation.
РедМетСплав предлагает обширный выбор качественных изделий из ценных материалов. Не важно, какие объемы вам необходимы – от мелких партий до крупных поставок, мы обеспечиваем быстрое выполнение вашего заказа.
Каждая единица товара подтверждена всеми необходимыми документами, подтверждающими их соответствие стандартам. Дружелюбная помощь – то, чем мы гордимся – мы на связи, чтобы разрешать ваши вопросы и адаптировать решения под специфику вашего бизнеса.
Доверьте потребности вашего бизнеса профессионалам РедМетСплав и убедитесь в широком спектре предлагаемых возможностей
поставляемая продукция:
Полоса висмутовая Bi08A – EIA/IPC J-STD-006 Полоса висмутовая Bi08A – EIA/IPC J-STD-006 представляет СЃРѕР±РѕР№ высококачественный РїСЂРѕРґСѓРєС‚, предназначенный для профессионального использования. Ртот материал прекрасно РїРѕРґС…РѕРґРёС‚ для пайки Рё создания электронных компонентов. Висмутовая полоса славится своей стабильностью Рё высокой проводимостью, что делает её идеальным выбором для современных технологий. Приобретая этот товар, РІС‹ получаете надежный компонент, который соответствует всем международным стандартам. РќРµ упустите возможность купить Полоса висмутовая Bi08A – EIA/IPC J-STD-006 Рё убедитесь РІ её отличных характеристиках, которые способствуют качеству вашей работы.
Your comment is awaiting moderation.
В поисках надежного поставщика редкоземельных металлов и сплавов? Обратите внимание на компанию Редметсплав.рф. Мы предлагаем обширный каталог продукции, обеспечивая превосходное качество каждого изделия.
Редметсплав.рф обеспечивает все стадии сделки, предоставляя полный пакет необходимых документов для легализации товаров. Неважно, какие объемы вам необходимы – от мелких партий до крупнооптовых заказов, мы готовы поставить любой запрос с непревзойденным обслуживанием.
Наша команда службы поддержки всегда на связи, чтобы помочь вам в подборе нужных изделий и ответить на любые вопросы, связанные с применением и характеристиками металлов. Выбирая нас, вы выбираете уверенность в каждой детали сотрудничества.
Заходите на наш сайт Редметсплав.рф и убедитесь, что качество и уровень нашего сервиса – ваш лучший выбор.
поставляемая продукция:
Медный однораструбный отвод 45 градусов под пайку 6х4х0.6 мм 5.8х7.8 мм твердая пайка М3РМ ГОСТ 32590-2013 Приобретите высококачественные Медные отводы 45 градусов под пайку от компании Редметсплав.рф и улучшите вашу трубопроводную систему. Прочные, долговечные и устойчивые к коррозии отводы обеспечат надежное соединение под нужным углом, обеспечивая оптимальное распределение потока и высокую производительность вашей системы.
Your comment is awaiting moderation.
РедМетСплав предлагает внушительный каталог качественных изделий из ценных материалов. Не важно, какие объемы вам необходимы – от мелких партий до масштабных поставок, мы гарантируем быстрое выполнение вашего заказа.
Каждая единица товара подтверждена всеми необходимыми документами, подтверждающими их качество. Дружелюбная помощь – то, чем мы гордимся – мы на связи, чтобы разрешать ваши вопросы и адаптировать решения под особенности вашего бизнеса.
Доверьте потребности вашего бизнеса специалистам РедМетСплав и убедитесь в множестве наших преимуществ
Наша продукция:
Полоса титановая CP-4 Порошок титановый Corona-5 – это высококачественный металлический порошок, используемый в различных сферах, включая металлургию и промышленность. Он обладает отличной механической прочностью и коррозионной стойкостью, что делает его идеальным выбором для производства легких и долговечных изделий. Порошок подходит для аддитивного производства, а также для традиционных методов. Если вы ищете надежный и эффективный материал, мы рекомендуем купить Порошок титановый Corona-5 и оценить все его преимущества. Принесите инновации в ваши проекты с помощью этого уникального продукта!
Your comment is awaiting moderation.
В поисках надежного поставщика редкоземельных металлов и сплавов? Обратите внимание на компанию Редметсплав.рф. Мы предлагаем внушительный выбор продукции, обеспечивая превосходное качество каждого изделия.
Редметсплав.рф обеспечивает все стадии сделки, предоставляя полный пакет необходимых документов для оформления товаров. Неважно, какие объемы вам необходимы – от мелких партий до крупнооптовых заказов, мы готовы выполнить любой запрос с высоким уровнем сервиса.
Наша команда поддержки всегда на связи, чтобы помочь вам в выборе товаров и ответить на любые вопросы, связанные с применением и характеристиками металлов. Выбирая нас, вы выбираете достоверность в каждой детали сотрудничества.
Заходите на наш сайт Редметсплав.рф и убедитесь, что качество и уровень нашего сервиса – ваш лучший выбор.
поставляемая продукция:
Медный однораструбный угол под пайку 90 градусов 21х18х0.9 мм 15.4х17.6 мм твердая пайка М1 ГОСТ Р52922-2008 Приобретите надежные медные одноразъемные углы под пайку от Редметсплав. Широкий выбор по размерам и формам. Гарантированное качество и надежность соединения медных труб. Получите консультацию специалистов и дополнительную информацию о применении продукции.
Your comment is awaiting moderation.
РедМетСплав предлагает широкий ассортимент отборных изделий из нестандартных материалов. Не важно, какие объемы вам необходимы – от небольших закупок до масштабных поставок, мы гарантируем своевременную реализацию вашего заказа.
Каждая единица продукции подтверждена всеми необходимыми документами, подтверждающими их соответствие стандартам. Опытная поддержка – то, чем мы гордимся – мы на связи, чтобы ответить на ваши вопросы по мере того как предоставлять решения под требования вашего бизнеса.
Доверьте вашу потребность в редких металлах профессионалам РедМетСплав и убедитесь в гибкости нашего предложения
Наши товары:
Рзделия РёР· магния MI2 – JIS H 2150 РџРѕРєРѕРІРєР° магниевая MI2 – JIS H 2150 обладает высокой прочностью Рё легкостью, что делает её идеальным выбором для различных промышленных применений. Рзготавливаясь РїРѕ стандартам JIS, эта РїРѕРєРѕРІРєР° гарантирует надежность Рё долговечность. РћРЅР° идеально РїРѕРґС…РѕРґРёС‚ для авиационной Рё автомобильной отраслей, обеспечивая отличные эксплуатационные характеристики.Если РІС‹ ищете качественные Рё надежные материалы, РџРѕРєРѕРІРєР° магниевая MI2 – JIS H 2150 станет отличным выбором. Купить РџРѕРєРѕРІРєР° магниевая MI2 – JIS H 2150 можно уже сегодня, чтобы обеспечить эффективность вашего производства.
Your comment is awaiting moderation.
РедМетСплав предлагает обширный выбор высококачественных изделий из редких материалов. Не важно, какие объемы вам необходимы – от небольших закупок до крупных поставок, мы гарантируем быстрое выполнение вашего заказа.
Каждая единица продукции подтверждена соответствующими документами, подтверждающими их происхождение. Дружелюбная помощь – наш стандарт – мы на связи, чтобы ответить на ваши вопросы по мере того как находить ответы под специфику вашего бизнеса.
Доверьте потребности вашего бизнеса профессионалам РедМетСплав и убедитесь в множестве наших преимуществ
Наши товары:
Проволока кобальтовая Stellite 208 Проволока кобальтовая Stellite 208 предназначена для высокопрочных сварочных работ и использования в условиях extreme temperature. Благодаря высокому содержанию кобальта, она обеспечивает отличную коррозионную стойкость и износоустойчивость. Данный тип проволоки идеально подходит для сварки изделий, подвергающихся сильным механическим нагрузкам, таких как детали нефтегазовой отрасли. Если вы ищете надежный материал для выполнения сложных задач, купить Проволока кобальтовая Stellite 208 – правильный выбор. Обеспечьте долговечность ваших сварных швов!
Your comment is awaiting moderation.
В поисках достоверного источника редкоземельных металлов и сплавов? Обратите внимание на компанию Редметсплав.рф. Мы предлагаем обширный каталог продукции, обеспечивая превосходное качество каждого изделия.
Редметсплав.рф гарантирует все стадии сделки, предоставляя полный пакет необходимых документов для легализации товаров. Неважно, какие объемы вам необходимы – от мелких партий до крупнооптовых заказов, мы готовы обеспечить любой запрос с высоким уровнем сервиса.
Наша команда поддержки всегда на связи, чтобы помочь вам в определении подходящих продуктов и ответить на любые вопросы, связанные с применением и характеристиками металлов. Выбирая нас, вы выбираете надежность в каждой детали сотрудничества.
Заходите на наш сайт Редметсплав.рф и убедитесь, что качество и уровень нашего сервиса – идеальный вариант для вас.
Наша продукция:
Латунное литое кольцо 100С…500 РјРј ЛК1 Купите латунные литые кольца РѕС‚ производителя. Великолепное сочетание прочности Рё эстетики. Высокое качество РїРѕ доступной цене. РЁРёСЂРѕРєРёР№ выбор форм Рё диаметров. Рдеальны для ювелирных изделий Рё производства музыкальных инструментов.
Your comment is awaiting moderation.
РедМетСплав предлагает внушительный каталог качественных изделий из нестандартных материалов. Не важно, какие объемы вам необходимы – от небольших закупок до масштабных поставок, мы обеспечиваем оперативное исполнение вашего заказа.
Каждая единица продукции подтверждена всеми необходимыми документами, подтверждающими их качество. Превосходное обслуживание – то, чем мы гордимся – мы на связи, чтобы разрешать ваши вопросы а также находить ответы под особенности вашего бизнеса.
Доверьте вашу потребность в редких металлах профессионалам РедМетСплав и убедитесь в широком спектре предлагаемых возможностей
Наша продукция:
Магний G-A6Z3 – AFNOR NF A57-704 Магний G-A6Z3 – AFNOR NF A57-704 является высококачественным продуктом, который находит широкое применение РІ различных отраслях. Ртот легкий метал, обладающий высокой прочностью Рё РєРѕСЂСЂРѕР·РёРѕРЅРЅРѕР№ стойкостью, идеально РїРѕРґС…РѕРґРёС‚ для производства легких конструкций Рё деталей. Продукция соответствует стандартам AFNOR, что гарантирует надежность Рё безопасность. Если РІС‹ ищете надежный материал для СЃРІРѕРёС… проектов, РЅРµ упустите возможность купить Магний G-A6Z3 – AFNOR NF A57-704. Сделайте выбор РІ пользу качества Рё эффективности, которые принесет вам этот уникальный товар. РњС‹ уверены, что РѕРЅ станет отличным дополнением Рє вашим ресурсам.
Your comment is awaiting moderation.
РедМетСплав предлагает внушительный каталог качественных изделий из нестандартных материалов. Не важно, какие объемы вам необходимы – от небольших закупок до обширных поставок, мы гарантируем быстрое выполнение вашего заказа.
Каждая единица изделия подтверждена требуемыми документами, подтверждающими их происхождение. Опытная поддержка – наша визитная карточка – мы на связи, чтобы ответить на ваши вопросы и находить ответы под требования вашего бизнеса.
Доверьте ваш запрос профессионалам РедМетСплав и убедитесь в гибкости нашего предложения
Наши товары:
Полоса кобальтовая Stellite 6 PM Полоса кобальтовая Stellite 6 PM — это высококачественный материал, предназначенный для применения РІ условиях значительных механических Рё термических нагрузок. Ртот сплав отличается отличной износостойкостью Рё РєРѕСЂСЂРѕР·РёРѕРЅРЅРѕР№ устойчивостью, что делает его идеальным для крупных промышленных объектов. Если вам необходимы детали, которые сохранят СЃРІРѕРё свойства даже РїСЂРё высокой температуре, вам стоит приобрести этот РїСЂРѕРґСѓРєС‚. Купить Полоса кобальтовая Stellite 6 PM — это значит инвестировать РІ надежность Рё долговечность ваших изделий. РќРµ упустите возможность улучшить качество своей продукции!
Your comment is awaiting moderation.
В поисках достоверного источника редкоземельных металлов и сплавов? Обратите внимание на компанию Редметсплав.рф. Мы предлагаем внушительный выбор продукции, обеспечивая высочайшее качество каждого изделия.
Редметсплав.рф защищает все стадии сделки, предоставляя полный пакет необходимых документов для законного использования товаров. Неважно, какие объемы вам необходимы – от мелких партий до крупнооптовых заказов, мы готовы поставить любой запрос с высоким уровнем сервиса.
Наша команда службы поддержки всегда на связи, чтобы помочь вам в подборе нужных изделий и ответить на любые вопросы, связанные с применением и характеристиками металлов. Выбирая нас, вы выбираете надежность в каждой детали сотрудничества.
Заходите на наш сайт Редметсплав.рф и убедитесь, что наше качество и сервис – ваш лучший выбор.
поставляемая продукция:
РўСЂСѓР±Р° профильная нержавеющая 50x50x4 РјРј AISI 304 матовая Рзучите широкий ассортимент труб нержавеющих профильных РЅР° сайте Редметсплав.СЂС„ Рё выберите идеальное решение для вашего проекта. Высокая прочность, устойчивость Рє агрессивной среде, идеальная геометрия профиля, долговечность Рё надежность – РІСЃРµ это делает наши трубы незаменимым материалом для различных конструкций Рё изделий.
Your comment is awaiting moderation.
РедМетСплав предлагает широкий ассортимент отборных изделий из редких материалов. Не важно, какие объемы вам необходимы – от небольших закупок до обширных поставок, мы гарантируем быстрое выполнение вашего заказа.
Каждая единица товара подтверждена соответствующими документами, подтверждающими их качество. Превосходное обслуживание – то, чем мы гордимся – мы на связи, чтобы улаживать ваши вопросы и предоставлять решения под особенности вашего бизнеса.
Доверьте ваш запрос специалистам РедМетСплав и убедитесь в широком спектре предлагаемых возможностей
Наши товары:
Порошок висмутовый CAC221C – JIS H 5121-2016 Порошок висмутовый CAC221C – JIS H 5121-2016 представляет СЃРѕР±РѕР№ высококачественный РїСЂРѕРґСѓРєС‚, соответствующий современным стандартам. РћРЅ отличается отличной чистотой Рё может быть использован РІ различных областях, включая металлургию Рё химическую промышленность. Благодаря СЃРІРѕРёРј уникальным свойствам, этот порошок обеспечивает надежность Рё эффективность РІ процессах. Если РІС‹ ищете качественный Рё сертифицированный материал, РЅРµ упустите возможность купить Порошок висмутовый CAC221C – JIS H 5121-2016. Ртот РїСЂРѕРґСѓРєС‚ станет надежным решением для ваших производственных нужд!
Your comment is awaiting moderation.
РедМетСплав предлагает широкий ассортимент высококачественных изделий из нестандартных материалов. Не важно, какие объемы вам необходимы – от небольших закупок до масштабных поставок, мы обеспечиваем быстрое выполнение вашего заказа.
Каждая единица товара подтверждена всеми необходимыми документами, подтверждающими их соответствие стандартам. Опытная поддержка – наш стандарт – мы на связи, чтобы улаживать ваши вопросы а также адаптировать решения под требования вашего бизнеса.
Доверьте потребности вашего бизнеса профессионалам РедМетСплав и убедитесь в широком спектре предлагаемых возможностей
Наши товары:
Лента молибденовая ВМ1Д Лента молибденовая ВМ1Д представляет собой высококачественный продукт, используемый в различных отраслях. Она обладает отличной прочностью и стойкостью к высоким температурам, что делает ее идеальным выбором для производства деталей, требующих высокой точности и надежности. Если вам необходима лента, которая будет служить долго и эффективно, обратите внимание на Лента молибденовая ВМ1Д. Здесь вы можете купить Лента молибденовая ВМ1Д по конкурентным ценам. Не упустите возможность приобрести этот надежный материал для вашего производства!
Your comment is awaiting moderation.
В поисках надежного поставщика редкоземельных металлов и сплавов? Обратите внимание на компанию Редметсплав.рф. Мы предлагаем широкий ассортимент продукции, обеспечивая высочайшее качество каждого изделия.
Редметсплав.рф защищает все стадии сделки, предоставляя полный пакет необходимых документов для законного использования товаров. Неважно, какие объемы вам необходимы – от мелких партий до крупнооптовых заказов, мы готовы обеспечить любой запрос с прекрасным качеством обслуживания.
Наша команда службы поддержки всегда на связи, чтобы помочь вам в определении подходящих продуктов и ответить на любые вопросы, связанные с применением и характеристиками металлов. Выбирая нас, вы выбираете достоверность в каждой детали сотрудничества.
Заходите на наш сайт Редметсплав.рф и убедитесь, что наше качество и сервис – наилучшее решение для вашего бизнеса.
поставляемая продукция:
Шестигранник алюминиевый 48 мм АК4-1Т1 ГОСТ 8560-78 Покупайте высококачественный шестигранник алюминиевый размером 48 мм по стандарту ГОСТ 8560-78 на сайте Редметсплав.рф. Прочный и легкий алюминиевый материал, соответствие стандартам и удобство использования делают этот инструмент идеальным выбором для промышленных и ремонтных работ.
Your comment is awaiting moderation.
В поисках надежного поставщика редкоземельных металлов и сплавов? Обратите внимание на компанию Редметсплав.рф. Мы предлагаем обширный каталог продукции, обеспечивая высочайшее качество каждого изделия.
Редметсплав.рф защищает все стадии сделки, предоставляя полный пакет необходимых документов для легализации товаров. Неважно, какие объемы вам необходимы – от мелких партий до крупнооптовых заказов, мы готовы выполнить любой запрос с непревзойденным обслуживанием.
Наша команда службы поддержки всегда на связи, чтобы помочь вам в выборе товаров и ответить на любые вопросы, связанные с применением и характеристиками металлов. Выбирая нас, вы выбираете уверенность в каждой детали сотрудничества.
Заходите на наш сайт Редметсплав.рф и убедитесь, что наше качество и сервис – наилучшее решение для вашего бизнеса.
Наши товары:
Труба бронзовая 42х8.5х500 мм БрАЖН10-4-4 ГОСТ 1208-2014 Приобретайте трубы бронзовые круглые от профессионалов с опытом. Мы предлагаем широкий ассортимент качественной продукции, быструю обработку заказов и оперативную доставку. Обращайтесь, чтобы получить консультацию специалиста и выгодные условия покупки.
Your comment is awaiting moderation.
В поисках надежного поставщика редкоземельных металлов и сплавов? Обратите внимание на компанию Редметсплав.рф. Мы предлагаем внушительный выбор продукции, обеспечивая высочайшее качество каждого изделия.
Редметсплав.рф защищает все стадии сделки, предоставляя полный пакет необходимых документов для законного использования товаров. Неважно, какие объемы вам необходимы – от мелких партий до крупнооптовых заказов, мы готовы поставить любой запрос с прекрасным качеством обслуживания.
Наша команда службы поддержки всегда на связи, чтобы помочь вам в выборе товаров и ответить на любые вопросы, связанные с применением и характеристиками металлов. Выбирая нас, вы выбираете достоверность в каждой детали сотрудничества.
Заходите на наш сайт Редметсплав.рф и убедитесь, что наше качество и сервис – ваш лучший выбор.
Наши товары:
Труба из драгоценных металлов палладиевая 100х1х0.7 мм Пд99.9 ТУ Гарантированное качество и изысканный дизайн – купите драгоценные трубы для ювелирных украшений, машиностроения и архитектуры. Широкий выбор и высокое качество! Доставка по России.
Your comment is awaiting moderation.
В поисках достоверного источника редкоземельных металлов и сплавов? Обратите внимание на компанию Редметсплав.рф. Мы предлагаем внушительный выбор продукции, обеспечивая превосходное качество каждого изделия.
Редметсплав.рф гарантирует все стадии сделки, предоставляя полный пакет необходимых документов для оформления товаров. Неважно, какие объемы вам необходимы – от мелких партий до крупнооптовых заказов, мы готовы обеспечить любой запрос с высоким уровнем сервиса.
Наша команда службы поддержки всегда на связи, чтобы помочь вам в подборе нужных изделий и ответить на любые вопросы, связанные с применением и характеристиками металлов. Выбирая нас, вы выбираете достоверность в каждой детали сотрудничества.
Заходите на наш сайт Редметсплав.рф и убедитесь, что качество и уровень нашего сервиса – ваш лучший выбор.
Наши товары:
Пружина из драгоценных металлов палладиевая 10х2х0.2 мм Пд99.9 ТУ Выберите идеальные пружины из золота, серебра или платины, чтобы дополнить ваше украшение. Найдите пружины с изысканным дизайном и прочностью. Они предлагают широкий выбор для того, чтобы подчеркнуть уникальность вашего украшения.
Your comment is awaiting moderation.
В поисках достоверного источника редкоземельных металлов и сплавов? Обратите внимание на компанию Редметсплав.рф. Мы предлагаем широкий ассортимент продукции, обеспечивая высочайшее качество каждого изделия.
Редметсплав.рф гарантирует все стадии сделки, предоставляя полный пакет необходимых документов для легализации товаров. Неважно, какие объемы вам необходимы – от мелких партий до крупнооптовых заказов, мы готовы выполнить любой запрос с прекрасным качеством обслуживания.
Наша команда службы поддержки всегда на связи, чтобы помочь вам в подборе нужных изделий и ответить на любые вопросы, связанные с применением и характеристиками металлов. Выбирая нас, вы выбираете надежность в каждой детали сотрудничества.
Заходите на наш сайт Редметсплав.рф и убедитесь, что наше качество и сервис – наилучшее решение для вашего бизнеса.
Наши товары:
Медный однораструбный СѓРіРѕР» РїРѕРґ пайку 90 градусов 6С…4С…0.6 РјРј 5.8С…7.8 РјРј твердая пайка Рњ0Р± ГОСТ Р 52922-2008 Приобретите медную муфту СЃ внутренней цилиндрической резьбой для надежного соединения труб диаметром 120С…2.8 РјРј. Рзготовленная РїРѕ стандарту ГОСТ Р 52949-2008, РѕРЅР° обеспечивает надежность, прочность Рё долговечность. РџРѕРґС…РѕРґРёС‚ для поставки цветных Рё редкоземельных металлов Рё изделий РёР· РЅРёС….
Your comment is awaiting moderation.
РедМетСплав предлагает внушительный каталог отборных изделий из редких материалов. Не важно, какие объемы вам необходимы – от мелких партий до крупных поставок, мы обеспечиваем быстрое выполнение вашего заказа.
Каждая единица товара подтверждена соответствующими документами, подтверждающими их происхождение. Превосходное обслуживание – то, чем мы гордимся – мы на связи, чтобы разрешать ваши вопросы а также находить ответы под требования вашего бизнеса.
Доверьте вашу потребность в редких металлах профессионалам РедМетСплав и убедитесь в множестве наших преимуществ
поставляемая продукция:
РўСЂСѓР±Р° кобальтовая РРЎРћ 5832-4 – ГОСТ Р РРЎРћ 5832-4-2011 РўСЂСѓР±Р° кобальтовая РРЎРћ 5832-4 – ГОСТ Р РРЎРћ 5832-4-2011 представляет СЃРѕР±РѕР№ высококачественный материал, предназначенный для использования РІ медицинских Рё промышленных приложениях. Ртот РїСЂРѕРґСѓРєС‚ обладает отличной РєРѕСЂСЂРѕР·РёР№РЅРѕР№ стойкостью Рё прочностью, что делает его идеальным выбором для изготовления имплантатов Рё РґСЂСѓРіРёС… изделий, требующих высокой надежности Рё долговечности. Если РІС‹ ищете надежные решения, то рекомендуем вам купить РўСЂСѓР±Р° кобальтовая РРЎРћ 5832-4 – ГОСТ Р РРЎРћ 5832-4-2011. Ртот товар соответствует всем необходимым стандартам Рё отлично подойдет для ваших нужд.
Your comment is awaiting moderation.
В поисках надежного поставщика редкоземельных металлов и сплавов? Обратите внимание на компанию Редметсплав.рф. Мы предлагаем широкий ассортимент продукции, обеспечивая высочайшее качество каждого изделия.
Редметсплав.рф защищает все стадии сделки, предоставляя полный пакет необходимых документов для легализации товаров. Неважно, какие объемы вам необходимы – от мелких партий до крупнооптовых заказов, мы готовы выполнить любой запрос с высоким уровнем сервиса.
Наша команда службы поддержки всегда на связи, чтобы помочь вам в выборе товаров и ответить на любые вопросы, связанные с применением и характеристиками металлов. Выбирая нас, вы выбираете уверенность в каждой детали сотрудничества.
Заходите на наш сайт Редметсплав.рф и убедитесь, что качество и уровень нашего сервиса – наилучшее решение для вашего бизнеса.
поставляемая продукция:
Пружина из драгоценных металлов палладиевая 20х4х0.8 мм ПДСР-40 ТУ Выберите идеальные пружины из золота, серебра или платины, чтобы дополнить ваше украшение. Найдите пружины с изысканным дизайном и прочностью. Они предлагают широкий выбор для того, чтобы подчеркнуть уникальность вашего украшения.
Your comment is awaiting moderation.
РедМетСплав предлагает обширный выбор высококачественных изделий из ценных материалов. Не важно, какие объемы вам необходимы – от мелких партий до крупных поставок, мы гарантируем своевременную реализацию вашего заказа.
Каждая единица изделия подтверждена соответствующими документами, подтверждающими их качество. Дружелюбная помощь – то, чем мы гордимся – мы на связи, чтобы разрешать ваши вопросы а также предоставлять решения под специфику вашего бизнеса.
Доверьте ваш запрос специалистам РедМетСплав и убедитесь в гибкости нашего предложения
Наши товары:
РўСЂСѓР±Р° висмутовая Bi14A – EIA/IPC J-STD-006 РўСЂСѓР±Р° висмутовая Bi14A – EIA/IPC J-STD-006 является высококачественным материалом, специально разработанным для использования РІ электронике Рё радиотехнике. Рто изделие отвечает международным стандартам Рё обладает отличными проводниковыми свойствами. РўСЂСѓР±Р° обеспечивает надежную защиту компонентов РѕС‚ РєРѕСЂСЂРѕР·РёРё Рё внешних воздействий. Приобретая РўСЂСѓР±Р° висмутовая Bi14A – EIA/IPC J-STD-006, РІС‹ получаете уверенность РІ долговечности Рё эффективности СЃРІРѕРёС… проектов. РќРµ упустите возможность купить РўСЂСѓР±Р° висмутовая Bi14A – EIA/IPC J-STD-006 Рё повысить качество СЃРІРѕРёС… разработок!
Your comment is awaiting moderation.
В поисках надежного поставщика редкоземельных металлов и сплавов? Обратите внимание на компанию Редметсплав.рф. Мы предлагаем обширный каталог продукции, обеспечивая высочайшее качество каждого изделия.
Редметсплав.рф гарантирует все стадии сделки, предоставляя полный пакет необходимых документов для оформления товаров. Неважно, какие объемы вам необходимы – от мелких партий до крупнооптовых заказов, мы готовы обеспечить любой запрос с высоким уровнем сервиса.
Наша команда поддержки всегда на связи, чтобы помочь вам в выборе товаров и ответить на любые вопросы, связанные с применением и характеристиками металлов. Выбирая нас, вы выбираете достоверность в каждой детали сотрудничества.
Заходите на наш сайт Редметсплав.рф и убедитесь, что качество и уровень нашего сервиса – ваш лучший выбор.
Наши товары:
Труба бронзовая 85х10х2500 мм БрБ2 ГОСТ 1208-2014 Приобретайте трубы бронзовые круглые от профессионалов с опытом. Мы предлагаем широкий ассортимент качественной продукции, быструю обработку заказов и оперативную доставку. Обращайтесь, чтобы получить консультацию специалиста и выгодные условия покупки.
Your comment is awaiting moderation.
РедМетСплав предлагает широкий ассортимент отборных изделий из нестандартных материалов. Не важно, какие объемы вам необходимы – от небольших закупок до крупных поставок, мы обеспечиваем своевременную реализацию вашего заказа.
Каждая единица изделия подтверждена всеми необходимыми документами, подтверждающими их происхождение. Дружелюбная помощь – наш стандарт – мы на связи, чтобы улаживать ваши вопросы а также предоставлять решения под специфику вашего бизнеса.
Доверьте ваш запрос профессионалам РедМетСплав и убедитесь в гибкости нашего предложения
Наша продукция:
Р’РёСЃРјСѓС‚ L54860 – UNS Р’РёСЃРјСѓС‚ L54860 – UNS – это высококачественный металл, обладающий уникальными физико-химическими свойствами, что делает его незаменимым для множества применений. РћРЅ применяется РІ металлургии, медицине Рё науке благодаря СЃРІРѕРёРј антимикробным Рё защитным качествам. Приобретая Р’РёСЃРјСѓС‚ L54860 – UNS, РІС‹ выбираете надежный материал, который отличается высокой чистотой Рё стабильностью. РќРµ упустите возможность купить Р’РёСЃРјСѓС‚ L54860 – UNS РїРѕ выгодной цене Рё обеспечить качество СЃРІРѕРёС… продуктов. Рдеальный выбор для профессионалов Рё любителей!
Your comment is awaiting moderation.
В поисках надежного поставщика редкоземельных металлов и сплавов? Обратите внимание на компанию Редметсплав.рф. Мы предлагаем обширный каталог продукции, обеспечивая превосходное качество каждого изделия.
Редметсплав.рф гарантирует все стадии сделки, предоставляя полный пакет необходимых документов для оформления товаров. Неважно, какие объемы вам необходимы – от мелких партий до крупнооптовых заказов, мы готовы поставить любой запрос с непревзойденным обслуживанием.
Наша команда поддержки всегда на связи, чтобы помочь вам в подборе нужных изделий и ответить на любые вопросы, связанные с применением и характеристиками металлов. Выбирая нас, вы выбираете уверенность в каждой детали сотрудничества.
Заходите на наш сайт Редметсплав.рф и убедитесь, что качество и уровень нашего сервиса – ваш лучший выбор.
Наша продукция:
Пружина из драгоценных металлов золотая 50х1х0.6 мм ЗлСрМ58.5-8 ТУ Выберите идеальные пружины из золота, серебра или платины, чтобы дополнить ваше украшение. Найдите пружины с изысканным дизайном и прочностью. Они предлагают широкий выбор для того, чтобы подчеркнуть уникальность вашего украшения.
Your comment is awaiting moderation.
РедМетСплав предлагает широкий ассортимент качественных изделий из редких материалов. Не важно, какие объемы вам необходимы – от небольших закупок до масштабных поставок, мы обеспечиваем своевременную реализацию вашего заказа.
Каждая единица изделия подтверждена всеми необходимыми документами, подтверждающими их соответствие стандартам. Дружелюбная помощь – наша визитная карточка – мы на связи, чтобы ответить на ваши вопросы и находить ответы под специфику вашего бизнеса.
Доверьте потребности вашего бизнеса специалистам РедМетСплав и убедитесь в широком спектре предлагаемых возможностей
Наша продукция:
РџРѕРєРѕРІРєР° магниевая AZ31A – ASTM B275 Лист магниевый AZ31A – ASTM B275 представляет СЃРѕР±РѕР№ легкий Рё прочный материал, обладающий высокой РєРѕСЂСЂРѕР·РёРѕРЅРЅРѕР№ устойчивостью. Благодаря СЃРІРѕРёРј отличным механическим свойствам, этот лист идеально РїРѕРґС…РѕРґРёС‚ для использования РІ аэрокосмической, автомобильной Рё РґСЂСѓРіРёС… отраслях. Р’ отличие РѕС‚ алюминия, магний имеет меньшую плотность, что делает его материалом выбора для проектов, РіРґРµ важен РЅРёР·РєРёР№ вес. Если РІС‹ ищете надежное решение, вам стоит купить Лист магниевый AZ31A – ASTM B275. Ртот РїСЂРѕРґСѓРєС‚ отвечает международным стандартам Рё гарантирует долгий СЃСЂРѕРє службы.
Your comment is awaiting moderation.
В поисках достоверного источника редкоземельных металлов и сплавов? Обратите внимание на компанию Редметсплав.рф. Мы предлагаем внушительный выбор продукции, обеспечивая превосходное качество каждого изделия.
Редметсплав.рф гарантирует все стадии сделки, предоставляя полный пакет необходимых документов для легализации товаров. Неважно, какие объемы вам необходимы – от мелких партий до крупнооптовых заказов, мы готовы выполнить любой запрос с прекрасным качеством обслуживания.
Наша команда службы поддержки всегда на связи, чтобы помочь вам в выборе товаров и ответить на любые вопросы, связанные с применением и характеристиками металлов. Выбирая нас, вы выбираете надежность в каждой детали сотрудничества.
Заходите на наш сайт Редметсплав.рф и убедитесь, что наше качество и сервис – ваш лучший выбор.
Наши товары:
Никелевая капиллярная трубка 3.55х0.2х5000 мм НВ3 ГОСТ 13548-2016 Приобретите никелевые капиллярные трубки от Редметсплав.рф для прочных, высокотехнологичных и надежных решений в различных отраслях.
Your comment is awaiting moderation.
В поисках достоверного источника редкоземельных металлов и сплавов? Обратите внимание на компанию Редметсплав.рф. Мы предлагаем широкий ассортимент продукции, обеспечивая превосходное качество каждого изделия.
Редметсплав.рф гарантирует все стадии сделки, предоставляя полный пакет необходимых документов для законного использования товаров. Неважно, какие объемы вам необходимы – от мелких партий до крупнооптовых заказов, мы готовы поставить любой запрос с прекрасным качеством обслуживания.
Наша команда службы поддержки всегда на связи, чтобы помочь вам в выборе товаров и ответить на любые вопросы, связанные с применением и характеристиками металлов. Выбирая нас, вы выбираете уверенность в каждой детали сотрудничества.
Заходите на наш сайт Редметсплав.рф и убедитесь, что наше качество и сервис – ваш лучший выбор.
Наши товары:
Рлектроды Р”6 Р42Рђ РЈРћРќР 13/45 Приобретите электроды Р”6 РРљ46 РђРќРћ-4 высочайшего качества для сварки низколегированных сталей РЅР° Редметсплав.СЂС„. Обеспечьте прочные Рё надежные сварные соединения СЃ помощью специально разработанных электродов, идеальных для различных областей применения.
Your comment is awaiting moderation.
В поисках достоверного источника редкоземельных металлов и сплавов? Обратите внимание на компанию Редметсплав.рф. Мы предлагаем обширный каталог продукции, обеспечивая высочайшее качество каждого изделия.
Редметсплав.рф обеспечивает все стадии сделки, предоставляя полный пакет необходимых документов для легализации товаров. Неважно, какие объемы вам необходимы – от мелких партий до крупнооптовых заказов, мы готовы поставить любой запрос с высоким уровнем сервиса.
Наша команда поддержки всегда на связи, чтобы помочь вам в подборе нужных изделий и ответить на любые вопросы, связанные с применением и характеристиками металлов. Выбирая нас, вы выбираете надежность в каждой детали сотрудничества.
Заходите на наш сайт Редметсплав.рф и убедитесь, что наше качество и сервис – наилучшее решение для вашего бизнеса.
Наши товары:
Плита бронзовая 30х300х400 мм БрАЖМЦ ТУ Приобретите высококачественные бронзовые плиты от Редметсплав. Наши материалы отличаются высокой прочностью, устойчивостью к коррозии, отличной обрабатываемостью и устойчивостью к высоким температурам. Найдите оптимальный вариант из широкого ассортимента размеров и толщин на официальном сайте компании.
Your comment is awaiting moderation.
РедМетСплав предлагает обширный выбор качественных изделий из редких материалов. Не важно, какие объемы вам необходимы – от небольших закупок до масштабных поставок, мы обеспечиваем быстрое выполнение вашего заказа.
Каждая единица продукции подтверждена требуемыми документами, подтверждающими их происхождение. Дружелюбная помощь – наш стандарт – мы на связи, чтобы ответить на ваши вопросы по мере того как адаптировать решения под требования вашего бизнеса.
Доверьте вашу потребность в редких металлах профессионалам РедМетСплав и убедитесь в множестве наших преимуществ
поставляемая продукция:
РљСЂСѓРі магниевый MgAl8Zn – DIN 1729 Part 1 Фольга магниевая MgAl8Zn – DIN 1729 Part 1 – это высококачественный материал, обладающий уникальными свойствами, такими как легкость Рё высокая коррозионная стойкость. Применяется РІ авиационной Рё автомобильной промышленности, Р° также РІ производстве электронных компонентов. Данный РїСЂРѕРґСѓРєС‚ способен значительно снизить вес конструкции, что улучшает общую эффективность Рё экономичность. Если вам необходимо улучшить производительность ваших изделий, то вам стоит купить Фольга магниевая MgAl8Zn – DIN 1729 Part 1. Ртот материал станет отличным решением для ваших нужд.
Your comment is awaiting moderation.
В поисках достоверного источника редкоземельных металлов и сплавов? Обратите внимание на компанию Редметсплав.рф. Мы предлагаем внушительный выбор продукции, обеспечивая превосходное качество каждого изделия.
Редметсплав.рф обеспечивает все стадии сделки, предоставляя полный пакет необходимых документов для оформления товаров. Неважно, какие объемы вам необходимы – от мелких партий до крупнооптовых заказов, мы готовы поставить любой запрос с непревзойденным обслуживанием.
Наша команда службы поддержки всегда на связи, чтобы помочь вам в подборе нужных изделий и ответить на любые вопросы, связанные с применением и характеристиками металлов. Выбирая нас, вы выбираете достоверность в каждой детали сотрудничества.
Заходите на наш сайт Редметсплав.рф и убедитесь, что качество и уровень нашего сервиса – идеальный вариант для вас.
Наша продукция:
Никелевая капиллярная трубка 4х0.2х5000 мм НМг ГОСТ 13548-2016 Приобретите никелевые капиллярные трубки от Редметсплав.рф для прочных, высокотехнологичных и надежных решений в различных отраслях.
Your comment is awaiting moderation.
В поисках достоверного источника редкоземельных металлов и сплавов? Обратите внимание на компанию Редметсплав.рф. Мы предлагаем широкий ассортимент продукции, обеспечивая высочайшее качество каждого изделия.
Редметсплав.рф защищает все стадии сделки, предоставляя полный пакет необходимых документов для легализации товаров. Неважно, какие объемы вам необходимы – от мелких партий до крупнооптовых заказов, мы готовы поставить любой запрос с прекрасным качеством обслуживания.
Наша команда поддержки всегда на связи, чтобы помочь вам в выборе товаров и ответить на любые вопросы, связанные с применением и характеристиками металлов. Выбирая нас, вы выбираете уверенность в каждой детали сотрудничества.
Заходите на наш сайт Редметсплав.рф и убедитесь, что наше качество и сервис – ваш лучший выбор.
Наша продукция:
Лист из магнитно-твердых сплавов 2.2 мм ЕВ6 ГОСТ 10994-74 Купить листы из магнитно-твердых сплавов высокого качества. Листы с высокой магнитной индукцией, устойчивостью к коррозии и превосходной термической стабильностью. Применение в электротехнике, медицинском оборудовании и других отраслях. Большой выбор размеров и конфигураций.
Your comment is awaiting moderation.
РедМетСплав предлагает широкий ассортимент отборных изделий из ценных материалов. Не важно, какие объемы вам необходимы – от мелких партий до обширных поставок, мы гарантируем быстрое выполнение вашего заказа.
Каждая единица изделия подтверждена всеми необходимыми документами, подтверждающими их происхождение. Превосходное обслуживание – то, чем мы гордимся – мы на связи, чтобы улаживать ваши вопросы а также предоставлять решения под особенности вашего бизнеса.
Доверьте ваш запрос специалистам РедМетСплав и убедитесь в гибкости нашего предложения
Наши товары:
Проволока вольфрамовая ВМ (20-30) Проволока вольфрамовая ВМ (20-30) представляет собой высококачественный материал, используемый в различных промышленных приложениях. Обладает отличной температурной стойкостью и механическими свойствами, что делает её идеальным выбором для изготовления ламп, электрических контактов и других изделий. Данная проволока устойчива к коррозии и обладает малым коэффициентом теплового расширения. Если вы ищете надежный и долговечный продукт, вам стоит купить Проволока вольфрамовая ВМ (20-30) для своих нужд. Она обеспечит надежность и высокую производительность в любых условиях.
Your comment is awaiting moderation.
В поисках достоверного источника редкоземельных металлов и сплавов? Обратите внимание на компанию Редметсплав.рф. Мы предлагаем внушительный выбор продукции, обеспечивая высочайшее качество каждого изделия.
Редметсплав.рф обеспечивает все стадии сделки, предоставляя полный пакет необходимых документов для законного использования товаров. Неважно, какие объемы вам необходимы – от мелких партий до крупнооптовых заказов, мы готовы выполнить любой запрос с высоким уровнем сервиса.
Наша команда поддержки всегда на связи, чтобы помочь вам в определении подходящих продуктов и ответить на любые вопросы, связанные с применением и характеристиками металлов. Выбирая нас, вы выбираете надежность в каждой детали сотрудничества.
Заходите на наш сайт Редметсплав.рф и убедитесь, что наше качество и сервис – ваш лучший выбор.
Наши товары:
Медная двухраструбная редукционная переходная муфта РїРѕРґ пайку 133С…106 РјРј мягкая пайка Рњ1СЂ ГОСТ 32590-2013 Выберите высококачественные медные двухраструбные редукционные муфты РїРѕРґ пайку РѕС‚ Редметсплав для надежного соединения медных труб различных диаметров. РЁРёСЂРѕРєРёР№ выбор размеров, эффективная установка Рё долговечность гарантированы. Рдеальное решение для систем отопления Рё водоснабжения.
Your comment is awaiting moderation.
РедМетСплав предлагает внушительный каталог высококачественных изделий из редких материалов. Не важно, какие объемы вам необходимы – от небольших закупок до обширных поставок, мы обеспечиваем быстрое выполнение вашего заказа.
Каждая единица товара подтверждена соответствующими документами, подтверждающими их происхождение. Опытная поддержка – наша визитная карточка – мы на связи, чтобы разрешать ваши вопросы по мере того как предоставлять решения под требования вашего бизнеса.
Доверьте вашу потребность в редких металлах профессионалам РедМетСплав и убедитесь в широком спектре предлагаемых возможностей
Наши товары:
Фольга магниевая MC8 – JIS H 5203 РўСЂСѓР±Р° магниевая MC8 – JIS H 5203 представляет СЃРѕР±РѕР№ высококачественный материал, который используется РІ различных отраслях. Благодаря СЃРІРѕРёРј превосходным механическим свойствам Рё легкости, эта труба идеальна для применения РІ строительстве Рё машиностроении. Особая коррозионная стойкость гарантирует долгий СЃСЂРѕРє службы. Если РІС‹ ищете надежный Рё легкий РїСЂРѕРґСѓРєС‚, труба магниевая MC8 – JIS H 5203 – отличный выбор для вас. РќРµ упустите возможность купить РўСЂСѓР±Р° магниевая MC8 – JIS H 5203 Рё обеспечить надежность вашего проекта.
Your comment is awaiting moderation.
РедМетСплав предлагает внушительный каталог высококачественных изделий из редких материалов. Не важно, какие объемы вам необходимы – от небольших закупок до обширных поставок, мы обеспечиваем оперативное исполнение вашего заказа.
Каждая единица продукции подтверждена требуемыми документами, подтверждающими их происхождение. Дружелюбная помощь – наш стандарт – мы на связи, чтобы ответить на ваши вопросы по мере того как находить ответы под специфику вашего бизнеса.
Доверьте ваш запрос специалистам РедМетСплав и убедитесь в множестве наших преимуществ
Наша продукция:
Р’РёСЃРјСѓС‚ РџРћРЎР’Рё 36-4 Р’РёСЃРјСѓС‚ РџРћРЎР’Рё 36-4 — уникальный высококачественный металл, который широко используется РІ различных отраслях. Ртот сплав характеризуется отличной РєРѕСЂСЂРѕР·РёРѕРЅРЅРѕР№ стойкостью Рё высокой теплопроводностью, что делает его идеальным для применения РІ электронике Рё медицине. Благодаря СЃРІРѕРёРј свойствам, Р’РёСЃРјСѓС‚ РџРћРЎР’Рё 36-4 находит применение РІ производстве термопар Рё специальных сплавов. Если РІС‹ хотите купить Р’РёСЃРјСѓС‚ РџРћРЎР’Рё 36-4, вам стоит обратить внимание РЅР° его доступность Рё качество. Закажите уже сегодня, чтобы РЅРµ упустить возможность улучшить СЃРІРѕРё производственные процессы!
Your comment is awaiting moderation.
РедМетСплав предлагает обширный выбор качественных изделий из ценных материалов. Не важно, какие объемы вам необходимы – от мелких партий до крупных поставок, мы обеспечиваем своевременную реализацию вашего заказа.
Каждая единица продукции подтверждена соответствующими документами, подтверждающими их качество. Опытная поддержка – то, чем мы гордимся – мы на связи, чтобы разрешать ваши вопросы а также предоставлять решения под специфику вашего бизнеса.
Доверьте потребности вашего бизнеса профессионалам РедМетСплав и убедитесь в множестве наших преимуществ
поставляемая продукция:
Магний HM21A – ASTM B275 Магний HM21A – ASTM B275 представляет СЃРѕР±РѕР№ высококачественный легкий металл, обладающий уникальными физико-химическими свойствами. Ртот сплав широко используется РІ авиастроении, автомобилестроении Рё РґСЂСѓРіРёС… отраслях, благодаря своей высокой прочности Рё РєРѕСЂСЂРѕР·РёРѕРЅРЅРѕР№ стойкости. РљСѓРїРёРІ Магний HM21A – ASTM B275, РІС‹ гарантируете своему производству надежность Рё долговечность изделий. РћРЅ легко поддается обработке, что позволяет эффективно применять его РІ различных технологических процессах. РќРµ упустите возможность приобрести этот востребованный материал РїРѕ конкурентной цене!
Your comment is awaiting moderation.
В поисках достоверного источника редкоземельных металлов и сплавов? Обратите внимание на компанию Редметсплав.рф. Мы предлагаем широкий ассортимент продукции, обеспечивая высочайшее качество каждого изделия.
Редметсплав.рф гарантирует все стадии сделки, предоставляя полный пакет необходимых документов для законного использования товаров. Неважно, какие объемы вам необходимы – от мелких партий до крупнооптовых заказов, мы готовы обеспечить любой запрос с высоким уровнем сервиса.
Наша команда поддержки всегда на связи, чтобы помочь вам в определении подходящих продуктов и ответить на любые вопросы, связанные с применением и характеристиками металлов. Выбирая нас, вы выбираете уверенность в каждой детали сотрудничества.
Заходите на наш сайт Редметсплав.рф и убедитесь, что качество и уровень нашего сервиса – наилучшее решение для вашего бизнеса.
поставляемая продукция:
Кольцо РёР· драгоценных металлов платиновое 8С…2С…1 РјРј РџР»Р90-10 РўРЈ РЁРёСЂРѕРєРёР№ выбор высококачественных кольц РёР· драгоценных металлов. Рлегантные украшения, созданные талантливыми мастерами. Уникальность Рё изысканность РІ каждой детали. Возможность заказа персонального кольца РїРѕ вашим пожеланиям. Подчеркните СЃРІРѕСЋ индивидуальность СЃ нашими кольцами.
Your comment is awaiting moderation.
РедМетСплав предлагает широкий ассортимент качественных изделий из нестандартных материалов. Не важно, какие объемы вам необходимы – от мелких партий до масштабных поставок, мы гарантируем оперативное исполнение вашего заказа.
Каждая единица изделия подтверждена требуемыми документами, подтверждающими их качество. Опытная поддержка – наш стандарт – мы на связи, чтобы улаживать ваши вопросы по мере того как адаптировать решения под специфику вашего бизнеса.
Доверьте ваш запрос специалистам РедМетСплав и убедитесь в широком спектре предлагаемых возможностей
поставляемая продукция:
Р’РёСЃРјСѓС‚ B580 – EN 61190-1-3 Р’РёСЃРјСѓС‚ B580 – EN 61190-1-3 – это надежный Рё качественный материал для пайки, идеально подходящий для использования РІ электронике. Его состав обеспечивает отличную текучесть Рё совместимость СЃ различными типами компонентов, что делает его незаменимым РІ работе специалиста. Благодаря высоким стандартам качества, этот РІРёСЃРјСѓС‚ обеспечивает надежное соединение Рё долгий СЃСЂРѕРє службы. Если РІС‹ ищете эффективные решения РІ области пайки, вам стоит купить Р’РёСЃРјСѓС‚ B580 – EN 61190-1-3. Ртот товар станет отличным помощником РІ ваших проектах, гарантируя бесперебойную работу ваших систем.
Your comment is awaiting moderation.
РедМетСплав предлагает широкий ассортимент качественных изделий из нестандартных материалов. Не важно, какие объемы вам необходимы – от мелких партий до обширных поставок, мы гарантируем оперативное исполнение вашего заказа.
Каждая единица товара подтверждена требуемыми документами, подтверждающими их качество. Дружелюбная помощь – наш стандарт – мы на связи, чтобы разрешать ваши вопросы по мере того как предоставлять решения под требования вашего бизнеса.
Доверьте ваш запрос профессионалам РедМетСплав и убедитесь в широком спектре предлагаемых возможностей
поставляемая продукция:
Магний G-Z6Th2Zr – AFNOR NF A57-704 Магний G-Z6Th2Zr – AFNOR NF A57-704 представляет СЃРѕР±РѕР№ высококачественный легированный магний, предназначенный для применения РІ различных отраслях, включая машиностроение Рё авиацию. Его уникальные свойства, такие как легкость Рё прочность, делают его идеальным выбором для создания легких конструкций. РљРѕРіРґР° требуется надежный Рё долговечный материал, Магний G-Z6Th2Zr – AFNOR NF A57-704 станет отличным решением. РќРµ упустите возможность купить Магний G-Z6Th2Zr – AFNOR NF A57-704 Сѓ нас РїРѕ выгодной цене. Ртот материал обеспечит вашу продукцию необходимыми характеристиками, позволяя вам выделяться РЅР° рынке. Заказывайте РїСЂСЏРјРѕ сейчас!
Your comment is awaiting moderation.
РедМетСплав предлагает широкий ассортимент качественных изделий из нестандартных материалов. Не важно, какие объемы вам необходимы – от мелких партий до обширных поставок, мы обеспечиваем оперативное исполнение вашего заказа.
Каждая единица продукции подтверждена требуемыми документами, подтверждающими их качество. Опытная поддержка – то, чем мы гордимся – мы на связи, чтобы улаживать ваши вопросы по мере того как адаптировать решения под специфику вашего бизнеса.
Доверьте ваш запрос профессионалам РедМетСплав и убедитесь в гибкости нашего предложения
Наша продукция:
Рзделия РёР· титана Р’Рў6Р› – РћРЎРў 1 90060-92 РџРѕРєРѕРІРєР° титановая Р’Рў6Р› – РћРЎРў 1 90060-92 является высококачественным материалом, широко применяемым РІ различных отраслях, включая авиационную Рё медицинскую. Ртот сплав обладает отличной РєРѕСЂСЂРѕР·РёРѕРЅРЅРѕР№ стойкостью Рё высокой прочностью, что делает его идеальным выбором для ответственных конструкций. Если РІС‹ ищете надежное решение, то вам стоит купить РџРѕРєРѕРІРєР° титановая Р’Рў6Р› – РћРЎРў 1 90060-92. Данный РїСЂРѕРґСѓРєС‚ отвечает всем современным стандартам Рё требованиям, обеспечивая долговечность Рё стабильность РІ эксплуатации.
Your comment is awaiting moderation.
В поисках достоверного источника редкоземельных металлов и сплавов? Обратите внимание на компанию Редметсплав.рф. Мы предлагаем широкий ассортимент продукции, обеспечивая превосходное качество каждого изделия.
Редметсплав.рф защищает все стадии сделки, предоставляя полный пакет необходимых документов для оформления товаров. Неважно, какие объемы вам необходимы – от мелких партий до крупнооптовых заказов, мы готовы обеспечить любой запрос с высоким уровнем сервиса.
Наша команда службы поддержки всегда на связи, чтобы помочь вам в выборе товаров и ответить на любые вопросы, связанные с применением и характеристиками металлов. Выбирая нас, вы выбираете достоверность в каждой детали сотрудничества.
Заходите на наш сайт Редметсплав.рф и убедитесь, что качество и уровень нашего сервиса – идеальный вариант для вас.
Наша продукция:
Пружина РёР· драгоценных металлов платиновая 100С…10С…0.8 РјРј РџР»Р90-10 РўРЈ Выберите идеальные пружины РёР· золота, серебра или платины, чтобы дополнить ваше украшение. Найдите пружины СЃ изысканным дизайном Рё прочностью. РћРЅРё предлагают широкий выбор для того, чтобы подчеркнуть уникальность вашего украшения.
Your comment is awaiting moderation.
РедМетСплав предлагает внушительный каталог высококачественных изделий из нестандартных материалов. Не важно, какие объемы вам необходимы – от небольших закупок до масштабных поставок, мы обеспечиваем своевременную реализацию вашего заказа.
Каждая единица продукции подтверждена соответствующими документами, подтверждающими их происхождение. Дружелюбная помощь – то, чем мы гордимся – мы на связи, чтобы улаживать ваши вопросы и находить ответы под требования вашего бизнеса.
Доверьте вашу потребность в редких металлах профессионалам РедМетСплав и убедитесь в гибкости нашего предложения
Наша продукция:
Лист магниевый G-MgAg3SE2Zr1 – DIN 1729 Part 2 Лента магниевая G-MgAg3SE2Zr1 – DIN 1729 Part 2 представляет СЃРѕР±РѕР№ высококачественный материал, разработанный для использования РІ аэрокосмической Рё автомобильной промышленности. РћРЅР° обладает отличной прочностью, легкостью Рё РєРѕСЂСЂРѕР·РёРѕРЅРЅРѕР№ стойкостью, что делает ее идеальным выбором для различных приложений. Высокие механические характеристики гарантируют надежность даже РІ самых сложных условиях эксплуатации. Приобретая этот РїСЂРѕРґСѓРєС‚, РІС‹ обеспечиваете себе долгосрочную эксплуатацию Рё устойчивость Рє неблагоприятным факторам. РќРµ упустите возможность купить Лента магниевая G-MgAg3SE2Zr1 – DIN 1729 Part 2, чтобы получить максимальные преимущества РІ СЃРІРѕРёС… проектах!
Your comment is awaiting moderation.
В поисках надежного поставщика редкоземельных металлов и сплавов? Обратите внимание на компанию Редметсплав.рф. Мы предлагаем широкий ассортимент продукции, обеспечивая высочайшее качество каждого изделия.
Редметсплав.рф обеспечивает все стадии сделки, предоставляя полный пакет необходимых документов для законного использования товаров. Неважно, какие объемы вам необходимы – от мелких партий до крупнооптовых заказов, мы готовы поставить любой запрос с непревзойденным обслуживанием.
Наша команда службы поддержки всегда на связи, чтобы помочь вам в подборе нужных изделий и ответить на любые вопросы, связанные с применением и характеристиками металлов. Выбирая нас, вы выбираете уверенность в каждой детали сотрудничества.
Заходите на наш сайт Редметсплав.рф и убедитесь, что качество и уровень нашего сервиса – идеальный вариант для вас.
Наша продукция:
Медная крестовина под пайку 88.9х76х1.8 мм 14х17 мм твердая пайка М3РМ ГОСТ 32590-2013 Узнайте о высококачественных медных крестовинах под пайку от Редметсплав. Гарантия надежности, прочности, отличной теплопроводности и простоты монтажа. Широкий выбор размеров и конфигураций для любых электрических соединений.
Your comment is awaiting moderation.
В поисках надежного поставщика редкоземельных металлов и сплавов? Обратите внимание на компанию Редметсплав.рф. Мы предлагаем широкий ассортимент продукции, обеспечивая высочайшее качество каждого изделия.
Редметсплав.рф гарантирует все стадии сделки, предоставляя полный пакет необходимых документов для законного использования товаров. Неважно, какие объемы вам необходимы – от мелких партий до крупнооптовых заказов, мы готовы обеспечить любой запрос с высоким уровнем сервиса.
Наша команда службы поддержки всегда на связи, чтобы помочь вам в подборе нужных изделий и ответить на любые вопросы, связанные с применением и характеристиками металлов. Выбирая нас, вы выбираете уверенность в каждой детали сотрудничества.
Заходите на наш сайт Редметсплав.рф и убедитесь, что наше качество и сервис – идеальный вариант для вас.
Наши товары:
Лента РёР· прецизионных сплавов для СѓРїСЂСѓРіРёС… элементов 1.9×32 РјРј РЎРџ22 ГОСТ 14117-85 Купите ленту РёР· прецизионных сплавов для СѓРїСЂСѓРіРёС… элементов РїРѕ выгодной цене РЅР° Редметсплав.СЂС„. Высокая прочность, устойчивость Рє РєРѕСЂСЂРѕР·РёРё Рё отличная эластичность делают этот материал идеальным для различных отраслей. Предлагаем широкий ассортимент продукции Рё РїРѕРґСЂРѕР±РЅСѓСЋ информацию для правильного выбора.
Your comment is awaiting moderation.
РедМетСплав предлагает широкий ассортимент отборных изделий из ценных материалов. Не важно, какие объемы вам необходимы – от небольших закупок до обширных поставок, мы гарантируем оперативное исполнение вашего заказа.
Каждая единица товара подтверждена всеми необходимыми документами, подтверждающими их качество. Дружелюбная помощь – то, чем мы гордимся – мы на связи, чтобы ответить на ваши вопросы и предоставлять решения под особенности вашего бизнеса.
Доверьте вашу потребность в редких металлах профессионалам РедМетСплав и убедитесь в гибкости нашего предложения
Наши товары:
Проволока магниевая G-Z4TRZr – AFNOR NF A57-704 Полоса магниевая G-Z4TRZr – AFNOR NF A57-704 предназначена для использования РІ различных отраслях, включая аэрокосмическую Рё автомобильную. Ртот высококачественный материал обеспечивает отличные механические характеристики Рё РєРѕСЂСЂРѕР·РёРѕРЅРЅСѓСЋ стойкость. Полоса обладает легкостью Рё прочностью, что делает её идеальной для конструктивных решений. Если РІС‹ ищете надежный Рё долговечный материал, то стоит рассмотреть эту полосу. РњС‹ предлагаем удобные условия для РїРѕРєСѓРїРєРё. РќРµ упустите шанс купить Полоса магниевая G-Z4TRZr – AFNOR NF A57-704 РїРѕ привлекательной цене!
Your comment is awaiting moderation.
В поисках достоверного источника редкоземельных металлов и сплавов? Обратите внимание на компанию Редметсплав.рф. Мы предлагаем внушительный выбор продукции, обеспечивая превосходное качество каждого изделия.
Редметсплав.рф гарантирует все стадии сделки, предоставляя полный пакет необходимых документов для законного использования товаров. Неважно, какие объемы вам необходимы – от мелких партий до крупнооптовых заказов, мы готовы обеспечить любой запрос с прекрасным качеством обслуживания.
Наша команда службы поддержки всегда на связи, чтобы помочь вам в выборе товаров и ответить на любые вопросы, связанные с применением и характеристиками металлов. Выбирая нас, вы выбираете уверенность в каждой детали сотрудничества.
Заходите на наш сайт Редметсплав.рф и убедитесь, что наше качество и сервис – идеальный вариант для вас.
поставляемая продукция:
Труба бронзовая 65х17.5х3000 мм БрАМц9-2 ГОСТ 1208-2014 Приобретайте трубы бронзовые круглые от профессионалов с опытом. Мы предлагаем широкий ассортимент качественной продукции, быструю обработку заказов и оперативную доставку. Обращайтесь, чтобы получить консультацию специалиста и выгодные условия покупки.
Your comment is awaiting moderation.
РедМетСплав предлагает широкий ассортимент отборных изделий из ценных материалов. Не важно, какие объемы вам необходимы – от мелких партий до обширных поставок, мы обеспечиваем своевременную реализацию вашего заказа.
Каждая единица продукции подтверждена соответствующими документами, подтверждающими их качество. Опытная поддержка – то, чем мы гордимся – мы на связи, чтобы разрешать ваши вопросы по мере того как находить ответы под особенности вашего бизнеса.
Доверьте вашу потребность в редких металлах специалистам РедМетСплав и убедитесь в широком спектре предлагаемых возможностей
Наши товары:
Лист магниевый M13320 – UNS Лента магниевая M13320 – UNS является идеальным решением для различных промышленных приложений. РћРЅР° отличается высокой прочностью Рё стойкостью Рє РєРѕСЂСЂРѕР·РёРё, что делает её незаменимой РІ аспектах, связанных СЃ обработкой металлов. Применение магниевой ленты обеспечивает надежную защиту Рё долговечность РІ условиях эксплуатации.Если РІС‹ ищете надежный Рё высококачественный материал, то лента магниевая M13320 – UNS станет отличным выбором. Р’С‹ можете купить Лента магниевая M13320 – UNS РїСЂСЏРјРѕ сейчас Рё убедиться РІ её превосходных характеристиках.
Your comment is awaiting moderation.
РедМетСплав предлагает обширный выбор отборных изделий из ценных материалов. Не важно, какие объемы вам необходимы – от небольших закупок до масштабных поставок, мы обеспечиваем оперативное исполнение вашего заказа.
Каждая единица изделия подтверждена требуемыми документами, подтверждающими их происхождение. Опытная поддержка – наша визитная карточка – мы на связи, чтобы разрешать ваши вопросы по мере того как предоставлять решения под специфику вашего бизнеса.
Доверьте ваш запрос профессионалам РедМетСплав и убедитесь в множестве наших преимуществ
Наши товары:
Кобальт Stellite 107 Кобальт Stellite 107 – это высококачественный сплав, применяемый РІ различных отраслях. РћРЅ обладает отличными антифрикционными свойствами Рё высокой РєРѕСЂСЂРѕР·РёРѕРЅРЅРѕР№ стойкостью, что делает его идеальным выбором для инструментов Рё деталей, работающих РІ агрессивных условиях.Ртот сплав часто используют РІ авиационной, нефтегазовой Рё медицинской отраслях. Благодаря СЃРІРѕРёРј уникальным характеристикам, Кобальт Stellite 107 РїРѕРґС…РѕРґРёС‚ для изготовления режущих инструментов Рё узлов механического оборудования.Если РІС‹ хотите купить Кобальт Stellite 107, обратите внимание РЅР° его превосходные эксплуатационные качества Рё долгий СЃСЂРѕРє службы. Выбор данного материала — это залог надежности Рё эффективности ваших проектов.
Your comment is awaiting moderation.
РедМетСплав предлагает внушительный каталог высококачественных изделий из ценных материалов. Не важно, какие объемы вам необходимы – от мелких партий до обширных поставок, мы обеспечиваем своевременную реализацию вашего заказа.
Каждая единица изделия подтверждена всеми необходимыми документами, подтверждающими их происхождение. Опытная поддержка – то, чем мы гордимся – мы на связи, чтобы ответить на ваши вопросы а также адаптировать решения под особенности вашего бизнеса.
Доверьте ваш запрос профессионалам РедМетСплав и убедитесь в множестве наших преимуществ
Наши товары:
Лист магниевый M16620 – UNS Лента магниевая M16620 – UNS – это высококачественный РїСЂРѕРґСѓРєС‚, который идеально РїРѕРґС…РѕРґРёС‚ для различных областей применения, включая строительство Рё промышленность. Благодаря СЃРІРѕРёРј уникальным свойствам, эта лента обеспечивает отличную прочность Рё долговечность. Рспользование магния гарантирует легкость Рё устойчивость Рє РєРѕСЂСЂРѕР·РёРё, что делает её идеальным выбором для монтажа Рё ремонта. Если РІС‹ ищете надежный материал, то РЅРµ упустите возможность купить Лента магниевая M16620 – UNS. РњС‹ предлагаем выгодные условия Рё быструю доставку. Убедитесь РІ высоком качестве нашего продукта!
Your comment is awaiting moderation.
В поисках достоверного источника редкоземельных металлов и сплавов? Обратите внимание на компанию Редметсплав.рф. Мы предлагаем обширный каталог продукции, обеспечивая превосходное качество каждого изделия.
Редметсплав.рф гарантирует все стадии сделки, предоставляя полный пакет необходимых документов для законного использования товаров. Неважно, какие объемы вам необходимы – от мелких партий до крупнооптовых заказов, мы готовы обеспечить любой запрос с высоким уровнем сервиса.
Наша команда службы поддержки всегда на связи, чтобы помочь вам в подборе нужных изделий и ответить на любые вопросы, связанные с применением и характеристиками металлов. Выбирая нас, вы выбираете надежность в каждой детали сотрудничества.
Заходите на наш сайт Редметсплав.рф и убедитесь, что наше качество и сервис – ваш лучший выбор.
Наша продукция:
Лента из сплавов с высоким электрическим сопротивлением 2.2 мм Х15Н60-Н ГОСТ 12766.2-90 Купить ленту из сплавов с высоким электрическим сопротивлением от компании Редметсплав.рф. Описание, особенности, преимущества и области применения продукции. Гарантированное качество, надежность и высокий уровень обслуживания.
Your comment is awaiting moderation.
РедМетСплав предлагает обширный выбор высококачественных изделий из редких материалов. Не важно, какие объемы вам необходимы – от небольших закупок до крупных поставок, мы обеспечиваем быстрое выполнение вашего заказа.
Каждая единица продукции подтверждена всеми необходимыми документами, подтверждающими их соответствие стандартам. Превосходное обслуживание – наш стандарт – мы на связи, чтобы ответить на ваши вопросы и предоставлять решения под требования вашего бизнеса.
Доверьте вашу потребность в редких металлах профессионалам РедМетСплав и убедитесь в множестве наших преимуществ
Наша продукция:
Проволока магниевая H-Mg99.8 – DIN 17800 Полоса магниевая H-Mg99.8 – DIN 17800 представляется как идеальное решение для различных промышленных задач. Благодаря высокому содержанию магния, РѕРЅР° обеспечивает отличные механические свойства Рё легкость. Ртот материал широко используется РІ авиации, автомобилестроении Рё электротехнике. Каждая полоса РїСЂРѕС…РѕРґРёС‚ строгий контроль качества, что подтверждает её надежность. Если РІС‹ ищете эффективный Рё прочный материал, РЅРµ упустите возможность купить Полоса магниевая H-Mg99.8 – DIN 17800. Убедитесь РІ высоком качестве Рё получили оптимальные решения для ваших проектов.
Your comment is awaiting moderation.
РедМетСплав предлагает внушительный каталог отборных изделий из нестандартных материалов. Не важно, какие объемы вам необходимы – от небольших закупок до крупных поставок, мы обеспечиваем быстрое выполнение вашего заказа.
Каждая единица продукции подтверждена всеми необходимыми документами, подтверждающими их соответствие стандартам. Опытная поддержка – наш стандарт – мы на связи, чтобы ответить на ваши вопросы а также находить ответы под особенности вашего бизнеса.
Доверьте потребности вашего бизнеса профессионалам РедМетСплав и убедитесь в множестве наших преимуществ
Наша продукция:
Лист титановый РђРў3 – ГОСТ 19807-91 Лента титановая РђРў3 – ГОСТ 19807-91 является незаменимым материалом РІ различных отраслях, включая авиастроение Рё медицинскую промышленность. РЎ высокой прочностью Рё отличной РєРѕСЂСЂРѕР·РёРѕРЅРЅРѕР№ устойчивостью, РѕРЅР° идеально РїРѕРґС…РѕРґРёС‚ для создания ответственных конструкций. Приобретая данную ленту, РІС‹ получаете проверенный РїСЂРѕРґСѓРєС‚, соответствующий высоким стандартам. Благодаря СЃРІРѕРёРј свойствам, Лента титановая РђРў3 – ГОСТ 19807-91 становится выбором номер РѕРґРёРЅ для профессионалов. РќРµ упустите возможность купить Лента титановая РђРў3 – ГОСТ 19807-91 Рё обеспечьте надежность СЃРІРѕРёС… проектов!
Your comment is awaiting moderation.
РедМетСплав предлагает обширный выбор отборных изделий из нестандартных материалов. Не важно, какие объемы вам необходимы – от небольших закупок до масштабных поставок, мы обеспечиваем своевременную реализацию вашего заказа.
Каждая единица продукции подтверждена соответствующими документами, подтверждающими их происхождение. Превосходное обслуживание – наш стандарт – мы на связи, чтобы разрешать ваши вопросы а также находить ответы под требования вашего бизнеса.
Доверьте потребности вашего бизнеса профессионалам РедМетСплав и убедитесь в гибкости нашего предложения
поставляемая продукция:
Пруток висмутовый C89520 – UNS Пруток висмутовый C89520 – UNS представляет СЃРѕР±РѕР№ высококачественный материал, обладающий уникальными свойствами. Его можно использовать РІ различных областях, включая электронику Рё медицинское оборудование. Р’РёСЃРјСѓС‚, как материал, отличается отличной стойкостью Рє РєРѕСЂСЂРѕР·РёРё Рё высоким уровнем теплопроводности. Приобретая пруток висмутовый C89520 – UNS, РІС‹ получаете надежный РїСЂРѕРґСѓРєС‚ для СЃРІРѕРёС… нужд. Обеспечьте себе высококачественные материалы, закупив этот пруток. РќРµ упустите возможность купить Пруток висмутовый C89520 – UNS Рё улучшить СЃРІРѕРё проекты СЃ его помощью.
Your comment is awaiting moderation.
В поисках надежного поставщика редкоземельных металлов и сплавов? Обратите внимание на компанию Редметсплав.рф. Мы предлагаем обширный каталог продукции, обеспечивая высочайшее качество каждого изделия.
Редметсплав.рф гарантирует все стадии сделки, предоставляя полный пакет необходимых документов для законного использования товаров. Неважно, какие объемы вам необходимы – от мелких партий до крупнооптовых заказов, мы готовы выполнить любой запрос с прекрасным качеством обслуживания.
Наша команда поддержки всегда на связи, чтобы помочь вам в выборе товаров и ответить на любые вопросы, связанные с применением и характеристиками металлов. Выбирая нас, вы выбираете уверенность в каждой детали сотрудничества.
Заходите на наш сайт Редметсплав.рф и убедитесь, что качество и уровень нашего сервиса – ваш лучший выбор.
Наши товары:
РўСЂСѓР±Р° профильная нержавеющая 50x30x1.5 РјРј AISI 304 шлифованная Рзучите широкий ассортимент труб нержавеющих профильных РЅР° сайте Редметсплав.СЂС„ Рё выберите идеальное решение для вашего проекта. Высокая прочность, устойчивость Рє агрессивной среде, идеальная геометрия профиля, долговечность Рё надежность – РІСЃРµ это делает наши трубы незаменимым материалом для различных конструкций Рё изделий.
Your comment is awaiting moderation.
РедМетСплав предлагает широкий ассортимент качественных изделий из редких материалов. Не важно, какие объемы вам необходимы – от небольших закупок до крупных поставок, мы гарантируем своевременную реализацию вашего заказа.
Каждая единица товара подтверждена требуемыми документами, подтверждающими их соответствие стандартам. Превосходное обслуживание – то, чем мы гордимся – мы на связи, чтобы ответить на ваши вопросы а также находить ответы под требования вашего бизнеса.
Доверьте вашу потребность в редких металлах специалистам РедМетСплав и убедитесь в гибкости нашего предложения
поставляемая продукция:
РљСЂСѓРі кобальтовый HAYNES 188 РљСЂСѓРі кобальтовый HAYNES 188 — это высококачественный материал, предназначенный для различных промышленных применений. РћРЅ обладает отличной стойкостью Рє РєРѕСЂСЂРѕР·РёРё Рё высоким температурам, что делает его идеальным выбором для работы РІ сложных условиях.Рзготавливается СЃ использованием современных технологий, что обеспечивает стабильность Рё надежность продукции. Если РІС‹ ищете надежный Рё долговечный инструмент, то вам следует купить РљСЂСѓРі кобальтовый HAYNES 188. Ртот РєСЂСѓРі отвечает самым высоким стандартам качества Рё станет незаменимым помощником РІ вашей работе, позволяя достигать отличных результатов.
Your comment is awaiting moderation.
В поисках достоверного источника редкоземельных металлов и сплавов? Обратите внимание на компанию Редметсплав.рф. Мы предлагаем внушительный выбор продукции, обеспечивая высочайшее качество каждого изделия.
Редметсплав.рф защищает все стадии сделки, предоставляя полный пакет необходимых документов для легализации товаров. Неважно, какие объемы вам необходимы – от мелких партий до крупнооптовых заказов, мы готовы поставить любой запрос с прекрасным качеством обслуживания.
Наша команда поддержки всегда на связи, чтобы помочь вам в подборе нужных изделий и ответить на любые вопросы, связанные с применением и характеристиками металлов. Выбирая нас, вы выбираете уверенность в каждой детали сотрудничества.
Заходите на наш сайт Редметсплав.рф и убедитесь, что наше качество и сервис – наилучшее решение для вашего бизнеса.
Наша продукция:
Сетка тканая 0.3х0.63 мм ГОСТ 6613-86 латунная ЛМц58-2 Покупайте качественную тканую латунную сетку для широкого спектра применений. У нас вы найдете прочные варианты с высокой стойкостью к коррозии и эстетичным внешним видом. Различные размеры и типы плетения для вашего проекта. Гарантированное качество и индивидуальный подход.
Your comment is awaiting moderation.
В поисках достоверного источника редкоземельных металлов и сплавов? Обратите внимание на компанию Редметсплав.рф. Мы предлагаем широкий ассортимент продукции, обеспечивая высочайшее качество каждого изделия.
Редметсплав.рф обеспечивает все стадии сделки, предоставляя полный пакет необходимых документов для оформления товаров. Неважно, какие объемы вам необходимы – от мелких партий до крупнооптовых заказов, мы готовы выполнить любой запрос с высоким уровнем сервиса.
Наша команда поддержки всегда на связи, чтобы помочь вам в подборе нужных изделий и ответить на любые вопросы, связанные с применением и характеристиками металлов. Выбирая нас, вы выбираете уверенность в каждой детали сотрудничества.
Заходите на наш сайт Редметсплав.рф и убедитесь, что наше качество и сервис – ваш лучший выбор.
поставляемая продукция:
Медный переходной пресс тройник 35х14.7 мм М1 ГОСТ Р52948-2008 Приобретайте надежные медные переходные тройники для соединения труб с разным диаметром. Устойчивы к коррозии, легки в монтаже и обеспечивают надежное соединение. Широкий выбор размеров. Гарантированное качество и долговечность.
Your comment is awaiting moderation.
РедМетСплав предлагает обширный выбор высококачественных изделий из ценных материалов. Не важно, какие объемы вам необходимы – от небольших закупок до обширных поставок, мы обеспечиваем быстрое выполнение вашего заказа.
Каждая единица продукции подтверждена требуемыми документами, подтверждающими их соответствие стандартам. Опытная поддержка – наша визитная карточка – мы на связи, чтобы ответить на ваши вопросы и находить ответы под требования вашего бизнеса.
Доверьте ваш запрос профессионалам РедМетСплав и убедитесь в широком спектре предлагаемых возможностей
поставляемая продукция:
РўСЂСѓР±Р° магниевая AZ91A – ASTM B275 Пруток магниевый AZ91A – ASTM B275 представляет СЃРѕР±РѕР№ легкий Рё прочный материал, идеально подходящий для различных промышленных применений. Содержание магния делает его устойчивым Рє РєРѕСЂСЂРѕР·РёРё Рё повышает механические свойства. Благодаря высокой пластичности, данный пруток легко поддается обработке Рё формованию. Если РІС‹ ищете надежный Рё качественный материал, РЅРµ упустите возможность купить Пруток магниевый AZ91A – ASTM B275 РїРѕ доступной цене. РћРЅ РїРѕРґС…РѕРґРёС‚ для производства деталей, требующих легкости Рё прочности. Сделайте правильный выбор для вашего бизнеса!
Your comment is awaiting moderation.
В поисках достоверного источника редкоземельных металлов и сплавов? Обратите внимание на компанию Редметсплав.рф. Мы предлагаем внушительный выбор продукции, обеспечивая превосходное качество каждого изделия.
Редметсплав.рф обеспечивает все стадии сделки, предоставляя полный пакет необходимых документов для легализации товаров. Неважно, какие объемы вам необходимы – от мелких партий до крупнооптовых заказов, мы готовы обеспечить любой запрос с непревзойденным обслуживанием.
Наша команда поддержки всегда на связи, чтобы помочь вам в выборе товаров и ответить на любые вопросы, связанные с применением и характеристиками металлов. Выбирая нас, вы выбираете достоверность в каждой детали сотрудничества.
Заходите на наш сайт Редметсплав.рф и убедитесь, что наше качество и сервис – идеальный вариант для вас.
поставляемая продукция:
Меднаядвухраструбнаямуфта под пайку22х1.4ммМ1ЕГОСТ 32590-2013 Выберите медные двухраструбные муфты под пайку от производителя RedmetSplav. Прочные и герметичные соединения для систем водоснабжения, отопления и газоснабжения. Долговечные и надежные муфты для любых видов работ. Подходят для использования в домашних условиях, коммерческих и промышленных объектах.
Your comment is awaiting moderation.
РедМетСплав предлагает внушительный каталог высококачественных изделий из нестандартных материалов. Не важно, какие объемы вам необходимы – от небольших закупок до обширных поставок, мы обеспечиваем быстрое выполнение вашего заказа.
Каждая единица продукции подтверждена требуемыми документами, подтверждающими их соответствие стандартам. Опытная поддержка – наш стандарт – мы на связи, чтобы разрешать ваши вопросы и находить ответы под особенности вашего бизнеса.
Доверьте потребности вашего бизнеса специалистам РедМетСплав и убедитесь в множестве наших преимуществ
поставляемая продукция:
РљСЂСѓРі вольфрамовый W-Ni-Fe РљСЂСѓРі вольфрамовый W-Ni-Fe – это высококачественный материал, идеально подходящий для различных промышленных задач. Рзготовленный РёР· сплава вольфрама СЃ добавлением никеля Рё железа, РѕРЅ обладает отличной прочностью Рё устойчивостью Рє высоким температурам. Применяется РІ производстве деталей, требующих высокой жесткости Рё термостойкости. Если РІС‹ ищете надежный Рё долговечный материал, чтобы улучшить качество своей продукции, обратите внимание РЅР° наш РљСЂСѓРі вольфрамовый W-Ni-Fe. РќРµ упустите возможность купить РљСЂСѓРі вольфрамовый W-Ni-Fe Сѓ нас РїРѕ выгодной цене!
Your comment is awaiting moderation.
В поисках достоверного источника редкоземельных металлов и сплавов? Обратите внимание на компанию Редметсплав.рф. Мы предлагаем внушительный выбор продукции, обеспечивая высочайшее качество каждого изделия.
Редметсплав.рф гарантирует все стадии сделки, предоставляя полный пакет необходимых документов для легализации товаров. Неважно, какие объемы вам необходимы – от мелких партий до крупнооптовых заказов, мы готовы поставить любой запрос с непревзойденным обслуживанием.
Наша команда службы поддержки всегда на связи, чтобы помочь вам в подборе нужных изделий и ответить на любые вопросы, связанные с применением и характеристиками металлов. Выбирая нас, вы выбираете достоверность в каждой детали сотрудничества.
Заходите на наш сайт Редметсплав.рф и убедитесь, что наше качество и сервис – наилучшее решение для вашего бизнеса.
поставляемая продукция:
Медная однораструбная редукционная переходная муфта РїРѕРґ пайку стандартная 25С…18 РјРј твердая пайка Рњ3С‚ ГОСТ Р 52922-2008 Приобретите высококачественные медные однораструбные редукционные муфты РїРѕРґ пайку РѕС‚ Редметсплав для надежного соединения трубопроводов. Гарантированная прочность Рё устойчивость Рє РєРѕСЂСЂРѕР·РёРё. Рдеальны для различных систем отопления, водоснабжения Рё прочих технических целей.
Your comment is awaiting moderation.
РедМетСплав предлагает внушительный каталог отборных изделий из ценных материалов. Не важно, какие объемы вам необходимы – от мелких партий до масштабных поставок, мы гарантируем своевременную реализацию вашего заказа.
Каждая единица товара подтверждена соответствующими документами, подтверждающими их происхождение. Опытная поддержка – то, чем мы гордимся – мы на связи, чтобы улаживать ваши вопросы а также адаптировать решения под особенности вашего бизнеса.
Доверьте ваш запрос специалистам РедМетСплав и убедитесь в гибкости нашего предложения
Наша продукция:
Магний M1A – WW T-825B Магний M1A – WW T-825B – это высококачественный РїСЂРѕРґСѓРєС‚, созданный для удовлетворения потребностей активных людей. РћРЅ улучшает обмен веществ, способствует восстановлению мышц Рё поддерживает Р·РґРѕСЂРѕРІСЊРµ нервной системы. Благодаря идеальной биодоступности Рё высокой степени усвоения, этот магний стал предпочтительным выбором для спортсменов Рё тех, кто следит Р·Р° СЃРІРѕРёРј состоянием Р·РґРѕСЂРѕРІСЊСЏ. Если РІС‹ ищете надежный источник магния, чтобы повысить СЃРІРѕСЋ активность Рё общее самочувствие, вам стоит купить Магний M1A – WW T-825B. РЎ РЅРёРј РІС‹ сможете добиться выдающихся результатов РІ своем тренировочном процессе.
Your comment is awaiting moderation.
В поисках надежного поставщика редкоземельных металлов и сплавов? Обратите внимание на компанию Редметсплав.рф. Мы предлагаем внушительный выбор продукции, обеспечивая превосходное качество каждого изделия.
Редметсплав.рф гарантирует все стадии сделки, предоставляя полный пакет необходимых документов для законного использования товаров. Неважно, какие объемы вам необходимы – от мелких партий до крупнооптовых заказов, мы готовы обеспечить любой запрос с высоким уровнем сервиса.
Наша команда поддержки всегда на связи, чтобы помочь вам в выборе товаров и ответить на любые вопросы, связанные с применением и характеристиками металлов. Выбирая нас, вы выбираете уверенность в каждой детали сотрудничества.
Заходите на наш сайт Редметсплав.рф и убедитесь, что качество и уровень нашего сервиса – ваш лучший выбор.
поставляемая продукция:
Лента РёР· прецизионных сплавов для СѓРїСЂСѓРіРёС… элементов 0.35×36 РјРј 40РљРҐРќРњ ГОСТ 14117-85 Купите ленту РёР· прецизионных сплавов для СѓРїСЂСѓРіРёС… элементов РїРѕ выгодной цене РЅР° Редметсплав.СЂС„. Высокая прочность, устойчивость Рє РєРѕСЂСЂРѕР·РёРё Рё отличная эластичность делают этот материал идеальным для различных отраслей. Предлагаем широкий ассортимент продукции Рё РїРѕРґСЂРѕР±РЅСѓСЋ информацию для правильного выбора.
Your comment is awaiting moderation.
РедМетСплав предлагает обширный выбор высококачественных изделий из ценных материалов. Не важно, какие объемы вам необходимы – от небольших закупок до обширных поставок, мы гарантируем своевременную реализацию вашего заказа.
Каждая единица продукции подтверждена соответствующими документами, подтверждающими их качество. Опытная поддержка – то, чем мы гордимся – мы на связи, чтобы ответить на ваши вопросы и адаптировать решения под требования вашего бизнеса.
Доверьте потребности вашего бизнеса специалистам РедМетСплав и убедитесь в широком спектре предлагаемых возможностей
Наши товары:
Полоса кобальтовая Stellite 25 Полоса кобальтовая Stellite 25 – это высококачественный продукт, предназначенный для применения в условиях повышенных нагрузок и температур. Обладая отличной стойкостью к коррозии и износу, эта полоса идеально подходит для изготовления режущих инструментов и деталей, работающих в агрессивной среде. Благодаря высоким механическим свойствам, Полоса кобальтовая Stellite 25 обеспечивает долговечность и надежность в эксплуатации. Не упустите возможность купить Полоса кобальтовая Stellite 25 и убедитесь в ее превосходных характеристиках сами!
Your comment is awaiting moderation.
В поисках надежного поставщика редкоземельных металлов и сплавов? Обратите внимание на компанию Редметсплав.рф. Мы предлагаем широкий ассортимент продукции, обеспечивая высочайшее качество каждого изделия.
Редметсплав.рф обеспечивает все стадии сделки, предоставляя полный пакет необходимых документов для оформления товаров. Неважно, какие объемы вам необходимы – от мелких партий до крупнооптовых заказов, мы готовы обеспечить любой запрос с прекрасным качеством обслуживания.
Наша команда поддержки всегда на связи, чтобы помочь вам в выборе товаров и ответить на любые вопросы, связанные с применением и характеристиками металлов. Выбирая нас, вы выбираете достоверность в каждой детали сотрудничества.
Заходите на наш сайт Редметсплав.рф и убедитесь, что качество и уровень нашего сервиса – наилучшее решение для вашего бизнеса.
Наша продукция:
Лента РёР· прецизионных сплавов для СѓРїСЂСѓРіРёС… элементов 0.65×29 РјРј РЎРџ22 ГОСТ 14117-85 Купите ленту РёР· прецизионных сплавов для СѓРїСЂСѓРіРёС… элементов РїРѕ выгодной цене РЅР° Редметсплав.СЂС„. Высокая прочность, устойчивость Рє РєРѕСЂСЂРѕР·РёРё Рё отличная эластичность делают этот материал идеальным для различных отраслей. Предлагаем широкий ассортимент продукции Рё РїРѕРґСЂРѕР±РЅСѓСЋ информацию для правильного выбора.
Your comment is awaiting moderation.
РедМетСплав предлагает широкий ассортимент отборных изделий из ценных материалов. Не важно, какие объемы вам необходимы – от мелких партий до крупных поставок, мы обеспечиваем быстрое выполнение вашего заказа.
Каждая единица товара подтверждена соответствующими документами, подтверждающими их происхождение. Превосходное обслуживание – то, чем мы гордимся – мы на связи, чтобы улаживать ваши вопросы и находить ответы под особенности вашего бизнеса.
Доверьте потребности вашего бизнеса специалистам РедМетСплав и убедитесь в множестве наших преимуществ
Наши товары:
РљСЂСѓРі магниевый 4633 – SS 144633 Фольга магниевая 4633 – SS 144633 предназначена для использования РІ различных отраслях, включая автомобилестроение Рё энергетическое оборудование. РћРЅР° обеспечивает надежную защиту РѕС‚ РєРѕСЂСЂРѕР·РёРё благодаря высоким антикоррозийным свойствам. РџСЂРѕРґСѓРєС‚ обладает отличной проводимостью Рё термостойкостью, что делает его идеальным выбором для сложных условий эксплуатации.Р’С‹ можете купить Фольга магниевая 4633 – SS 144633, чтобы активно улучшить параметры СЃРІРѕРёС… проектов. Рта фольга представляет СЃРѕР±РѕР№ высококачественный материал, который удовлетворит требования даже самых взыскательных клиентов.
Your comment is awaiting moderation.
В поисках надежного поставщика редкоземельных металлов и сплавов? Обратите внимание на компанию Редметсплав.рф. Мы предлагаем широкий ассортимент продукции, обеспечивая высочайшее качество каждого изделия.
Редметсплав.рф гарантирует все стадии сделки, предоставляя полный пакет необходимых документов для легализации товаров. Неважно, какие объемы вам необходимы – от мелких партий до крупнооптовых заказов, мы готовы обеспечить любой запрос с прекрасным качеством обслуживания.
Наша команда поддержки всегда на связи, чтобы помочь вам в определении подходящих продуктов и ответить на любые вопросы, связанные с применением и характеристиками металлов. Выбирая нас, вы выбираете достоверность в каждой детали сотрудничества.
Заходите на наш сайт Редметсплав.рф и убедитесь, что качество и уровень нашего сервиса – ваш лучший выбор.
Наша продукция:
Латунное литое кольцо 500х400 мм ЛЦ37Мц2С2К Познакомьтесь с латунным литым кольцом размером 500х400 мм из сплава ЛЦ37Мц2С2К на Редметсплав.рф. Прочное, устойчивое к коррозии изделие подойдет для использования в различных отраслях промышленности и решит ваши потребности в надежных компонентах.
Your comment is awaiting moderation.
РедМетСплав предлагает широкий ассортимент высококачественных изделий из нестандартных материалов. Не важно, какие объемы вам необходимы – от небольших закупок до обширных поставок, мы гарантируем быстрое выполнение вашего заказа.
Каждая единица продукции подтверждена требуемыми документами, подтверждающими их соответствие стандартам. Дружелюбная помощь – наша визитная карточка – мы на связи, чтобы ответить на ваши вопросы а также находить ответы под требования вашего бизнеса.
Доверьте вашу потребность в редких металлах профессионалам РедМетСплав и убедитесь в гибкости нашего предложения
Наша продукция:
РљСЂСѓРі магниевый G-MgAg3SE2Zr1 – DIN 1729 Part 2 Фольга магниевая G-MgAg3SE2Zr1 – DIN 1729 Part 2 предназначена для использования РІ различных отраслях, включая электронику Рё автоматику. Рта фольга обладает отличной прочностью Рё стойкостью Рє РєРѕСЂСЂРѕР·РёРё, что делает её идеальным выбором для применения РІ сложных условиях. Ключевыми преимуществами являются легкость, высокая проводимость Рё термостойкость, что обеспечивает надежность РІ работе. Если РІС‹ ищете качественный материал, который отвечает современным стандартам, то вам стоит купить Фольга магниевая G-MgAg3SE2Zr1 – DIN 1729 Part 2. РћРЅР° станет отличным решением для ваших проектов.
Your comment is awaiting moderation.
В поисках надежного поставщика редкоземельных металлов и сплавов? Обратите внимание на компанию Редметсплав.рф. Мы предлагаем обширный каталог продукции, обеспечивая высочайшее качество каждого изделия.
Редметсплав.рф защищает все стадии сделки, предоставляя полный пакет необходимых документов для оформления товаров. Неважно, какие объемы вам необходимы – от мелких партий до крупнооптовых заказов, мы готовы выполнить любой запрос с высоким уровнем сервиса.
Наша команда поддержки всегда на связи, чтобы помочь вам в выборе товаров и ответить на любые вопросы, связанные с применением и характеристиками металлов. Выбирая нас, вы выбираете достоверность в каждой детали сотрудничества.
Заходите на наш сайт Редметсплав.рф и убедитесь, что качество и уровень нашего сервиса – ваш лучший выбор.
Наша продукция:
Латуное наружное стопорное пружинное кольцо 88С…3 РјРј ЛАЖМц ГОСТ 13942-86 Купить латунные наружные стопорные кольца РїРѕ ГОСТ РІ Р РѕСЃСЃРёРё. Надежная фиксация элементов конструкции. Высокое качество РїРѕ доступной цене. Рспользуются РІ строительстве, машиностроении Рё производстве. Заказывайте сейчас РЅР° сайте Редметсплав.
Your comment is awaiting moderation.
РедМетСплав предлагает широкий ассортимент качественных изделий из нестандартных материалов. Не важно, какие объемы вам необходимы – от небольших закупок до обширных поставок, мы обеспечиваем быстрое выполнение вашего заказа.
Каждая единица продукции подтверждена требуемыми документами, подтверждающими их соответствие стандартам. Опытная поддержка – то, чем мы гордимся – мы на связи, чтобы разрешать ваши вопросы а также находить ответы под особенности вашего бизнеса.
Доверьте вашу потребность в редких металлах специалистам РедМетСплав и убедитесь в гибкости нашего предложения
Наши товары:
РљСЂСѓРі кобальтовый HAYNES 150 РљСЂСѓРі кобальтовый HAYNES 150 – это высококачественный инструмент, предназначенный для обработки различных металлов Рё сплавов. Рзготавливаемый РёР· надежного кобальтового сплава, РѕРЅ обеспечивает отличную устойчивость Рє РёР·РЅРѕСЃСѓ Рё высокой температуре. РљСЂСѓРі отлично РїРѕРґС…РѕРґРёС‚ для резки Рё шлифовки, обеспечивая точность Рё долговечность.РЎ его помощью РІС‹ сможете легко справляться СЃ самыми трудными задачами, повышая эффективность работы. РќРµ упустите возможность купить РљСЂСѓРі кобальтовый HAYNES 150 Рё улучшить качество СЃРІРѕРёС… изделий. Профессионалы Рё любители высоко ценят этот РїСЂРѕРґСѓРєС‚ Р·Р° его надежность Рё производительность.
Your comment is awaiting moderation.
В поисках надежного поставщика редкоземельных металлов и сплавов? Обратите внимание на компанию Редметсплав.рф. Мы предлагаем внушительный выбор продукции, обеспечивая превосходное качество каждого изделия.
Редметсплав.рф обеспечивает все стадии сделки, предоставляя полный пакет необходимых документов для оформления товаров. Неважно, какие объемы вам необходимы – от мелких партий до крупнооптовых заказов, мы готовы выполнить любой запрос с прекрасным качеством обслуживания.
Наша команда поддержки всегда на связи, чтобы помочь вам в выборе товаров и ответить на любые вопросы, связанные с применением и характеристиками металлов. Выбирая нас, вы выбираете уверенность в каждой детали сотрудничества.
Заходите на наш сайт Редметсплав.рф и убедитесь, что качество и уровень нашего сервиса – наилучшее решение для вашего бизнеса.
Наши товары:
Титановая труба 63х2.2х4000 мм ПТ1М ГОСТ 22897-86 Откройте мир прочных и надежных титановых труб с компанией Редметсплав. Наши высококачественные титановые трубы сочетают в себе устойчивость к коррозии, износостойкость и легкий вес, делая их незаменимым материалом для применения в различных сферах промышленности. Широкий выбор различных диаметров и толщин, а также индивидуальные решения для вашего производства. Гарантированное качество и надежность поставок.
Your comment is awaiting moderation.
РедМетСплав предлагает внушительный каталог качественных изделий из ценных материалов. Не важно, какие объемы вам необходимы – от небольших закупок до крупных поставок, мы обеспечиваем оперативное исполнение вашего заказа.
Каждая единица изделия подтверждена требуемыми документами, подтверждающими их соответствие стандартам. Превосходное обслуживание – наша визитная карточка – мы на связи, чтобы ответить на ваши вопросы по мере того как предоставлять решения под специфику вашего бизнеса.
Доверьте вашу потребность в редких металлах специалистам РедМетСплав и убедитесь в широком спектре предлагаемых возможностей
поставляемая продукция:
Магний MS1 – JIS H 4204 Магний MS1 – JIS H 4204 – это высококачественный металл, который используется РІ различных отраслях, включая авиацию Рё автомобилестроение. Его легкость Рё прочность делают его идеальным выбором для создания деталей, требующих высокой производительности Рё надежности. Основные характеристики включают отличную РєРѕСЂСЂРѕР·РёРѕРЅРЅСѓСЋ стойкость Рё высокую теплопроводность.Если РІС‹ ищете надежный материал для СЃРІРѕРёС… проектов, вам стоит купить Магний MS1 – JIS H 4204. Ртот РїСЂРѕРґСѓРєС‚ соответствует современным стандартам Рё требованиям, что делает его универсальным решением для профессионалов.
Your comment is awaiting moderation.
В поисках достоверного источника редкоземельных металлов и сплавов? Обратите внимание на компанию Редметсплав.рф. Мы предлагаем широкий ассортимент продукции, обеспечивая высочайшее качество каждого изделия.
Редметсплав.рф защищает все стадии сделки, предоставляя полный пакет необходимых документов для оформления товаров. Неважно, какие объемы вам необходимы – от мелких партий до крупнооптовых заказов, мы готовы обеспечить любой запрос с непревзойденным обслуживанием.
Наша команда поддержки всегда на связи, чтобы помочь вам в подборе нужных изделий и ответить на любые вопросы, связанные с применением и характеристиками металлов. Выбирая нас, вы выбираете надежность в каждой детали сотрудничества.
Заходите на наш сайт Редметсплав.рф и убедитесь, что качество и уровень нашего сервиса – наилучшее решение для вашего бизнеса.
поставляемая продукция:
Кольцо РёР· драгоценных металлов палладиевое 30С…5С…3 РјРј ПДСР-20 РўРЈ РЁРёСЂРѕРєРёР№ выбор высококачественных кольц РёР· драгоценных металлов. Рлегантные украшения, созданные талантливыми мастерами. Уникальность Рё изысканность РІ каждой детали. Возможность заказа персонального кольца РїРѕ вашим пожеланиям. Подчеркните СЃРІРѕСЋ индивидуальность СЃ нашими кольцами.
Your comment is awaiting moderation.
РедМетСплав предлагает широкий ассортимент качественных изделий из ценных материалов. Не важно, какие объемы вам необходимы – от небольших закупок до крупных поставок, мы обеспечиваем быстрое выполнение вашего заказа.
Каждая единица продукции подтверждена требуемыми документами, подтверждающими их происхождение. Дружелюбная помощь – наш стандарт – мы на связи, чтобы ответить на ваши вопросы и находить ответы под специфику вашего бизнеса.
Доверьте потребности вашего бизнеса специалистам РедМетСплав и убедитесь в гибкости нашего предложения
Наши товары:
Пруток титановый РўРЎ – ГОСТ 2171-90 Проволока титановая РўРЎ – ГОСТ 2171-90 – это высококачественный материал, используемый РІ различных отраслях, включая авиацию Рё машиностроение. Рта проволока обладает отличной прочностью Рё РєРѕСЂСЂРѕР·РёРѕРЅРЅРѕР№ стойкостью, что делает ее идеальным выбором для производства различных деталей Рё конструкций. Благодаря СЃРІРѕРёРј физико-механическим свойствам, титановая проволока широко применяется РІ медицине, производстве химического оборудования Рё РІ РґСЂСѓРіРёС… сферах. РќРµ упустите шанс купить Проволока титановая РўРЎ – ГОСТ 2171-90 Рё убедиться РІ ее надежности Рё долговечности. Выбор Р·Р° вами!
Your comment is awaiting moderation.
В поисках надежного поставщика редкоземельных металлов и сплавов? Обратите внимание на компанию Редметсплав.рф. Мы предлагаем внушительный выбор продукции, обеспечивая высочайшее качество каждого изделия.
Редметсплав.рф обеспечивает все стадии сделки, предоставляя полный пакет необходимых документов для законного использования товаров. Неважно, какие объемы вам необходимы – от мелких партий до крупнооптовых заказов, мы готовы поставить любой запрос с прекрасным качеством обслуживания.
Наша команда службы поддержки всегда на связи, чтобы помочь вам в определении подходящих продуктов и ответить на любые вопросы, связанные с применением и характеристиками металлов. Выбирая нас, вы выбираете уверенность в каждой детали сотрудничества.
Заходите на наш сайт Редметсплав.рф и убедитесь, что качество и уровень нашего сервиса – наилучшее решение для вашего бизнеса.
Наша продукция:
Диск РёР· драгоценных металлов палладиевый 100С…1 РјРј РџРґ99.9 РўРЈ РЁРёСЂРѕРєРёР№ выбор РґРёСЃРєРѕРІ РёР· драгоценных металлов для вашего автомобиля. Рксклюзивный дизайн, высокая устойчивость Рє РєРѕСЂСЂРѕР·РёРё, улучшенная управляемость Рё неповторимый стиль. Подчеркните индивидуальность вашего автомобиля СЃ нашими уникальными дисками.
Your comment is awaiting moderation.
РедМетСплав предлагает широкий ассортимент высококачественных изделий из нестандартных материалов. Не важно, какие объемы вам необходимы – от мелких партий до масштабных поставок, мы гарантируем своевременную реализацию вашего заказа.
Каждая единица продукции подтверждена соответствующими документами, подтверждающими их происхождение. Опытная поддержка – то, чем мы гордимся – мы на связи, чтобы разрешать ваши вопросы по мере того как предоставлять решения под требования вашего бизнеса.
Доверьте потребности вашего бизнеса профессионалам РедМетСплав и убедитесь в гибкости нашего предложения
Наши товары:
Фольга висмутовая C89835 – UNS Фольга висмутовая C89835 – UNS – это высококачественный материал, известный СЃРІРѕРёРјРё уникальными свойствами. РћРЅР° обладает отличной стойкостью Рє РєРѕСЂСЂРѕР·РёРё Рё высокой проводимостью, что делает её идеальной для применения РІ различных отраслях. Рта фольга широко используется РІ электронике, медицине Рё РґСЂСѓРіРёС… научных исследованиях. Если РІС‹ ищете надежный Рё эффективный материал, то вам стоит купить Фольга висмутовая C89835 – UNS. Ртот РїСЂРѕРґСѓРєС‚ обеспечит вам высокую производительность Рё долговечность, что важно для достижения ваших целей.
Your comment is awaiting moderation.
В поисках надежного поставщика редкоземельных металлов и сплавов? Обратите внимание на компанию Редметсплав.рф. Мы предлагаем внушительный выбор продукции, обеспечивая высочайшее качество каждого изделия.
Редметсплав.рф обеспечивает все стадии сделки, предоставляя полный пакет необходимых документов для законного использования товаров. Неважно, какие объемы вам необходимы – от мелких партий до крупнооптовых заказов, мы готовы поставить любой запрос с высоким уровнем сервиса.
Наша команда службы поддержки всегда на связи, чтобы помочь вам в определении подходящих продуктов и ответить на любые вопросы, связанные с применением и характеристиками металлов. Выбирая нас, вы выбираете надежность в каждой детали сотрудничества.
Заходите на наш сайт Редметсплав.рф и убедитесь, что наше качество и сервис – наилучшее решение для вашего бизнеса.
Наша продукция:
Мишень РёР· драгоценного металла или его сплава круглая палладий 5С…3.5 РјРј РџРґРЎСЂ60-40 РўРЈ Выберите уникальные мишени РёР· драгоценных металлов для напыления РѕС‚ Редметсплав.СЂС„. Обеспечивают высокую степень защиты Рё долговечность. Рдеальный выбор для промышленности, строительства Рё производства.
Your comment is awaiting moderation.
РедМетСплав предлагает обширный выбор отборных изделий из редких материалов. Не важно, какие объемы вам необходимы – от небольших закупок до крупных поставок, мы обеспечиваем своевременную реализацию вашего заказа.
Каждая единица изделия подтверждена требуемыми документами, подтверждающими их соответствие стандартам. Дружелюбная помощь – то, чем мы гордимся – мы на связи, чтобы улаживать ваши вопросы а также адаптировать решения под требования вашего бизнеса.
Доверьте потребности вашего бизнеса профессионалам РедМетСплав и убедитесь в широком спектре предлагаемых возможностей
Наша продукция:
Фольга ниобиевая 10Р’5МЦУ-2 Фольга ниобиевая 10Р’5МЦУ-2 – это высококачественный материал, используемый РІ различных отраслях, включая электронику Рё металлургию. РћРЅР° отличается отличной прочностью Рё стойкостью Рє РєРѕСЂСЂРѕР·РёРё, что делает ее идеальным выбором для сложных условий эксплуатации. РџСЂРѕРґСѓРєС‚ обладает высокой теплопроводностью Рё хорошей электропроводностью, что расширяет его применение РІ специализированных сферах. Если РІС‹ ищете надежный Рё долговечный материал, РІС‹ можете купить Фольга ниобиевая 10Р’5МЦУ-2 Рё быть уверенными РІ высоком качестве продукта. Ртот товар подойдет для вас, если вам важны надежность Рё эффективность.
Your comment is awaiting moderation.
В поисках надежного поставщика редкоземельных металлов и сплавов? Обратите внимание на компанию Редметсплав.рф. Мы предлагаем обширный каталог продукции, обеспечивая высочайшее качество каждого изделия.
Редметсплав.рф гарантирует все стадии сделки, предоставляя полный пакет необходимых документов для законного использования товаров. Неважно, какие объемы вам необходимы – от мелких партий до крупнооптовых заказов, мы готовы обеспечить любой запрос с непревзойденным обслуживанием.
Наша команда службы поддержки всегда на связи, чтобы помочь вам в определении подходящих продуктов и ответить на любые вопросы, связанные с применением и характеристиками металлов. Выбирая нас, вы выбираете достоверность в каждой детали сотрудничества.
Заходите на наш сайт Редметсплав.рф и убедитесь, что качество и уровень нашего сервиса – ваш лучший выбор.
Наша продукция:
Лента РёР· прецизионных сплавов для СѓРїСЂСѓРіРёС… элементов 0.22×240 РјРј РРџ414 ГОСТ 14117-85 Купите ленту РёР· прецизионных сплавов для СѓРїСЂСѓРіРёС… элементов РїРѕ выгодной цене РЅР° Редметсплав.СЂС„. Высокая прочность, устойчивость Рє РєРѕСЂСЂРѕР·РёРё Рё отличная эластичность делают этот материал идеальным для различных отраслей. Предлагаем широкий ассортимент продукции Рё РїРѕРґСЂРѕР±РЅСѓСЋ информацию для правильного выбора.
Your comment is awaiting moderation.
В поисках надежного поставщика редкоземельных металлов и сплавов? Обратите внимание на компанию Редметсплав.рф. Мы предлагаем широкий ассортимент продукции, обеспечивая высочайшее качество каждого изделия.
Редметсплав.рф защищает все стадии сделки, предоставляя полный пакет необходимых документов для законного использования товаров. Неважно, какие объемы вам необходимы – от мелких партий до крупнооптовых заказов, мы готовы выполнить любой запрос с прекрасным качеством обслуживания.
Наша команда поддержки всегда на связи, чтобы помочь вам в выборе товаров и ответить на любые вопросы, связанные с применением и характеристиками металлов. Выбирая нас, вы выбираете надежность в каждой детали сотрудничества.
Заходите на наш сайт Редметсплав.рф и убедитесь, что качество и уровень нашего сервиса – наилучшее решение для вашего бизнеса.
поставляемая продукция:
Мишень РёР· драгоценного металла или его сплава кольцевая серебро 15С…0.5 РјРј РЎСЂРњ87.5 РўРЈ Выберите уникальные мишени РёР· драгоценных металлов для напыления РѕС‚ Редметсплав.СЂС„. Обеспечивают высокую степень защиты Рё долговечность. Рдеальный выбор для промышленности, строительства Рё производства.
Your comment is awaiting moderation.
В поисках надежного поставщика редкоземельных металлов и сплавов? Обратите внимание на компанию Редметсплав.рф. Мы предлагаем обширный каталог продукции, обеспечивая высочайшее качество каждого изделия.
Редметсплав.рф гарантирует все стадии сделки, предоставляя полный пакет необходимых документов для легализации товаров. Неважно, какие объемы вам необходимы – от мелких партий до крупнооптовых заказов, мы готовы выполнить любой запрос с непревзойденным обслуживанием.
Наша команда поддержки всегда на связи, чтобы помочь вам в выборе товаров и ответить на любые вопросы, связанные с применением и характеристиками металлов. Выбирая нас, вы выбираете достоверность в каждой детали сотрудничества.
Заходите на наш сайт Редметсплав.рф и убедитесь, что наше качество и сервис – наилучшее решение для вашего бизнеса.
Наши товары:
Латуное внутреннее стопорное пружинное кольцо 42х1.7 мм ЛМцКА ГОСТ 13943-86 Купить латунные внутренние стопорные кольца по ГОСТ от производителя. Надежное крепление и удержание элементов механизмов. Широкий выбор размеров и конфигураций. Высокое качество и надежность. Применение в машиностроении, автомобильной и других отраслях. Обращайтесь к нашим специалистам для получения более подробной информации.
Your comment is awaiting moderation.
РедМетСплав предлагает обширный выбор отборных изделий из ценных материалов. Не важно, какие объемы вам необходимы – от небольших закупок до обширных поставок, мы гарантируем быстрое выполнение вашего заказа.
Каждая единица товара подтверждена соответствующими документами, подтверждающими их происхождение. Дружелюбная помощь – наша визитная карточка – мы на связи, чтобы разрешать ваши вопросы и предоставлять решения под особенности вашего бизнеса.
Доверьте потребности вашего бизнеса специалистам РедМетСплав и убедитесь в гибкости нашего предложения
Наша продукция:
Рзделия РёР· молибдена ОЧМ-РћРњ Рзделия РёР· молибдена ОЧМ-РћРњ представляют СЃРѕР±РѕР№ высококачественные компоненты, обладающие исключительными физико-химическими свойствами. Рти изделия обладают высокой прочностью, РєРѕСЂСЂРѕР·РёРѕРЅРЅРѕР№ стойкостью Рё теплопроводностью, что делает РёС… идеальными для использования РІ различных отраслях, включая авиацию, атомную энергетику Рё машиностроение.\n\nНаша продукция соответствует всем современным стандартам качества Рё безопасна РІ эксплуатации. РњС‹ предлагаем оптимальные решения для ваших производственных нужд. РќРµ упустите возможность купить Рзделия РёР· молибдена ОЧМ-РћРњ Рё обеспечить СЃРІРѕР№ бизнес надежными Рё эффективными материалами!
Your comment is awaiting moderation.
В поисках достоверного источника редкоземельных металлов и сплавов? Обратите внимание на компанию Редметсплав.рф. Мы предлагаем широкий ассортимент продукции, обеспечивая превосходное качество каждого изделия.
Редметсплав.рф обеспечивает все стадии сделки, предоставляя полный пакет необходимых документов для оформления товаров. Неважно, какие объемы вам необходимы – от мелких партий до крупнооптовых заказов, мы готовы выполнить любой запрос с высоким уровнем сервиса.
Наша команда службы поддержки всегда на связи, чтобы помочь вам в выборе товаров и ответить на любые вопросы, связанные с применением и характеристиками металлов. Выбирая нас, вы выбираете уверенность в каждой детали сотрудничества.
Заходите на наш сайт Редметсплав.рф и убедитесь, что наше качество и сервис – наилучшее решение для вашего бизнеса.
Наши товары:
Медный двухраструбный отвод 45 градусов под пайку 42х36х1.1 мм 27х29 мм мягкая пайка М1 ГОСТ Р52922-2008 Приобретите высококачественные Медные отводы 45 градусов под пайку от компании Редметсплав.рф и улучшите вашу трубопроводную систему. Прочные, долговечные и устойчивые к коррозии отводы обеспечат надежное соединение под нужным углом, обеспечивая оптимальное распределение потока и высокую производительность вашей системы.
Your comment is awaiting moderation.
РедМетСплав предлагает широкий ассортимент отборных изделий из ценных материалов. Не важно, какие объемы вам необходимы – от небольших закупок до крупных поставок, мы обеспечиваем быстрое выполнение вашего заказа.
Каждая единица продукции подтверждена требуемыми документами, подтверждающими их соответствие стандартам. Дружелюбная помощь – наш стандарт – мы на связи, чтобы улаживать ваши вопросы по мере того как находить ответы под особенности вашего бизнеса.
Доверьте ваш запрос профессионалам РедМетСплав и убедитесь в гибкости нашего предложения
Наша продукция:
Р РѕСЃСЃРёР№СЃРєРёРµ сплавы Р РѕСЃСЃРёР№СЃРєРёРµ сплавы представляют СЃРѕР±РѕР№ высококачественные материалы, используемые РІ различных отраслях промышленности. РћРЅРё отличаются высокой прочностью, стойкостью Рєи…ђРѕР·РёРё Рё долговечностью, что делает РёС… идеальными для разработки надежных изделий. Сплавы производятся РїРѕ современным технологиям, обеспечивая стабильный контроль качества РЅР° всех этапах. Выбор СЂРѕСЃСЃРёР№СЃРєРёС… сплавов позволяет оптимизировать производственные процессы Рё снизить затраты РЅР° материалы. Если РІС‹ хотите повысить эффективность вашего бизнеса, рекомендуем вам купить СЂРѕСЃСЃРёР№СЃРєРёРµ сплавы. Рто разумное вложение, СЃРїРѕСЃРѕР±РЅРѕРµ улучшить производственные характеристики Рё увеличить СЃСЂРѕРє службы готовой продукции.
Your comment is awaiting moderation.
В поисках надежного поставщика редкоземельных металлов и сплавов? Обратите внимание на компанию Редметсплав.рф. Мы предлагаем широкий ассортимент продукции, обеспечивая высочайшее качество каждого изделия.
Редметсплав.рф обеспечивает все стадии сделки, предоставляя полный пакет необходимых документов для оформления товаров. Неважно, какие объемы вам необходимы – от мелких партий до крупнооптовых заказов, мы готовы поставить любой запрос с непревзойденным обслуживанием.
Наша команда службы поддержки всегда на связи, чтобы помочь вам в определении подходящих продуктов и ответить на любые вопросы, связанные с применением и характеристиками металлов. Выбирая нас, вы выбираете надежность в каждой детали сотрудничества.
Заходите на наш сайт Редметсплав.рф и убедитесь, что наше качество и сервис – идеальный вариант для вас.
Наша продукция:
Медный удлиненный двухраструбный отвод 90 градусов под пайку 16х12х0.7 мм 7х9 мм твердая пайка М2р ГОСТ Р52922-2008 Покупайте медные двухраструбные отводы 90 градусов под пайку на Редметсплав.рф. Надежные и долговечные отводы из высококачественной меди для систем водоснабжения, отопления и кондиционирования воздуха. Гарантированно надежные соединения, простой монтаж и оптимальное распределение потока.
Your comment is awaiting moderation.
В поисках надежного поставщика редкоземельных металлов и сплавов? Обратите внимание на компанию Редметсплав.рф. Мы предлагаем внушительный выбор продукции, обеспечивая высочайшее качество каждого изделия.
Редметсплав.рф защищает все стадии сделки, предоставляя полный пакет необходимых документов для оформления товаров. Неважно, какие объемы вам необходимы – от мелких партий до крупнооптовых заказов, мы готовы обеспечить любой запрос с высоким уровнем сервиса.
Наша команда службы поддержки всегда на связи, чтобы помочь вам в определении подходящих продуктов и ответить на любые вопросы, связанные с применением и характеристиками металлов. Выбирая нас, вы выбираете достоверность в каждой детали сотрудничества.
Заходите на наш сайт Редметсплав.рф и убедитесь, что наше качество и сервис – ваш лучший выбор.
Наша продукция:
Нержавеющий штрипс 7С…1600 РјРј Strenx-600MC-D EN 10149-2 Приобретите нержавеющий штрипс высокого качества для разнообразных областей применения РЅР° Редметсплав.СЂС„. РЁРёСЂРѕРєРёР№ ассортимент различных размеров Рё толщин, включая услуги нарезки РїРѕРґ ваш заказ. Рзбегайте проблем СЃ коррозией Рё обеспечьте долгий СЃСЂРѕРє службы вашим конструкциям Рё деталям, используя наш надежный материал.
Your comment is awaiting moderation.
В поисках надежного поставщика редкоземельных металлов и сплавов? Обратите внимание на компанию Редметсплав.рф. Мы предлагаем обширный каталог продукции, обеспечивая превосходное качество каждого изделия.
Редметсплав.рф защищает все стадии сделки, предоставляя полный пакет необходимых документов для оформления товаров. Неважно, какие объемы вам необходимы – от мелких партий до крупнооптовых заказов, мы готовы обеспечить любой запрос с прекрасным качеством обслуживания.
Наша команда службы поддержки всегда на связи, чтобы помочь вам в подборе нужных изделий и ответить на любые вопросы, связанные с применением и характеристиками металлов. Выбирая нас, вы выбираете достоверность в каждой детали сотрудничества.
Заходите на наш сайт Редметсплав.рф и убедитесь, что наше качество и сервис – наилучшее решение для вашего бизнеса.
поставляемая продукция:
Труба из драгоценных металлов платиновая 200х7х1 мм ПлН95.5 ТУ Гарантированное качество и изысканный дизайн – купите драгоценные трубы для ювелирных украшений, машиностроения и архитектуры. Широкий выбор и высокое качество! Доставка по России.
Your comment is awaiting moderation.
В поисках надежного поставщика редкоземельных металлов и сплавов? Обратите внимание на компанию Редметсплав.рф. Мы предлагаем широкий ассортимент продукции, обеспечивая высочайшее качество каждого изделия.
Редметсплав.рф защищает все стадии сделки, предоставляя полный пакет необходимых документов для оформления товаров. Неважно, какие объемы вам необходимы – от мелких партий до крупнооптовых заказов, мы готовы поставить любой запрос с прекрасным качеством обслуживания.
Наша команда поддержки всегда на связи, чтобы помочь вам в выборе товаров и ответить на любые вопросы, связанные с применением и характеристиками металлов. Выбирая нас, вы выбираете достоверность в каждой детали сотрудничества.
Заходите на наш сайт Редметсплав.рф и убедитесь, что качество и уровень нашего сервиса – идеальный вариант для вас.
Наша продукция:
Медный двухраструбный отвод под высокотемпературную пайку 45 градусов 88.9х76х1.8 мм 37.5х40.5 мм твердая пайка М2 ГОСТ Р52922-2008 Купите высококачественные медные отводы под высокотемпературную пайку для систем водоснабжения, отопления и кондиционирования воздуха. Превосходные технические характеристики, простота монтажа и долгий срок службы. Широкий выбор размеров и типов отводов. Доставка по России.
Your comment is awaiting moderation.
РедМетСплав предлагает внушительный каталог отборных изделий из редких материалов. Не важно, какие объемы вам необходимы – от небольших закупок до масштабных поставок, мы гарантируем оперативное исполнение вашего заказа.
Каждая единица изделия подтверждена всеми необходимыми документами, подтверждающими их качество. Превосходное обслуживание – наша визитная карточка – мы на связи, чтобы улаживать ваши вопросы а также предоставлять решения под особенности вашего бизнеса.
Доверьте потребности вашего бизнеса профессионалам РедМетСплав и убедитесь в множестве наших преимуществ
поставляемая продукция:
Гафний B 776 Grade R3 – ASTM B776 Гафний B 776 Grade R3 – ASTM B776 является важным материалом, использующимся РІ различных высокотехнологичных отраслях. Рто металлообразующий элемент, который обладает высокой температурной устойчивостью Рё отличными антикоррозийными свойствами. Применяется РІ производстве ядерных реакторов, ракетной техники Рё РІ электронной промышленности. Благодаря СЃРІРѕРёРј уникальным характеристикам, Гафний B 776 Grade R3 – ASTM B776 обладает высоким СЃРїСЂРѕСЃРѕРј РЅР° рынке. Если РІС‹ ищете качественный материал, РІС‹ можете купить Гафний B 776 Grade R3 – ASTM B776 РїСЂСЏРјРѕ сейчас Рё использовать его для достижения СЃРІРѕРёС… целей РІ производстве.
Your comment is awaiting moderation.
РедМетСплав предлагает широкий ассортимент отборных изделий из ценных материалов. Не важно, какие объемы вам необходимы – от мелких партий до масштабных поставок, мы гарантируем быстрое выполнение вашего заказа.
Каждая единица товара подтверждена всеми необходимыми документами, подтверждающими их происхождение. Превосходное обслуживание – то, чем мы гордимся – мы на связи, чтобы разрешать ваши вопросы по мере того как предоставлять решения под требования вашего бизнеса.
Доверьте ваш запрос профессионалам РедМетСплав и убедитесь в гибкости нашего предложения
Наша продукция:
Порошок висмутовый 42 3984 – CSN/STN 423984 Порошок висмутовый 42 3984 – CSN/STN 423984 представляет СЃРѕР±РѕР№ высококачественный химический РїСЂРѕРґСѓРєС‚, широко используемый РІ различных отраслях. Ртот порошок обладает отличной стабильностью Рё химической чистотой, что делает его идеальным выбором для лабораторных исследований Рё производственных процессов. Если РІС‹ ищете надежный Рё эффективный РїСЂРѕРґСѓРєС‚, чтобы улучшить СЃРІРѕРё химические реакции, вам стоит рассмотреть возможность купить Порошок висмутовый 42 3984 – CSN/STN 423984. РћРЅ обеспечит вам стабильные результаты Рё высокую производительность. РќРµ упустите возможность воспользоваться этим превосходным предложением!
Your comment is awaiting moderation.
В поисках надежного поставщика редкоземельных металлов и сплавов? Обратите внимание на компанию Редметсплав.рф. Мы предлагаем внушительный выбор продукции, обеспечивая высочайшее качество каждого изделия.
Редметсплав.рф гарантирует все стадии сделки, предоставляя полный пакет необходимых документов для оформления товаров. Неважно, какие объемы вам необходимы – от мелких партий до крупнооптовых заказов, мы готовы поставить любой запрос с прекрасным качеством обслуживания.
Наша команда поддержки всегда на связи, чтобы помочь вам в выборе товаров и ответить на любые вопросы, связанные с применением и характеристиками металлов. Выбирая нас, вы выбираете уверенность в каждой детали сотрудничества.
Заходите на наш сайт Редметсплав.рф и убедитесь, что наше качество и сервис – идеальный вариант для вас.
Наша продукция:
Кольцо РёР· драгоценных металлов платиновое 10С…3С…1.5 РјРј ПлПд95-5 РўРЈ РЁРёСЂРѕРєРёР№ выбор высококачественных кольц РёР· драгоценных металлов. Рлегантные украшения, созданные талантливыми мастерами. Уникальность Рё изысканность РІ каждой детали. Возможность заказа персонального кольца РїРѕ вашим пожеланиям. Подчеркните СЃРІРѕСЋ индивидуальность СЃ нашими кольцами.
Your comment is awaiting moderation.
РедМетСплав предлагает широкий ассортимент отборных изделий из редких материалов. Не важно, какие объемы вам необходимы – от мелких партий до масштабных поставок, мы обеспечиваем быстрое выполнение вашего заказа.
Каждая единица товара подтверждена требуемыми документами, подтверждающими их соответствие стандартам. Опытная поддержка – наша визитная карточка – мы на связи, чтобы ответить на ваши вопросы по мере того как находить ответы под специфику вашего бизнеса.
Доверьте потребности вашего бизнеса специалистам РедМетСплав и убедитесь в гибкости нашего предложения
поставляемая продукция:
Лента висмутовая Sn43Pb43Bi14A – IEC 61190-1-3 Лента висмутовая Sn43Pb43Bi14A – IEC 61190-1-3 представляет СЃРѕР±РѕР№ высококачественный материал, идеально подходящий для пайки Рё РґСЂСѓРіРёС… электротехнических процессов. Благодаря уникальному составу, РѕРЅР° обеспечивает отличную проводимость Рё надёжность соединений. Рспользование этой ленты значительно упрощает работу Рё повышает качество итоговых изделий. Если РІС‹ ищете надежное Рё эффективное решение для вашего бизнеса, купить Лента висмутовая Sn43Pb43Bi14A – IEC 61190-1-3 будет отличным выбором. Позаботьтесь Рѕ будущем ваших проектов уже сегодня!
Your comment is awaiting moderation.
РедМетСплав предлагает внушительный каталог высококачественных изделий из нестандартных материалов. Не важно, какие объемы вам необходимы – от небольших закупок до масштабных поставок, мы обеспечиваем оперативное исполнение вашего заказа.
Каждая единица продукции подтверждена соответствующими документами, подтверждающими их соответствие стандартам. Опытная поддержка – наш стандарт – мы на связи, чтобы улаживать ваши вопросы и предоставлять решения под специфику вашего бизнеса.
Доверьте потребности вашего бизнеса профессионалам РедМетСплав и убедитесь в широком спектре предлагаемых возможностей
Наша продукция:
Магний M11311 – UNS Магний M11311 – UNS – это высококачественный металл, который широко применяется РІ различных отраслях. Его уникальные свойства делают его незаменимым для производства легких Рё прочных конструкций. Ртот сплав обладает отличной РєРѕСЂСЂРѕР·РёРѕРЅРЅРѕР№ стойкостью Рё хорошо поддается обработке. Купить Магний M11311 – UNS стоит каждому, кто ценит высокую надежность Рё долговечность материалов. Подходящий выбор для аэрокосмической, автомобилестроительной Рё химической промышленности.РќРµ упустите возможность приобрести проверенный РїСЂРѕРґСѓРєС‚ Рё улучшить СЃРІРѕРё проекты СЃ Магний M11311 – UNS!
Your comment is awaiting moderation.
РедМетСплав предлагает обширный выбор качественных изделий из нестандартных материалов. Не важно, какие объемы вам необходимы – от мелких партий до обширных поставок, мы гарантируем оперативное исполнение вашего заказа.
Каждая единица изделия подтверждена всеми необходимыми документами, подтверждающими их происхождение. Дружелюбная помощь – то, чем мы гордимся – мы на связи, чтобы разрешать ваши вопросы по мере того как находить ответы под специфику вашего бизнеса.
Доверьте потребности вашего бизнеса специалистам РедМетСплав и убедитесь в множестве наших преимуществ
Наши товары:
Фольга магниевая Р›4 – РўРЈ 1714-002-00545484-99 РўСЂСѓР±Р° магниевая Р›4 – РўРЈ 1714-002-00545484-99 является надежным компонентом для различных промышленных применений. Рзготавливается РїРѕ строгим стандартам, что обеспечивает высокую прочность Рё долговечность. Рта труба идеально подойдет для электрохимических процессов Рё РґСЂСѓРіРёС… высоких технологий. Если РІС‹ ищете качественный Рё доступный РїСЂРѕРґСѓРєС‚, то вам стоит купить РўСЂСѓР±Р° магниевая Р›4 – РўРЈ 1714-002-00545484-99. РћРЅР° гарантировано удовлетворит ваши требования Рё обеспечит эффективность ваших проектов. Убедитесь РІ высоком качестве Рё сделайте правильный выбор сегодня.
Your comment is awaiting moderation.
В поисках достоверного источника редкоземельных металлов и сплавов? Обратите внимание на компанию Редметсплав.рф. Мы предлагаем обширный каталог продукции, обеспечивая превосходное качество каждого изделия.
Редметсплав.рф гарантирует все стадии сделки, предоставляя полный пакет необходимых документов для легализации товаров. Неважно, какие объемы вам необходимы – от мелких партий до крупнооптовых заказов, мы готовы поставить любой запрос с высоким уровнем сервиса.
Наша команда службы поддержки всегда на связи, чтобы помочь вам в определении подходящих продуктов и ответить на любые вопросы, связанные с применением и характеристиками металлов. Выбирая нас, вы выбираете надежность в каждой детали сотрудничества.
Заходите на наш сайт Редметсплав.рф и убедитесь, что наше качество и сервис – идеальный вариант для вас.
Наша продукция:
Титановая труба 38х0.8х7000 мм ОТ4 ГОСТ 22897-86 Откройте мир прочных и надежных титановых труб с компанией Редметсплав. Наши высококачественные титановые трубы сочетают в себе устойчивость к коррозии, износостойкость и легкий вес, делая их незаменимым материалом для применения в различных сферах промышленности. Широкий выбор различных диаметров и толщин, а также индивидуальные решения для вашего производства. Гарантированное качество и надежность поставок.
Your comment is awaiting moderation.
РедМетСплав предлагает обширный выбор высококачественных изделий из редких материалов. Не важно, какие объемы вам необходимы – от небольших закупок до масштабных поставок, мы обеспечиваем быстрое выполнение вашего заказа.
Каждая единица изделия подтверждена требуемыми документами, подтверждающими их соответствие стандартам. Превосходное обслуживание – наша визитная карточка – мы на связи, чтобы ответить на ваши вопросы по мере того как предоставлять решения под требования вашего бизнеса.
Доверьте ваш запрос профессионалам РедМетСплав и убедитесь в широком спектре предлагаемых возможностей
Наши товары:
Проволока магниевая ISO-MC21230 – BS ISO 16220 Полоса магниевая ISO-MC21230 – BS ISO 16220 представляет СЃРѕР±РѕР№ высококачественный РїСЂРѕРґСѓРєС‚, соответствующий международным стандартам. Рта полоса используется РІ различных отраслях, включая авиацию Рё машиностроение, благодаря СЃРІРѕРёРј отличным механическим свойствам Рё легкости. Купить Полоса магниевая ISO-MC21230 – BS ISO 16220 можно для реализации проектов, требующих надежных Рё легких материалов. Рто отличный выбор для тех, кто ценит качество Рё долговечность. РќРµ упустите возможность улучшить СЃРІРѕРё производственные процессы СЃ помощью этого надежного продукта.
Your comment is awaiting moderation.
В поисках надежного поставщика редкоземельных металлов и сплавов? Обратите внимание на компанию Редметсплав.рф. Мы предлагаем широкий ассортимент продукции, обеспечивая высочайшее качество каждого изделия.
Редметсплав.рф защищает все стадии сделки, предоставляя полный пакет необходимых документов для оформления товаров. Неважно, какие объемы вам необходимы – от мелких партий до крупнооптовых заказов, мы готовы поставить любой запрос с высоким уровнем сервиса.
Наша команда службы поддержки всегда на связи, чтобы помочь вам в подборе нужных изделий и ответить на любые вопросы, связанные с применением и характеристиками металлов. Выбирая нас, вы выбираете надежность в каждой детали сотрудничества.
Заходите на наш сайт Редметсплав.рф и убедитесь, что наше качество и сервис – ваш лучший выбор.
поставляемая продукция:
Быстрорежущая пластина форма 56 номер 5602 левая 12х40х6х7 мм сечение резца 20х12 мм Р18 ГОСТ 2379-77 Выберите лучшие быстрорежущие пластины к резцам онлайн. Отличная износостойкость, высокая точность обработки и широкий выбор размеров. Узнайте, как наши пластины могут улучшить вашу металлообработку.
Your comment is awaiting moderation.
РедМетСплав предлагает обширный выбор отборных изделий из нестандартных материалов. Не важно, какие объемы вам необходимы – от мелких партий до крупных поставок, мы обеспечиваем своевременную реализацию вашего заказа.
Каждая единица продукции подтверждена соответствующими документами, подтверждающими их происхождение. Опытная поддержка – наша визитная карточка – мы на связи, чтобы разрешать ваши вопросы по мере того как предоставлять решения под требования вашего бизнеса.
Доверьте вашу потребность в редких металлах специалистам РедМетСплав и убедитесь в гибкости нашего предложения
Наши товары:
Порошок магниевый AZ92 – CSA HG.3 Рзделия РёР· магния AZ92 – CSA HG.3 представляют СЃРѕР±РѕР№ высококачественные компоненты, разработанные для различных отраслей. РћРЅРё отличаются отличной прочностью, легкостью Рё устойчивостью Рє РєРѕСЂСЂРѕР·РёРё, что делает РёС… идеальным выбором для авиации, автомобилестроения Рё электроники. Рти изделия обеспечивают высокую производительность Рё долговечность, благодаря чему становятся незаменимыми РІ современных технологиях. Если РІС‹ хотите купить Рзделия РёР· магния AZ92 – CSA HG.3, это решение гарантирует надежность Рё эффективность вашего проекта. Выберите наше предложение Рё убедитесь РІ качестве самих изделий РёР· магния.
Your comment is awaiting moderation.
В поисках достоверного источника редкоземельных металлов и сплавов? Обратите внимание на компанию Редметсплав.рф. Мы предлагаем широкий ассортимент продукции, обеспечивая высочайшее качество каждого изделия.
Редметсплав.рф обеспечивает все стадии сделки, предоставляя полный пакет необходимых документов для легализации товаров. Неважно, какие объемы вам необходимы – от мелких партий до крупнооптовых заказов, мы готовы обеспечить любой запрос с непревзойденным обслуживанием.
Наша команда службы поддержки всегда на связи, чтобы помочь вам в определении подходящих продуктов и ответить на любые вопросы, связанные с применением и характеристиками металлов. Выбирая нас, вы выбираете надежность в каждой детали сотрудничества.
Заходите на наш сайт Редметсплав.рф и убедитесь, что наше качество и сервис – наилучшее решение для вашего бизнеса.
Наша продукция:
Медная однораструбная редукционная переходная муфта РїРѕРґ пайку удлиненная 14С…10 РјРј твердая пайка Cu-DHP ГОСТ Р 52922-2008 Приобретите высококачественные медные однораструбные редукционные муфты РїРѕРґ пайку РѕС‚ Редметсплав для надежного соединения трубопроводов. Гарантированная прочность Рё устойчивость Рє РєРѕСЂСЂРѕР·РёРё. Рдеальны для различных систем отопления, водоснабжения Рё прочих технических целей.
Your comment is awaiting moderation.
РедМетСплав предлагает широкий ассортимент отборных изделий из ценных материалов. Не важно, какие объемы вам необходимы – от мелких партий до обширных поставок, мы обеспечиваем оперативное исполнение вашего заказа.
Каждая единица продукции подтверждена требуемыми документами, подтверждающими их происхождение. Опытная поддержка – наш стандарт – мы на связи, чтобы улаживать ваши вопросы и предоставлять решения под особенности вашего бизнеса.
Доверьте потребности вашего бизнеса профессионалам РедМетСплав и убедитесь в гибкости нашего предложения
Наша продукция:
Лист висмутовый CAC906C – JIS H 5121-2016 Лист висмутовый CAC906C – JIS H 5121-2016 представляет СЃРѕР±РѕР№ высококачественный материал, соответствующий современным стандартам. Р’РёСЃРјСѓС‚ обладает уникальными антиоксидантными свойствами, что делает этот товар идеальным для различных областей применения, включая электронику Рё медицинскую технику. Выбор этого листа гарантирует надежность Рё долговечность. Если РІС‹ ищете надежный Рё качественный материал, рекомендуем купить Лист висмутовый CAC906C – JIS H 5121-2016. Обеспечьте высокую производительность СЃРІРѕРёС… проектов, используя этот проверенный РїСЂРѕРґСѓРєС‚.
Your comment is awaiting moderation.
В поисках надежного поставщика редкоземельных металлов и сплавов? Обратите внимание на компанию Редметсплав.рф. Мы предлагаем обширный каталог продукции, обеспечивая высочайшее качество каждого изделия.
Редметсплав.рф гарантирует все стадии сделки, предоставляя полный пакет необходимых документов для оформления товаров. Неважно, какие объемы вам необходимы – от мелких партий до крупнооптовых заказов, мы готовы обеспечить любой запрос с непревзойденным обслуживанием.
Наша команда поддержки всегда на связи, чтобы помочь вам в выборе товаров и ответить на любые вопросы, связанные с применением и характеристиками металлов. Выбирая нас, вы выбираете достоверность в каждой детали сотрудничества.
Заходите на наш сайт Редметсплав.рф и убедитесь, что наше качество и сервис – идеальный вариант для вас.
поставляемая продукция:
Лента никелевая 0.35С…125 РјРј НРГОСТ 2170-73 Познакомьтесь СЃ высококачественной никелевой лентой РѕС‚ Редметсплав.СЂС„. РЁРёСЂРѕРєРёР№ выбор размеров Рё толщин. Прочность, устойчивость Рє высоким температурам. Применение РІ различных отраслях. Рдеально РїРѕРґС…РѕРґРёС‚ для электротехники, химической промышленности Рё медицинской техники.
Your comment is awaiting moderation.
РедМетСплав предлагает внушительный каталог отборных изделий из редких материалов. Не важно, какие объемы вам необходимы – от небольших закупок до обширных поставок, мы гарантируем своевременную реализацию вашего заказа.
Каждая единица продукции подтверждена соответствующими документами, подтверждающими их происхождение. Дружелюбная помощь – наш стандарт – мы на связи, чтобы ответить на ваши вопросы и находить ответы под требования вашего бизнеса.
Доверьте ваш запрос специалистам РедМетСплав и убедитесь в гибкости нашего предложения
Наши товары:
Магний AZ-63HP – РўРЈ 1714-001-00545484-96 Магний AZ-63HP – РўРЈ 1714-001-00545484-96 – это высококачественный легированный магний, который идеально РїРѕРґС…РѕРґРёС‚ для применения РІ различных отраслях, включая авиацию Рё автомобилестроение. Ртот сплав обеспечивает отличную прочность Рё устойчивость Рє РєРѕСЂСЂРѕР·РёРё, что делает его незаменимым материалом для производства легких конструкций. Если РІС‹ хотите купить Магний AZ-63HP – РўРЈ 1714-001-00545484-96, РІС‹ получите надежный РїСЂРѕРґСѓРєС‚, отвечающий всем современным требованиям. Ртот магний станет идеальным решением для вашего бизнеса.
Your comment is awaiting moderation.
В поисках достоверного источника редкоземельных металлов и сплавов? Обратите внимание на компанию Редметсплав.рф. Мы предлагаем обширный каталог продукции, обеспечивая высочайшее качество каждого изделия.
Редметсплав.рф обеспечивает все стадии сделки, предоставляя полный пакет необходимых документов для оформления товаров. Неважно, какие объемы вам необходимы – от мелких партий до крупнооптовых заказов, мы готовы выполнить любой запрос с высоким уровнем сервиса.
Наша команда поддержки всегда на связи, чтобы помочь вам в определении подходящих продуктов и ответить на любые вопросы, связанные с применением и характеристиками металлов. Выбирая нас, вы выбираете уверенность в каждой детали сотрудничества.
Заходите на наш сайт Редметсплав.рф и убедитесь, что качество и уровень нашего сервиса – наилучшее решение для вашего бизнеса.
Наша продукция:
Титановая труба 120х5х1500 мм ВТ1-0 ГОСТ 22897-86 Откройте мир прочных и надежных титановых труб с компанией Редметсплав. Наши высококачественные титановые трубы сочетают в себе устойчивость к коррозии, износостойкость и легкий вес, делая их незаменимым материалом для применения в различных сферах промышленности. Широкий выбор различных диаметров и толщин, а также индивидуальные решения для вашего производства. Гарантированное качество и надежность поставок.
Your comment is awaiting moderation.
В поисках достоверного источника редкоземельных металлов и сплавов? Обратите внимание на компанию Редметсплав.рф. Мы предлагаем обширный каталог продукции, обеспечивая высочайшее качество каждого изделия.
Редметсплав.рф защищает все стадии сделки, предоставляя полный пакет необходимых документов для легализации товаров. Неважно, какие объемы вам необходимы – от мелких партий до крупнооптовых заказов, мы готовы поставить любой запрос с непревзойденным обслуживанием.
Наша команда поддержки всегда на связи, чтобы помочь вам в выборе товаров и ответить на любые вопросы, связанные с применением и характеристиками металлов. Выбирая нас, вы выбираете надежность в каждой детали сотрудничества.
Заходите на наш сайт Редметсплав.рф и убедитесь, что качество и уровень нашего сервиса – ваш лучший выбор.
поставляемая продукция:
Прецизионная сварная Рё холоднокалиброванная труба 108С…5 РјРј E320 EN 10305-3 Выбирайте прецизионные сварные Рё холоднокалиброванные трубы РЅР° Редметсплав.СЂС„. Надежные Рё высококачественные трубы СЃ уникальными характеристиками Рё высокой точностью изготовления. Рдеальный выбор для машиностроения, авиации Рё энергетики.
Your comment is awaiting moderation.
РедМетСплав предлагает обширный выбор качественных изделий из редких материалов. Не важно, какие объемы вам необходимы – от небольших закупок до обширных поставок, мы обеспечиваем быстрое выполнение вашего заказа.
Каждая единица товара подтверждена соответствующими документами, подтверждающими их качество. Опытная поддержка – то, чем мы гордимся – мы на связи, чтобы улаживать ваши вопросы по мере того как предоставлять решения под специфику вашего бизнеса.
Доверьте ваш запрос специалистам РедМетСплав и убедитесь в множестве наших преимуществ
поставляемая продукция:
Порошок магниевый M10800 – UNS Рзделия РёР· магния M10800 – UNS – это надежные Рё легкие изделия, идеально подходящие для применения РІ различных отраслях. Высокая прочность Рё легкость магния обеспечивают отличную производительность, снижая вес конструкций без потери качества. Выберите Рзделия РёР· магния M10800 – UNS для оптимизации СЃРІРѕРёС… проектов, так как РѕРЅРё прекрасно резонируют СЃ требованиями современного производства. РќРµ упустите возможность улучшить СЃРІРѕР№ бизнес! Купить Рзделия РёР· магния M10800 – UNS можно РїСЂСЏРјРѕ сейчас, обеспечив себе конкурентные преимущества.
Your comment is awaiting moderation.
РедМетСплав предлагает внушительный каталог высококачественных изделий из ценных материалов. Не важно, какие объемы вам необходимы – от небольших закупок до масштабных поставок, мы обеспечиваем быстрое выполнение вашего заказа.
Каждая единица изделия подтверждена соответствующими документами, подтверждающими их происхождение. Опытная поддержка – то, чем мы гордимся – мы на связи, чтобы разрешать ваши вопросы и предоставлять решения под требования вашего бизнеса.
Доверьте ваш запрос специалистам РедМетСплав и убедитесь в множестве наших преимуществ
Наши товары:
Проволока магниевая MDIn2A – JIS H 2222 Полоса магниевая MDIn2A – JIS H 2222 представляет СЃРѕР±РѕР№ высококачественный материал, обеспечивающий отличную прочность Рё легкость. Ртот РїСЂРѕРґСѓРєС‚ идеально РїРѕРґС…РѕРґРёС‚ для использования РІ различных отраслях, включая авиационную Рё автомобилестроение. Характеризуется высокой РєРѕСЂСЂРѕР·РёР№РЅРѕР№ стойкостью Рё СѓРґРѕР±РЅРѕР№ обработкой, что делает его универсальным решением для профессионалов. РќРµ упустите возможность купить Полоса магниевая MDIn2A – JIS H 2222 Рё повысить эффективность ваших проектов. Данный товар отличается высокими эксплуатационными характеристиками Рё надежностью РІ применении.
Your comment is awaiting moderation.
В поисках надежного поставщика редкоземельных металлов и сплавов? Обратите внимание на компанию Редметсплав.рф. Мы предлагаем обширный каталог продукции, обеспечивая превосходное качество каждого изделия.
Редметсплав.рф защищает все стадии сделки, предоставляя полный пакет необходимых документов для оформления товаров. Неважно, какие объемы вам необходимы – от мелких партий до крупнооптовых заказов, мы готовы поставить любой запрос с высоким уровнем сервиса.
Наша команда поддержки всегда на связи, чтобы помочь вам в подборе нужных изделий и ответить на любые вопросы, связанные с применением и характеристиками металлов. Выбирая нас, вы выбираете надежность в каждой детали сотрудничества.
Заходите на наш сайт Редметсплав.рф и убедитесь, что наше качество и сервис – наилучшее решение для вашего бизнеса.
Наши товары:
Кольцо РёР· драгоценных металлов платиновое 100С…35С…3 РјРј ПлПд90-10 РўРЈ РЁРёСЂРѕРєРёР№ выбор высококачественных кольц РёР· драгоценных металлов. Рлегантные украшения, созданные талантливыми мастерами. Уникальность Рё изысканность РІ каждой детали. Возможность заказа персонального кольца РїРѕ вашим пожеланиям. Подчеркните СЃРІРѕСЋ индивидуальность СЃ нашими кольцами.
Your comment is awaiting moderation.
РедМетСплав предлагает широкий ассортимент качественных изделий из редких материалов. Не важно, какие объемы вам необходимы – от небольших закупок до крупных поставок, мы обеспечиваем своевременную реализацию вашего заказа.
Каждая единица продукции подтверждена требуемыми документами, подтверждающими их происхождение. Дружелюбная помощь – наша визитная карточка – мы на связи, чтобы разрешать ваши вопросы по мере того как находить ответы под особенности вашего бизнеса.
Доверьте ваш запрос профессионалам РедМетСплав и убедитесь в гибкости нашего предложения
Наша продукция:
Лента молибденовая Mo-W30 Лента молибденовая Mo-W30 – это высококачественный РїСЂРѕРґСѓРєС‚, обладающий исключительными свойствами. РћРЅ обеспечивает отличную устойчивость Рє высоким температурам Рё РєРѕСЂСЂРѕР·РёРё, что делает его идеальным для применения РІ самых различных отраслях. Лента РїРѕРґС…РѕРґРёС‚ для использования РІ электронной промышленности, Р° также РІ производстве специальных сплавов. Заказав Рё РєСѓРїРёРІ Ленту молибденовую Mo-W30, РІС‹ получите надежный материал, который подчеркнет высокий уровень вашего производства. РќРµ упустите шанс оптимизировать ваши процессы СЃ помощью этого уникального продукта.
Your comment is awaiting moderation.
В поисках достоверного источника редкоземельных металлов и сплавов? Обратите внимание на компанию Редметсплав.рф. Мы предлагаем внушительный выбор продукции, обеспечивая высочайшее качество каждого изделия.
Редметсплав.рф обеспечивает все стадии сделки, предоставляя полный пакет необходимых документов для оформления товаров. Неважно, какие объемы вам необходимы – от мелких партий до крупнооптовых заказов, мы готовы обеспечить любой запрос с высоким уровнем сервиса.
Наша команда поддержки всегда на связи, чтобы помочь вам в определении подходящих продуктов и ответить на любые вопросы, связанные с применением и характеристиками металлов. Выбирая нас, вы выбираете надежность в каждой детали сотрудничества.
Заходите на наш сайт Редметсплав.рф и убедитесь, что качество и уровень нашего сервиса – ваш лучший выбор.
поставляемая продукция:
Меднаядвухраструбная подвижнаямуфта под пайку70х2.6ммМ2МГОСТ Р52922-2008 Выберите медные двухраструбные муфты под пайку от производителя RedmetSplav. Прочные и герметичные соединения для систем водоснабжения, отопления и газоснабжения. Долговечные и надежные муфты для любых видов работ. Подходят для использования в домашних условиях, коммерческих и промышленных объектах.
Your comment is awaiting moderation.
В поисках надежного поставщика редкоземельных металлов и сплавов? Обратите внимание на компанию Редметсплав.рф. Мы предлагаем широкий ассортимент продукции, обеспечивая высочайшее качество каждого изделия.
Редметсплав.рф защищает все стадии сделки, предоставляя полный пакет необходимых документов для законного использования товаров. Неважно, какие объемы вам необходимы – от мелких партий до крупнооптовых заказов, мы готовы обеспечить любой запрос с высоким уровнем сервиса.
Наша команда службы поддержки всегда на связи, чтобы помочь вам в определении подходящих продуктов и ответить на любые вопросы, связанные с применением и характеристиками металлов. Выбирая нас, вы выбираете уверенность в каждой детали сотрудничества.
Заходите на наш сайт Редметсплав.рф и убедитесь, что наше качество и сервис – идеальный вариант для вас.
Наша продукция:
Пружина из драгоценных металлов золотая 20х8х1 мм Зл99.99 ТУ Выберите идеальные пружины из золота, серебра или платины, чтобы дополнить ваше украшение. Найдите пружины с изысканным дизайном и прочностью. Они предлагают широкий выбор для того, чтобы подчеркнуть уникальность вашего украшения.
Your comment is awaiting moderation.
РедМетСплав предлагает внушительный каталог высококачественных изделий из ценных материалов. Не важно, какие объемы вам необходимы – от небольших закупок до крупных поставок, мы обеспечиваем оперативное исполнение вашего заказа.
Каждая единица продукции подтверждена требуемыми документами, подтверждающими их качество. Опытная поддержка – наша визитная карточка – мы на связи, чтобы разрешать ваши вопросы а также находить ответы под особенности вашего бизнеса.
Доверьте ваш запрос профессионалам РедМетСплав и убедитесь в гибкости нашего предложения
Наши товары:
РљСЂСѓРі магниевый MC2 – JIS H 5203 Фольга магниевая MC2 – JIS H 5203 является высококачественным материалом, используемым РІ различных отраслях, включая авиацию Рё автомобилестроение. Рта фольга обладает отличной прочностью Рё легкостью, что делает ее идеальным выбором для создания легких конструкций. Рзготавливаемая РїРѕ стандарту JIS H 5203, РѕРЅР° гарантирует надежность Рё долговечность. Если РІС‹ ищете качественный материал для своей продукции, купить Фольга магниевая MC2 – JIS H 5203 станет верным решением. РќРµ упустите возможность улучшить СЃРІРѕР№ проект СЃ помощью этого надежного решения!
Your comment is awaiting moderation.
РедМетСплав предлагает внушительный каталог высококачественных изделий из редких материалов. Не важно, какие объемы вам необходимы – от мелких партий до обширных поставок, мы гарантируем оперативное исполнение вашего заказа.
Каждая единица изделия подтверждена соответствующими документами, подтверждающими их происхождение. Превосходное обслуживание – наш стандарт – мы на связи, чтобы разрешать ваши вопросы и предоставлять решения под специфику вашего бизнеса.
Доверьте потребности вашего бизнеса специалистам РедМетСплав и убедитесь в множестве наших преимуществ
поставляемая продукция:
Проволока висмутовая C49355 – UNS Проволока висмутовая C49355 – UNS обладает высокой прочностью Рё устойчивостью Рє РєРѕСЂСЂРѕР·РёРё, что делает ее идеальной для различных промышленных применений. Рта проволока широко используется РІ электронике Рё медицинском оборудовании благодаря СЃРІРѕРёРј уникальным свойствам. Убедитесь РІ качестве нашего продукта, чтобы получить надежность Рё долговечность. Если РІС‹ ищете надежные материалы, чтобы улучшить СЃРІРѕСЋ продукцию, вам стоит купить Проволока висмутовая C49355 – UNS. РќРµ упустите возможность приобрести этот высококачественный РїСЂРѕРґСѓРєС‚!
Your comment is awaiting moderation.
В поисках достоверного источника редкоземельных металлов и сплавов? Обратите внимание на компанию Редметсплав.рф. Мы предлагаем обширный каталог продукции, обеспечивая высочайшее качество каждого изделия.
Редметсплав.рф защищает все стадии сделки, предоставляя полный пакет необходимых документов для законного использования товаров. Неважно, какие объемы вам необходимы – от мелких партий до крупнооптовых заказов, мы готовы поставить любой запрос с прекрасным качеством обслуживания.
Наша команда службы поддержки всегда на связи, чтобы помочь вам в определении подходящих продуктов и ответить на любые вопросы, связанные с применением и характеристиками металлов. Выбирая нас, вы выбираете уверенность в каждой детали сотрудничества.
Заходите на наш сайт Редметсплав.рф и убедитесь, что качество и уровень нашего сервиса – идеальный вариант для вас.
Наша продукция:
Прецизионный лист горячекатаный 13С…600 РјРј 42РќРђ-ВРГОСТ 14082-78 Купить прецизионные листы СЃ заданным ТКЛРпо выгодной цене. Рдеальные материалы для производства авиационной, автомобильной Рё медицинской техники, судостроения Рё энергетики. Высокая прочность, устойчивость Рє РєРѕСЂСЂРѕР·РёРё Рё точные размеры обеспечат надежность Рё долговечность ваших конструкций.
Your comment is awaiting moderation.
РедМетСплав предлагает внушительный каталог высококачественных изделий из нестандартных материалов. Не важно, какие объемы вам необходимы – от мелких партий до масштабных поставок, мы обеспечиваем быстрое выполнение вашего заказа.
Каждая единица изделия подтверждена соответствующими документами, подтверждающими их происхождение. Дружелюбная помощь – то, чем мы гордимся – мы на связи, чтобы разрешать ваши вопросы и адаптировать решения под требования вашего бизнеса.
Доверьте вашу потребность в редких металлах профессионалам РедМетСплав и убедитесь в широком спектре предлагаемых возможностей
Наша продукция:
РџРѕРєРѕРІРєР° ванадиевая FeV80Al14 – ISO 5451 РџРѕРєРѕРІРєР° ванадиевая FeV80Al14 – ISO 5451 представляет СЃРѕР±РѕР№ высококачественный сплав, широко используемый РІ машиностроении Рё аэрокосмической отрасли. РћРЅ обладает отличной РєРѕСЂСЂРѕР·РёР№РЅРѕР№ стойкостью Рё высокой прочностью, что делает его идеальным выбором для ответственных конструкций. Ванадиевая РїРѕРєРѕРІРєР° обеспечивает улучшенные механические свойства, что особенно важно РїСЂРё эксплуатации РІ условиях повышенных нагрузок. Если РІС‹ ищете надежный материал, РЅРµ пропустите возможность купить РџРѕРєРѕРІРєР° ванадиевая FeV80Al14 – ISO 5451. Ртот РїСЂРѕРґСѓРєС‚ отвечает всем современным стандартам Рё требованиям, обеспечивая долгий СЃСЂРѕРє службы Рё высокий уровень производительности.
Your comment is awaiting moderation.
В поисках достоверного источника редкоземельных металлов и сплавов? Обратите внимание на компанию Редметсплав.рф. Мы предлагаем внушительный выбор продукции, обеспечивая высочайшее качество каждого изделия.
Редметсплав.рф защищает все стадии сделки, предоставляя полный пакет необходимых документов для легализации товаров. Неважно, какие объемы вам необходимы – от мелких партий до крупнооптовых заказов, мы готовы обеспечить любой запрос с прекрасным качеством обслуживания.
Наша команда службы поддержки всегда на связи, чтобы помочь вам в определении подходящих продуктов и ответить на любые вопросы, связанные с применением и характеристиками металлов. Выбирая нас, вы выбираете достоверность в каждой детали сотрудничества.
Заходите на наш сайт Редметсплав.рф и убедитесь, что качество и уровень нашего сервиса – ваш лучший выбор.
Наша продукция:
Бронзовое наружное стопорное пружинное кольцо M57 52.8С…2 РјРј БрБНТ1.9 DIN 471 Купить бронзовые наружные стопорные кольца РїРѕ DIN РІ широком ассортименте РѕС‚ Редметсплав. Прочные Рё надежные компоненты, высокая стойкость Рє РёР·РЅРѕСЃСѓ Рё РєРѕСЂСЂРѕР·РёРё. Рдеально РїРѕРґС…РѕРґСЏС‚ для машиностроения, авиации, судостроения Рё РґСЂСѓРіРёС… отраслей. Уникальные особенности Рё высокие характеристики РїРѕ стандартам DIN.
Your comment is awaiting moderation.
РедМетСплав предлагает внушительный каталог отборных изделий из ценных материалов. Не важно, какие объемы вам необходимы – от мелких партий до крупных поставок, мы обеспечиваем оперативное исполнение вашего заказа.
Каждая единица продукции подтверждена требуемыми документами, подтверждающими их качество. Опытная поддержка – то, чем мы гордимся – мы на связи, чтобы ответить на ваши вопросы по мере того как находить ответы под специфику вашего бизнеса.
Доверьте ваш запрос профессионалам РедМетСплав и убедитесь в гибкости нашего предложения
Наша продукция:
РџРѕРєРѕРІРєР° молибденовая MTC-9 РџРѕРєРѕРІРєР° молибденовая MTC-9 – это высококачественный металл, используемый РІ различных отраслях, включая аэрокосмическую Рё РѕР±РѕСЂРѕРЅРЅСѓСЋ. Обладая превосходными механическими свойствами, РѕРЅ обеспечивает надежность Рё долговечность РІ эксплуатации. Молибденовая РїРѕРєРѕРІРєР° устойчива Рє высоким температурам Рё РєРѕСЂСЂРѕР·РёРё, что делает ее идеальным выбором для производства деталей, работающих РІ экстремальных условиях. Если РІС‹ ищете надежный металл, чтобы улучшить производственные процессы, вам стоит купить РџРѕРєРѕРІРєР° молибденовая MTC-9. Рнвестируйте РІ качество Рё эффективность!
Your comment is awaiting moderation.
В поисках достоверного источника редкоземельных металлов и сплавов? Обратите внимание на компанию Редметсплав.рф. Мы предлагаем обширный каталог продукции, обеспечивая превосходное качество каждого изделия.
Редметсплав.рф защищает все стадии сделки, предоставляя полный пакет необходимых документов для легализации товаров. Неважно, какие объемы вам необходимы – от мелких партий до крупнооптовых заказов, мы готовы выполнить любой запрос с прекрасным качеством обслуживания.
Наша команда службы поддержки всегда на связи, чтобы помочь вам в подборе нужных изделий и ответить на любые вопросы, связанные с применением и характеристиками металлов. Выбирая нас, вы выбираете уверенность в каждой детали сотрудничества.
Заходите на наш сайт Редметсплав.рф и убедитесь, что наше качество и сервис – идеальный вариант для вас.
Наши товары:
Двухраструбный медный обвод под пайку 8х6х0.6 мм 6.8х8.8 мм мягкая пайка М1т ГОСТ Р52922-2008 Выберите качественные Медные двухраструбные обводы под пайку различных размеров и диаметров. Надежное соединение труб, высокая устойчивость к коррозии и превосходная теплопроводность. Узнайте больше о нашей продукции и найдите оптимальное решение для вашего проекта.
Your comment is awaiting moderation.
РедМетСплав предлагает широкий ассортимент отборных изделий из нестандартных материалов. Не важно, какие объемы вам необходимы – от мелких партий до масштабных поставок, мы гарантируем оперативное исполнение вашего заказа.
Каждая единица изделия подтверждена всеми необходимыми документами, подтверждающими их происхождение. Превосходное обслуживание – наш стандарт – мы на связи, чтобы ответить на ваши вопросы по мере того как находить ответы под специфику вашего бизнеса.
Доверьте вашу потребность в редких металлах профессионалам РедМетСплав и убедитесь в широком спектре предлагаемых возможностей
поставляемая продукция:
Пруток висмутовый L54910 – UNS Пруток висмутовый L54910 – UNS является высококачественным продуктом, предназначенным для применения РІ различных отраслях, включая медицину Рё электронные технологии. Висмутовый материал обладает превосходными антикоррозийными свойствами Рё хорошей электропроводностью. Рто делает его идеальным выбором для изготовления компонентов, требующих высокой надежности Рё устойчивости Рє химическим воздействиям. Если вам необходим надежный материал, РЅРµ упустите возможность купить Пруток висмутовый L54910 – UNS. Ртот РїСЂРѕРґСѓРєС‚ сочетает РІ себе эффективность Рё долговечность, отвечая всем современным требованиям.
Your comment is awaiting moderation.
В поисках надежного поставщика редкоземельных металлов и сплавов? Обратите внимание на компанию Редметсплав.рф. Мы предлагаем обширный каталог продукции, обеспечивая превосходное качество каждого изделия.
Редметсплав.рф защищает все стадии сделки, предоставляя полный пакет необходимых документов для оформления товаров. Неважно, какие объемы вам необходимы – от мелких партий до крупнооптовых заказов, мы готовы обеспечить любой запрос с непревзойденным обслуживанием.
Наша команда службы поддержки всегда на связи, чтобы помочь вам в определении подходящих продуктов и ответить на любые вопросы, связанные с применением и характеристиками металлов. Выбирая нас, вы выбираете достоверность в каждой детали сотрудничества.
Заходите на наш сайт Редметсплав.рф и убедитесь, что качество и уровень нашего сервиса – наилучшее решение для вашего бизнеса.
поставляемая продукция:
Труба из драгоценных металлов платиновая 100х10х0.3 мм ПлПд90-10 ТУ Гарантированное качество и изысканный дизайн – купите драгоценные трубы для ювелирных украшений, машиностроения и архитектуры. Широкий выбор и высокое качество! Доставка по России.
Your comment is awaiting moderation.
РедМетСплав предлагает широкий ассортимент отборных изделий из ценных материалов. Не важно, какие объемы вам необходимы – от небольших закупок до обширных поставок, мы гарантируем быстрое выполнение вашего заказа.
Каждая единица товара подтверждена соответствующими документами, подтверждающими их качество. Опытная поддержка – наш стандарт – мы на связи, чтобы улаживать ваши вопросы по мере того как находить ответы под особенности вашего бизнеса.
Доверьте потребности вашего бизнеса профессионалам РедМетСплав и убедитесь в гибкости нашего предложения
Наша продукция:
Проволока титановая Рў25 – ГОСТ 2171-90 Полоса титановая Рў25 – ГОСТ 2171-90 – это высококачественный металлургический РїСЂРѕРґСѓРєС‚, обладающий исключительными прочностными характеристиками Рё высокой устойчивостью Рє РєРѕСЂСЂРѕР·РёРё. Данный материал используется РІ различных отраслях, включая машиностроение Рё авиацию, благодаря своей легкости Рё долговечности. Если вам необходимо купить Полоса титановая Рў25 – ГОСТ 2171-90, РІС‹ выбрали надежное решение для СЃРІРѕРёС… проектов. Благодаря современным технологиям производства, наша полоса обеспечит вам необходимую прочность Рё надежность. РќРµ упустите возможность приобрести этот ценный материал!
Your comment is awaiting moderation.
В поисках надежного поставщика редкоземельных металлов и сплавов? Обратите внимание на компанию Редметсплав.рф. Мы предлагаем внушительный выбор продукции, обеспечивая превосходное качество каждого изделия.
Редметсплав.рф защищает все стадии сделки, предоставляя полный пакет необходимых документов для законного использования товаров. Неважно, какие объемы вам необходимы – от мелких партий до крупнооптовых заказов, мы готовы выполнить любой запрос с непревзойденным обслуживанием.
Наша команда поддержки всегда на связи, чтобы помочь вам в определении подходящих продуктов и ответить на любые вопросы, связанные с применением и характеристиками металлов. Выбирая нас, вы выбираете надежность в каждой детали сотрудничества.
Заходите на наш сайт Редметсплав.рф и убедитесь, что качество и уровень нашего сервиса – наилучшее решение для вашего бизнеса.
Наша продукция:
Кольцо РёР· драгоценных металлов платиновое 100С…40С…3.5 РјРј РџР»99.9 РўРЈ РЁРёСЂРѕРєРёР№ выбор высококачественных кольц РёР· драгоценных металлов. Рлегантные украшения, созданные талантливыми мастерами. Уникальность Рё изысканность РІ каждой детали. Возможность заказа персонального кольца РїРѕ вашим пожеланиям. Подчеркните СЃРІРѕСЋ индивидуальность СЃ нашими кольцами.
Your comment is awaiting moderation.
РедМетСплав предлагает обширный выбор качественных изделий из нестандартных материалов. Не важно, какие объемы вам необходимы – от мелких партий до крупных поставок, мы обеспечиваем своевременную реализацию вашего заказа.
Каждая единица товара подтверждена всеми необходимыми документами, подтверждающими их происхождение. Превосходное обслуживание – наша визитная карточка – мы на связи, чтобы улаживать ваши вопросы по мере того как адаптировать решения под требования вашего бизнеса.
Доверьте вашу потребность в редких металлах профессионалам РедМетСплав и убедитесь в гибкости нашего предложения
Наша продукция:
Проволока магниевая M10601 – UNS Полоса магниевая M10601 – UNS представляет СЃРѕР±РѕР№ высококачественный материал, созданный для различных промышленных применений. РћРЅР° обладает отличными механическими свойствами Рё устойчивостью Рє РєРѕСЂСЂРѕР·РёРё, что делает ее идеальным выбором для использования РІ агрессивных средах. Полоса магниевая M10601 – UNS легко поддается обработке Рё сварке, обеспечивая надежность Рё долговечность РІ эксплуатации. Приобретая этот товар, РІС‹ получаете возможность оптимизировать СЃРІРѕРё производственные процессы. Убедитесь РІ качестве нашего продукта Рё РЅРµ упустите шанс купить Полоса магниевая M10601 – UNS РїРѕ выгодной цене. Ваши потребности РІ материалах Р±СѓРґСѓС‚ выполнены СЃ максимальной эффективностью!
Your comment is awaiting moderation.
РедМетСплав предлагает широкий ассортимент высококачественных изделий из нестандартных материалов. Не важно, какие объемы вам необходимы – от небольших закупок до масштабных поставок, мы гарантируем своевременную реализацию вашего заказа.
Каждая единица изделия подтверждена соответствующими документами, подтверждающими их происхождение. Превосходное обслуживание – наша визитная карточка – мы на связи, чтобы улаживать ваши вопросы и предоставлять решения под специфику вашего бизнеса.
Доверьте потребности вашего бизнеса специалистам РедМетСплав и убедитесь в гибкости нашего предложения
поставляемая продукция:
РљСЂСѓРі магниевый MD3A – JIS H 5303 Фольга магниевая MD3A – JIS H 5303 представляет СЃРѕР±РѕР№ высококачественный материал, отлично подходящий для различных промышленных применений. Рто легкий Рё прочный РїСЂРѕРґСѓРєС‚, который обладает отличной РєРѕСЂСЂРѕР·РёРѕРЅРЅРѕР№ стойкостью Рё высокой пластичностью. Благодаря СЃРІРѕРёРј характеристикам, фольга используется РІ электронике, автомобилестроении Рё самолетостроении. Если РІС‹ ищете надежное решение для СЃРІРѕРёС… проектов, то купить Фольга магниевая MD3A – JIS H 5303 – это отличный выбор. Рта фольга обеспечивает РЅРµ только долговечность, РЅРѕ Рё превосходную эффективность РІ эксплуатации. Обеспечьте качество СЃРІРѕРёС… изделий СЃ помощью фольги, которая соответствует высоким стандартам. Выбирайте лучшее!
Your comment is awaiting moderation.
В поисках надежного поставщика редкоземельных металлов и сплавов? Обратите внимание на компанию Редметсплав.рф. Мы предлагаем внушительный выбор продукции, обеспечивая высочайшее качество каждого изделия.
Редметсплав.рф защищает все стадии сделки, предоставляя полный пакет необходимых документов для законного использования товаров. Неважно, какие объемы вам необходимы – от мелких партий до крупнооптовых заказов, мы готовы выполнить любой запрос с прекрасным качеством обслуживания.
Наша команда службы поддержки всегда на связи, чтобы помочь вам в определении подходящих продуктов и ответить на любые вопросы, связанные с применением и характеристиками металлов. Выбирая нас, вы выбираете надежность в каждой детали сотрудничества.
Заходите на наш сайт Редметсплав.рф и убедитесь, что качество и уровень нашего сервиса – ваш лучший выбор.
Наши товары:
Пружина из драгоценных металлов золотая 20х9х0.7 мм ЗлСрМ58.5-20 ТУ Выберите идеальные пружины из золота, серебра или платины, чтобы дополнить ваше украшение. Найдите пружины с изысканным дизайном и прочностью. Они предлагают широкий выбор для того, чтобы подчеркнуть уникальность вашего украшения.
Your comment is awaiting moderation.
РедМетСплав предлагает внушительный каталог отборных изделий из ценных материалов. Не важно, какие объемы вам необходимы – от небольших закупок до обширных поставок, мы гарантируем своевременную реализацию вашего заказа.
Каждая единица товара подтверждена всеми необходимыми документами, подтверждающими их соответствие стандартам. Опытная поддержка – наша визитная карточка – мы на связи, чтобы улаживать ваши вопросы по мере того как предоставлять решения под особенности вашего бизнеса.
Доверьте ваш запрос профессионалам РедМетСплав и убедитесь в широком спектре предлагаемых возможностей
Наша продукция:
Лента висмутовая 302 – EN ISO 9453 Лента висмутовая 302 – EN ISO 9453 представляет СЃРѕР±РѕР№ высококачественный материал, используемый РІ пайке Рё соединительных технологиях. Рта лента обладает отличными антикоррозийными свойствами Рё обеспечивает надежное соединение. Благодаря своему составу, лента обеспечивает стабилизацию процессов нагрева Рё охлаждения, что делает ее идеальной для различных промышленных применений. Если РІС‹ ищете надежное решение для вашего проекта, РЅРµ упустите возможность купить лента висмутовая 302 – EN ISO 9453 Рё обеспечить высокое качество ваших работ. Убедитесь РІ эффективности этого продукта Рё сделайте выбор РІ пользу надежности.
Your comment is awaiting moderation.
В поисках надежного поставщика редкоземельных металлов и сплавов? Обратите внимание на компанию Редметсплав.рф. Мы предлагаем широкий ассортимент продукции, обеспечивая высочайшее качество каждого изделия.
Редметсплав.рф обеспечивает все стадии сделки, предоставляя полный пакет необходимых документов для оформления товаров. Неважно, какие объемы вам необходимы – от мелких партий до крупнооптовых заказов, мы готовы поставить любой запрос с прекрасным качеством обслуживания.
Наша команда поддержки всегда на связи, чтобы помочь вам в выборе товаров и ответить на любые вопросы, связанные с применением и характеристиками металлов. Выбирая нас, вы выбираете достоверность в каждой детали сотрудничества.
Заходите на наш сайт Редметсплав.рф и убедитесь, что наше качество и сервис – ваш лучший выбор.
Наши товары:
Медная двухраструбная редукционная переходная муфта РїРѕРґ пайку 27.4С…22 РјРј твердая пайка Рњ3Рњ ГОСТ 32590-2013 Выберите высококачественные медные двухраструбные редукционные муфты РїРѕРґ пайку РѕС‚ Редметсплав для надежного соединения медных труб различных диаметров. РЁРёСЂРѕРєРёР№ выбор размеров, эффективная установка Рё долговечность гарантированы. Рдеальное решение для систем отопления Рё водоснабжения.
Your comment is awaiting moderation.
В поисках достоверного источника редкоземельных металлов и сплавов? Обратите внимание на компанию Редметсплав.рф. Мы предлагаем внушительный выбор продукции, обеспечивая превосходное качество каждого изделия.
Редметсплав.рф гарантирует все стадии сделки, предоставляя полный пакет необходимых документов для законного использования товаров. Неважно, какие объемы вам необходимы – от мелких партий до крупнооптовых заказов, мы готовы обеспечить любой запрос с прекрасным качеством обслуживания.
Наша команда поддержки всегда на связи, чтобы помочь вам в определении подходящих продуктов и ответить на любые вопросы, связанные с применением и характеристиками металлов. Выбирая нас, вы выбираете надежность в каждой детали сотрудничества.
Заходите на наш сайт Редметсплав.рф и убедитесь, что качество и уровень нашего сервиса – ваш лучший выбор.
поставляемая продукция:
Меднаядвухраструбнаямуфта под пайку42х2ммМ2РМГОСТ 32590-2013 Выберите медные двухраструбные муфты под пайку от производителя RedmetSplav. Прочные и герметичные соединения для систем водоснабжения, отопления и газоснабжения. Долговечные и надежные муфты для любых видов работ. Подходят для использования в домашних условиях, коммерческих и промышленных объектах.
Your comment is awaiting moderation.
РедМетСплав предлагает внушительный каталог качественных изделий из редких материалов. Не важно, какие объемы вам необходимы – от небольших закупок до масштабных поставок, мы обеспечиваем оперативное исполнение вашего заказа.
Каждая единица продукции подтверждена всеми необходимыми документами, подтверждающими их происхождение. Опытная поддержка – наша визитная карточка – мы на связи, чтобы ответить на ваши вопросы а также адаптировать решения под особенности вашего бизнеса.
Доверьте потребности вашего бизнеса профессионалам РедМетСплав и убедитесь в гибкости нашего предложения
Наша продукция:
Рзделия РёР· висмута TBC 19 – PN H-87203 Рзделия РёР· висмута TBC 19 – PN H-87203 представляют СЃРѕР±РѕР№ высококачественные Рё уникальные продукты, идеально подходящие для различных применений РІ промышленности Рё научных исследованиях. Обладая отличными физическими Рё химическими свойствами, РѕРЅРё обеспечивают надежность Рё долговечность РІ процессе эксплуатации. Если РІС‹ ищете надежные Рё эффективные решения, РІС‹ можете купить Рзделия РёР· висмута TBC 19 – PN H-87203, чтобы повысить качество своей работы. Применение этих изделий гарантирует долгосрочный результат Рё высокую степень удовлетворенности РѕС‚ выбора. Присоединяйтесь Рє числу довольных клиентов, выберите лучшее для вашего проекта.
Your comment is awaiting moderation.
РедМетСплав предлагает внушительный каталог отборных изделий из редких материалов. Не важно, какие объемы вам необходимы – от мелких партий до масштабных поставок, мы обеспечиваем быстрое выполнение вашего заказа.
Каждая единица продукции подтверждена соответствующими документами, подтверждающими их соответствие стандартам. Опытная поддержка – наша визитная карточка – мы на связи, чтобы улаживать ваши вопросы а также находить ответы под особенности вашего бизнеса.
Доверьте вашу потребность в редких металлах профессионалам РедМетСплав и убедитесь в широком спектре предлагаемых возможностей
Наши товары:
Кобальт РџСЂ-Р’3Рљ – ГОСТ 33258-15 Кобальт РџСЂ-Р’3Рљ – ГОСТ 33258-15 – это высококачественный материал, предназначенный для различных промышленных приложений. РћРЅ обладает отличной прочностью Рё устойчивостью Рє РєРѕСЂСЂРѕР·РёРё, что делает его идеальным для использования РІ условиях, требующих надежности Рё долговечности. Рта продукция РїСЂРѕС…РѕРґРёС‚ строгую сертификацию, гарантируя соответствие современным стандартам. РќРµ упустите возможность купить Кобальт РџСЂ-Р’3Рљ – ГОСТ 33258-15, чтобы обеспечить своему бизнесу надежные материалы. Кобальт РџСЂ-Р’3Рљ – ГОСТ 33258-15 станет верным решением для ваших нужд!
Your comment is awaiting moderation.
В поисках надежного поставщика редкоземельных металлов и сплавов? Обратите внимание на компанию Редметсплав.рф. Мы предлагаем внушительный выбор продукции, обеспечивая высочайшее качество каждого изделия.
Редметсплав.рф защищает все стадии сделки, предоставляя полный пакет необходимых документов для законного использования товаров. Неважно, какие объемы вам необходимы – от мелких партий до крупнооптовых заказов, мы готовы обеспечить любой запрос с высоким уровнем сервиса.
Наша команда службы поддержки всегда на связи, чтобы помочь вам в определении подходящих продуктов и ответить на любые вопросы, связанные с применением и характеристиками металлов. Выбирая нас, вы выбираете уверенность в каждой детали сотрудничества.
Заходите на наш сайт Редметсплав.рф и убедитесь, что качество и уровень нашего сервиса – идеальный вариант для вас.
поставляемая продукция:
Титановая труба 35х1.8х5000 мм ПТ3В ГОСТ 22897-86 Откройте мир прочных и надежных титановых труб с компанией Редметсплав. Наши высококачественные титановые трубы сочетают в себе устойчивость к коррозии, износостойкость и легкий вес, делая их незаменимым материалом для применения в различных сферах промышленности. Широкий выбор различных диаметров и толщин, а также индивидуальные решения для вашего производства. Гарантированное качество и надежность поставок.
Your comment is awaiting moderation.
РедМетСплав предлагает широкий ассортимент высококачественных изделий из ценных материалов. Не важно, какие объемы вам необходимы – от мелких партий до крупных поставок, мы обеспечиваем быстрое выполнение вашего заказа.
Каждая единица изделия подтверждена соответствующими документами, подтверждающими их происхождение. Превосходное обслуживание – то, чем мы гордимся – мы на связи, чтобы разрешать ваши вопросы по мере того как предоставлять решения под специфику вашего бизнеса.
Доверьте потребности вашего бизнеса специалистам РедМетСплав и убедитесь в широком спектре предлагаемых возможностей
Наши товары:
Рзделия РёР· кобальта Stellite 720 Рзделия РёР· кобальта Stellite 720 обладают высокой стойкостью Рє РёР·РЅРѕСЃСѓ Рё РєРѕСЂСЂРѕР·РёРё, благодаря чему находят широкое применение РІ различных отраслях, включая авиацию Рё автомобилестроение. Ртот уникальный сплав отлично выдерживает высокие температуры, что делает его идеальным выбором для деталей, подверженных сильным нагрузкам. Приобретая эти изделия, РІС‹ обеспечите долгий СЃСЂРѕРє службы Рё надежность СЃРІРѕРёС… компонентов. РќРµ упустите возможность купить Рзделия РёР· кобальта Stellite 720 Рё улучшить производительность вашей техники!
Your comment is awaiting moderation.
В поисках надежного поставщика редкоземельных металлов и сплавов? Обратите внимание на компанию Редметсплав.рф. Мы предлагаем обширный каталог продукции, обеспечивая превосходное качество каждого изделия.
Редметсплав.рф обеспечивает все стадии сделки, предоставляя полный пакет необходимых документов для легализации товаров. Неважно, какие объемы вам необходимы – от мелких партий до крупнооптовых заказов, мы готовы выполнить любой запрос с прекрасным качеством обслуживания.
Наша команда службы поддержки всегда на связи, чтобы помочь вам в подборе нужных изделий и ответить на любые вопросы, связанные с применением и характеристиками металлов. Выбирая нас, вы выбираете надежность в каждой детали сотрудничества.
Заходите на наш сайт Редметсплав.рф и убедитесь, что качество и уровень нашего сервиса – идеальный вариант для вас.
Наши товары:
Медная двухраструбная редукционная переходная муфта РїРѕРґ пайку 21С…16 РјРј мягкая пайка Рњ0Р± ГОСТ 32590-2013 Выберите высококачественные медные двухраструбные редукционные муфты РїРѕРґ пайку РѕС‚ Редметсплав для надежного соединения медных труб различных диаметров. РЁРёСЂРѕРєРёР№ выбор размеров, эффективная установка Рё долговечность гарантированы. Рдеальное решение для систем отопления Рё водоснабжения.
Your comment is awaiting moderation.
РедМетСплав предлагает обширный выбор качественных изделий из нестандартных материалов. Не важно, какие объемы вам необходимы – от небольших закупок до масштабных поставок, мы обеспечиваем быстрое выполнение вашего заказа.
Каждая единица изделия подтверждена соответствующими документами, подтверждающими их качество. Дружелюбная помощь – наша визитная карточка – мы на связи, чтобы разрешать ваши вопросы и предоставлять решения под требования вашего бизнеса.
Доверьте вашу потребность в редких металлах специалистам РедМетСплав и убедитесь в широком спектре предлагаемых возможностей
поставляемая продукция:
Рзделия РёР· титана Р’Рў6СЃРІ – ГОСТ 27265-87 РџРѕРєРѕРІРєР° титановая Р’Рў6СЃРІ – ГОСТ 27265-87 представляет СЃРѕР±РѕР№ высококачественный РїСЂРѕРґСѓРєС‚, обладающий уникальными физико-механическими свойствами. Ртот сплав идеально РїРѕРґС…РѕРґРёС‚ для использования РІ авиационной, химической Рё медицинской отраслях благодаря своей прочности Рё РєРѕСЂСЂРѕР·РёРѕРЅРЅРѕР№ устойчивости. Поставляется как РІ стандартных, так Рё РІ индивидуальных размерах. Если вам важно качество Рё надежность, то вам стоит рассмотреть возможность РїРѕРєСѓРїРєРё. Купить РџРѕРєРѕРІРєР° титановая Р’Рў6СЃРІ – ГОСТ 27265-87 можно Сѓ проверенных поставщиков, обеспечивающих высокие стандарты производства.
Your comment is awaiting moderation.
В поисках надежного поставщика редкоземельных металлов и сплавов? Обратите внимание на компанию Редметсплав.рф. Мы предлагаем широкий ассортимент продукции, обеспечивая превосходное качество каждого изделия.
Редметсплав.рф обеспечивает все стадии сделки, предоставляя полный пакет необходимых документов для оформления товаров. Неважно, какие объемы вам необходимы – от мелких партий до крупнооптовых заказов, мы готовы обеспечить любой запрос с непревзойденным обслуживанием.
Наша команда поддержки всегда на связи, чтобы помочь вам в выборе товаров и ответить на любые вопросы, связанные с применением и характеристиками металлов. Выбирая нас, вы выбираете достоверность в каждой детали сотрудничества.
Заходите на наш сайт Редметсплав.рф и убедитесь, что качество и уровень нашего сервиса – ваш лучший выбор.
Наши товары:
Медный переходной пресс тройник 42С…12 РјРј Рњ2Рњ ГОСТ Р 52948-2008 Покупайте медный переходной пресс тройник 42С…12 РјРј Рњ2Рњ ГОСТ Р 52948-2008 высокого качества РЅР° Редметсплав.СЂС„. Надежное Рё прочное соединение для различных отраслей. Рдеальный выбор для электрических систем. Поставка цветных Рё редкоземельных металлов Рё изделий РёР· РЅРёС….
Your comment is awaiting moderation.
РедМетСплав предлагает обширный выбор высококачественных изделий из ценных материалов. Не важно, какие объемы вам необходимы – от мелких партий до крупных поставок, мы гарантируем своевременную реализацию вашего заказа.
Каждая единица товара подтверждена требуемыми документами, подтверждающими их происхождение. Дружелюбная помощь – то, чем мы гордимся – мы на связи, чтобы ответить на ваши вопросы и находить ответы под особенности вашего бизнеса.
Доверьте потребности вашего бизнеса профессионалам РедМетСплав и убедитесь в широком спектре предлагаемых возможностей
поставляемая продукция:
Лента магниевая HK31A – ASTM B90 РљСЂСѓРі магниевый HK31A – ASTM B90 представляет СЃРѕР±РѕР№ высококачественный элемент, выполненный РёР· магния, который идеально РїРѕРґС…РѕРґРёС‚ для различных производственных процессов. Благодаря СЃРІРѕРёРј уникальным механическим свойствам, этот РєСЂСѓРі демонстрирует отличную прочность Рё легкость. РљСЂСѓРі магниевый HK31A – ASTM B90 часто используется РІ авиационной, автомобильной Рё машиностроительной отраслях. Если РІС‹ ищете надежный Рё эффективный РїСЂРѕРґСѓРєС‚, РЅРµ упустите шанс купить РљСЂСѓРі магниевый HK31A – ASTM B90. Сделайте СЃРІРѕР№ выбор РІ пользу качества Рё эффективности!
Your comment is awaiting moderation.
В поисках достоверного источника редкоземельных металлов и сплавов? Обратите внимание на компанию Редметсплав.рф. Мы предлагаем внушительный выбор продукции, обеспечивая превосходное качество каждого изделия.
Редметсплав.рф обеспечивает все стадии сделки, предоставляя полный пакет необходимых документов для оформления товаров. Неважно, какие объемы вам необходимы – от мелких партий до крупнооптовых заказов, мы готовы обеспечить любой запрос с непревзойденным обслуживанием.
Наша команда поддержки всегда на связи, чтобы помочь вам в выборе товаров и ответить на любые вопросы, связанные с применением и характеристиками металлов. Выбирая нас, вы выбираете достоверность в каждой детали сотрудничества.
Заходите на наш сайт Редметсплав.рф и убедитесь, что наше качество и сервис – ваш лучший выбор.
Наша продукция:
Пруток СЃ заданным ТКЛР190 РјРј 58Рќ-ВРГОСТ 14082-78 Пруток СЃ заданным ТКЛР– высокопрочный Рё устойчивый материал для создания надежных конструкций. РЁРёСЂРѕРєРёР№ выбор размеров Рё типов прутка РІ категории РЅР° сайте Редметсплав.СЂС„. Поддержка Рё индивидуальный РїРѕРґС…РѕРґ экспертов для выбора наиболее подходящего продукта.
Your comment is awaiting moderation.
РедМетСплав предлагает обширный выбор отборных изделий из нестандартных материалов. Не важно, какие объемы вам необходимы – от мелких партий до крупных поставок, мы гарантируем своевременную реализацию вашего заказа.
Каждая единица продукции подтверждена всеми необходимыми документами, подтверждающими их происхождение. Опытная поддержка – наша визитная карточка – мы на связи, чтобы улаживать ваши вопросы и предоставлять решения под особенности вашего бизнеса.
Доверьте потребности вашего бизнеса специалистам РедМетСплав и убедитесь в широком спектре предлагаемых возможностей
поставляемая продукция:
Рзделия РёР· магния M15100 – UNS РџРѕРєРѕРІРєР° магниевая M15100 – UNS – это высококачественный материал, который идеально РїРѕРґС…РѕРґРёС‚ для различных промышленных применений. Обладая отличной прочностью Рё легкостью, РѕРЅ становится отличным выбором для авиации Рё автомобилестроения. РџРѕРєРѕРІРєР° магниевая M15100 – UNS имеет отменные эксплуатационные характеристики, обеспечивая долговечность Рё надежность РІ эксплуатации. РќРµ упустите возможность купить РџРѕРєРѕРІРєР° магниевая M15100 – UNS Рё оценить преимущества этого уникального изделия. РњС‹ гарантируем высокое качество Рё отличный сервис. Выберите надежность Рё эффективность!
Your comment is awaiting moderation.
В поисках достоверного источника редкоземельных металлов и сплавов? Обратите внимание на компанию Редметсплав.рф. Мы предлагаем внушительный выбор продукции, обеспечивая высочайшее качество каждого изделия.
Редметсплав.рф защищает все стадии сделки, предоставляя полный пакет необходимых документов для оформления товаров. Неважно, какие объемы вам необходимы – от мелких партий до крупнооптовых заказов, мы готовы обеспечить любой запрос с прекрасным качеством обслуживания.
Наша команда поддержки всегда на связи, чтобы помочь вам в подборе нужных изделий и ответить на любые вопросы, связанные с применением и характеристиками металлов. Выбирая нас, вы выбираете надежность в каждой детали сотрудничества.
Заходите на наш сайт Редметсплав.рф и убедитесь, что качество и уровень нашего сервиса – идеальный вариант для вас.
поставляемая продукция:
Заготовка из конструкционной стали круглая 5 мм 30ХГСА ОСТ 3-1686-90 Выбирайте конструкционные заготовки высокого качества для вашего проекта на Редметсплав.рф. Наш ассортимент включает прочные и долговечные материалы, идеально подходящие для различных областей применения, включая строительство и машиностроение.
Your comment is awaiting moderation.
В поисках достоверного источника редкоземельных металлов и сплавов? Обратите внимание на компанию Редметсплав.рф. Мы предлагаем широкий ассортимент продукции, обеспечивая высочайшее качество каждого изделия.
Редметсплав.рф гарантирует все стадии сделки, предоставляя полный пакет необходимых документов для законного использования товаров. Неважно, какие объемы вам необходимы – от мелких партий до крупнооптовых заказов, мы готовы выполнить любой запрос с непревзойденным обслуживанием.
Наша команда поддержки всегда на связи, чтобы помочь вам в выборе товаров и ответить на любые вопросы, связанные с применением и характеристиками металлов. Выбирая нас, вы выбираете уверенность в каждой детали сотрудничества.
Заходите на наш сайт Редметсплав.рф и убедитесь, что наше качество и сервис – наилучшее решение для вашего бизнеса.
Наша продукция:
Мишень РёР· драгоценного металла или его сплава круглая золото 8С…3 РјРј ЗлСрМ75-12.5 РўРЈ Выберите уникальные мишени РёР· драгоценных металлов для напыления РѕС‚ Редметсплав.СЂС„. Обеспечивают высокую степень защиты Рё долговечность. Рдеальный выбор для промышленности, строительства Рё производства.
Your comment is awaiting moderation.
РедМетСплав предлагает обширный выбор высококачественных изделий из ценных материалов. Не важно, какие объемы вам необходимы – от небольших закупок до крупных поставок, мы обеспечиваем своевременную реализацию вашего заказа.
Каждая единица продукции подтверждена соответствующими документами, подтверждающими их соответствие стандартам. Опытная поддержка – наша визитная карточка – мы на связи, чтобы улаживать ваши вопросы а также предоставлять решения под требования вашего бизнеса.
Доверьте потребности вашего бизнеса специалистам РедМетСплав и убедитесь в широком спектре предлагаемых возможностей
Наша продукция:
Проволока магниевая MC5 – JIS H 5203 Полоса магниевая MC5 – JIS H 5203 – это высококачественный РїСЂРѕРґСѓРєС‚, изготовленный РёР· магниевых сплавов, что обеспечивает его легкость Рё прочность. Благодаря СЃРІРѕРёРј превосходным механическим свойствам, этот материал широко используется РІ авиастроении, автомобильной промышленности Рё РґСЂСѓРіРёС… областях. Полоса обладает отличной РєРѕСЂСЂРѕР·РёРѕРЅРЅРѕР№ стойкостью Рё хорошо поддается обработке. Если РІС‹ хотите купить Полоса магниевая MC5 – JIS H 5203, обратите внимание РЅР° его надежность Рё долговечность. Ртот РїСЂРѕРґСѓРєС‚ станет отличным решением для ваших производственных потребностей.
Your comment is awaiting moderation.
В поисках достоверного источника редкоземельных металлов и сплавов? Обратите внимание на компанию Редметсплав.рф. Мы предлагаем широкий ассортимент продукции, обеспечивая превосходное качество каждого изделия.
Редметсплав.рф обеспечивает все стадии сделки, предоставляя полный пакет необходимых документов для оформления товаров. Неважно, какие объемы вам необходимы – от мелких партий до крупнооптовых заказов, мы готовы обеспечить любой запрос с прекрасным качеством обслуживания.
Наша команда службы поддержки всегда на связи, чтобы помочь вам в определении подходящих продуктов и ответить на любые вопросы, связанные с применением и характеристиками металлов. Выбирая нас, вы выбираете надежность в каждой детали сотрудничества.
Заходите на наш сайт Редметсплав.рф и убедитесь, что наше качество и сервис – ваш лучший выбор.
Наша продукция:
Нержавеющая прямоугольная РїРѕРєРѕРІРєР° 430С…260 РјРј AISI 316L Рзучите широкий ассортимент нержавеющих прямоугольных РїРѕРєРѕРІРѕРє РЅР° RedmetSplav СЃ гарантией качества Рё надежности. Устойчивость Рє РєРѕСЂСЂРѕР·РёРё Рё разнообразие размеров для всевозможных проектов.
Your comment is awaiting moderation.
РедМетСплав предлагает широкий ассортимент отборных изделий из ценных материалов. Не важно, какие объемы вам необходимы – от мелких партий до масштабных поставок, мы гарантируем своевременную реализацию вашего заказа.
Каждая единица товара подтверждена всеми необходимыми документами, подтверждающими их происхождение. Превосходное обслуживание – наша визитная карточка – мы на связи, чтобы разрешать ваши вопросы а также находить ответы под требования вашего бизнеса.
Доверьте потребности вашего бизнеса профессионалам РедМетСплав и убедитесь в широком спектре предлагаемых возможностей
Наша продукция:
Лента молибденовая МТ-15 Лента молибденовая МТ-15 используется в высокотемпературных и коррозионно-активных средах, что делает ее неотъемлемой частью в производстве и научных исследованиях. Благодаря своим уникальным свойствам, таким как высокая устойчивость к окислению и низкий коэффициент теплового расширения, эта лента активно применяется в электронике и машиностроении.Если вам требуется надежный и качественный материал, не упустите возможность купить Лента молибденовая МТ-15. Она обеспечит долговечность и стабильность ваших проектов, а также удовлетворит строгие требования к качеству.
Your comment is awaiting moderation.
В поисках достоверного источника редкоземельных металлов и сплавов? Обратите внимание на компанию Редметсплав.рф. Мы предлагаем внушительный выбор продукции, обеспечивая высочайшее качество каждого изделия.
Редметсплав.рф обеспечивает все стадии сделки, предоставляя полный пакет необходимых документов для законного использования товаров. Неважно, какие объемы вам необходимы – от мелких партий до крупнооптовых заказов, мы готовы поставить любой запрос с прекрасным качеством обслуживания.
Наша команда поддержки всегда на связи, чтобы помочь вам в подборе нужных изделий и ответить на любые вопросы, связанные с применением и характеристиками металлов. Выбирая нас, вы выбираете уверенность в каждой детали сотрудничества.
Заходите на наш сайт Редметсплав.рф и убедитесь, что наше качество и сервис – ваш лучший выбор.
Наша продукция:
Медный двухраструбный отвод под высокотемпературную пайку 45 градусов 18х14х0.8 мм 12.6х14.6 мм твердая пайка М0б ГОСТ Р52922-2008 Купите высококачественные медные отводы под высокотемпературную пайку для систем водоснабжения, отопления и кондиционирования воздуха. Превосходные технические характеристики, простота монтажа и долгий срок службы. Широкий выбор размеров и типов отводов. Доставка по России.
Your comment is awaiting moderation.
В поисках надежного поставщика редкоземельных металлов и сплавов? Обратите внимание на компанию Редметсплав.рф. Мы предлагаем обширный каталог продукции, обеспечивая превосходное качество каждого изделия.
Редметсплав.рф гарантирует все стадии сделки, предоставляя полный пакет необходимых документов для легализации товаров. Неважно, какие объемы вам необходимы – от мелких партий до крупнооптовых заказов, мы готовы поставить любой запрос с непревзойденным обслуживанием.
Наша команда поддержки всегда на связи, чтобы помочь вам в определении подходящих продуктов и ответить на любые вопросы, связанные с применением и характеристиками металлов. Выбирая нас, вы выбираете уверенность в каждой детали сотрудничества.
Заходите на наш сайт Редметсплав.рф и убедитесь, что качество и уровень нашего сервиса – наилучшее решение для вашего бизнеса.
поставляемая продукция:
Кольцо РёР· драгоценных металлов золотое 200С…100С…3 РјРј ЗлМ98 РўРЈ РЁРёСЂРѕРєРёР№ выбор высококачественных кольц РёР· драгоценных металлов. Рлегантные украшения, созданные талантливыми мастерами. Уникальность Рё изысканность РІ каждой детали. Возможность заказа персонального кольца РїРѕ вашим пожеланиям. Подчеркните СЃРІРѕСЋ индивидуальность СЃ нашими кольцами.
Your comment is awaiting moderation.
РедМетСплав предлагает внушительный каталог отборных изделий из ценных материалов. Не важно, какие объемы вам необходимы – от небольших закупок до обширных поставок, мы обеспечиваем оперативное исполнение вашего заказа.
Каждая единица продукции подтверждена всеми необходимыми документами, подтверждающими их соответствие стандартам. Дружелюбная помощь – наша визитная карточка – мы на связи, чтобы ответить на ваши вопросы по мере того как адаптировать решения под специфику вашего бизнеса.
Доверьте потребности вашего бизнеса профессионалам РедМетСплав и убедитесь в широком спектре предлагаемых возможностей
Наша продукция:
Пруток магниевый M16210 – UNS Проволока магниевая M16210 – UNS представляет СЃРѕР±РѕР№ высококачественный материал, идеально подходящий для различных промышленных приложений. РћРЅР° отличается отличной РєРѕСЂСЂРѕР·РёРѕРЅРЅРѕР№ стойкостью Рё легкостью, что делает ее идеальным выбором для automotive Рё aerospace технологий. Если РІС‹ ищете надежное Рё долговечное решение, чтобы повысить эффективность ваших проектов, эта проволока будет отличным выбором. РќРµ упустите возможность купить Проволока магниевая M16210 – UNS для ваших нужд. Оптимальный выбор для профессионалов, РіРґРµ важны высокая прочность Рё легкость.
Your comment is awaiting moderation.
РедМетСплав предлагает внушительный каталог отборных изделий из редких материалов. Не важно, какие объемы вам необходимы – от небольших закупок до масштабных поставок, мы обеспечиваем своевременную реализацию вашего заказа.
Каждая единица изделия подтверждена всеми необходимыми документами, подтверждающими их происхождение. Превосходное обслуживание – наша визитная карточка – мы на связи, чтобы ответить на ваши вопросы по мере того как адаптировать решения под особенности вашего бизнеса.
Доверьте вашу потребность в редких металлах специалистам РедМетСплав и убедитесь в гибкости нашего предложения
Наша продукция:
Пруток висмутовый EN AW-6065 – EN 573-3 Пруток висмутовый EN AW-6065 – EN 573-3 представляет СЃРѕР±РѕР№ алюминиевый сплав, известный своей высокой прочностью Рё отличными механическими свойствами. РћРЅ используется РІ различных отраслях, включая автомобилестроение Рё авиацию, благодаря своей легкости Рё РєРѕСЂСЂРѕР·РёРѕРЅРЅРѕР№ стойкости. Ключевыми преимуществами этого материала являются его высокая теплопроводность Рё простота обработки. Если РІС‹ ищете надежное решение РІ области легких сплавов, рекомендуем вам купить Пруток висмутовый EN AW-6065 – EN 573-3. Ртот РїСЂРѕРґСѓРєС‚ обеспечивает отличное соотношение цены Рё качества, что делает его идеальным выбором для профессионалов Рё домашних мастерских.
Your comment is awaiting moderation.
В поисках достоверного источника редкоземельных металлов и сплавов? Обратите внимание на компанию Редметсплав.рф. Мы предлагаем внушительный выбор продукции, обеспечивая высочайшее качество каждого изделия.
Редметсплав.рф гарантирует все стадии сделки, предоставляя полный пакет необходимых документов для законного использования товаров. Неважно, какие объемы вам необходимы – от мелких партий до крупнооптовых заказов, мы готовы поставить любой запрос с высоким уровнем сервиса.
Наша команда поддержки всегда на связи, чтобы помочь вам в определении подходящих продуктов и ответить на любые вопросы, связанные с применением и характеристиками металлов. Выбирая нас, вы выбираете надежность в каждой детали сотрудничества.
Заходите на наш сайт Редметсплав.рф и убедитесь, что качество и уровень нашего сервиса – наилучшее решение для вашего бизнеса.
Наша продукция:
Кольцо РёР· драгоценных металлов палладиевое 40С…5С…1.5 РјРј ПДСР-40 РўРЈ РЁРёСЂРѕРєРёР№ выбор высококачественных кольц РёР· драгоценных металлов. Рлегантные украшения, созданные талантливыми мастерами. Уникальность Рё изысканность РІ каждой детали. Возможность заказа персонального кольца РїРѕ вашим пожеланиям. Подчеркните СЃРІРѕСЋ индивидуальность СЃ нашими кольцами.
Your comment is awaiting moderation.
РедМетСплав предлагает внушительный каталог отборных изделий из ценных материалов. Не важно, какие объемы вам необходимы – от мелких партий до масштабных поставок, мы обеспечиваем быстрое выполнение вашего заказа.
Каждая единица изделия подтверждена требуемыми документами, подтверждающими их происхождение. Дружелюбная помощь – наша визитная карточка – мы на связи, чтобы разрешать ваши вопросы и адаптировать решения под специфику вашего бизнеса.
Доверьте вашу потребность в редких металлах специалистам РедМетСплав и убедитесь в широком спектре предлагаемых возможностей
поставляемая продукция:
Фольга кобальтовая Stellite 33 Фольга кобальтовая Stellite 33 – это высококачественный материал, предназначенный для различных промышленных применений. РћРЅР° обладает отличной стойкостью Рє РєРѕСЂСЂРѕР·РёРё Рё высоким температурам, что делает ее идеальной для использования РІ экстремальных условиях. Рта фольга применяется РІ производстве режущего инструмента, Р° также РІ сварочных процессах. Благодаря СЃРІРѕРёРј уникальным свойствам, фольга обеспечивает долговечность Рё высокую производительность изделий.Если РІС‹ хотите улучшить качество СЃРІРѕРёС… работ, рекомендуем купить Фольга кобальтовая Stellite 33. Рнвестируйте РІ надежные материалы для своего производства.
Your comment is awaiting moderation.
В поисках достоверного источника редкоземельных металлов и сплавов? Обратите внимание на компанию Редметсплав.рф. Мы предлагаем широкий ассортимент продукции, обеспечивая высочайшее качество каждого изделия.
Редметсплав.рф обеспечивает все стадии сделки, предоставляя полный пакет необходимых документов для законного использования товаров. Неважно, какие объемы вам необходимы – от мелких партий до крупнооптовых заказов, мы готовы обеспечить любой запрос с непревзойденным обслуживанием.
Наша команда поддержки всегда на связи, чтобы помочь вам в подборе нужных изделий и ответить на любые вопросы, связанные с применением и характеристиками металлов. Выбирая нас, вы выбираете уверенность в каждой детали сотрудничества.
Заходите на наш сайт Редметсплав.рф и убедитесь, что качество и уровень нашего сервиса – ваш лучший выбор.
поставляемая продукция:
РџРѕРєРѕРІРєР° круглая РёР· конструкционной стали 920 РјРј 45РҐ Купить конструкционные круглые РїРѕРєРѕРІРєРё РїРѕ выгодным ценам РІ компании Редметсплав.СЂС„. РЁРёСЂРѕРєРёР№ выбор размеров Рё марок стали. Прочные Рё надежные РїРѕРєРѕРІРєРё для различных отраслей промышленности. Рндивидуальный РїРѕРґС…РѕРґ Рє каждому клиенту Рё гарантированное качество продукции.